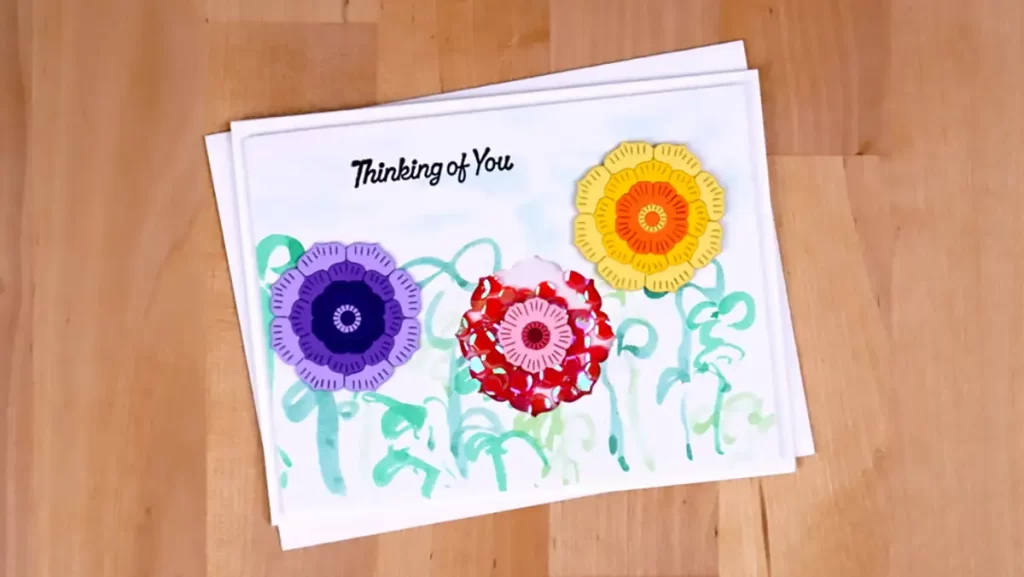
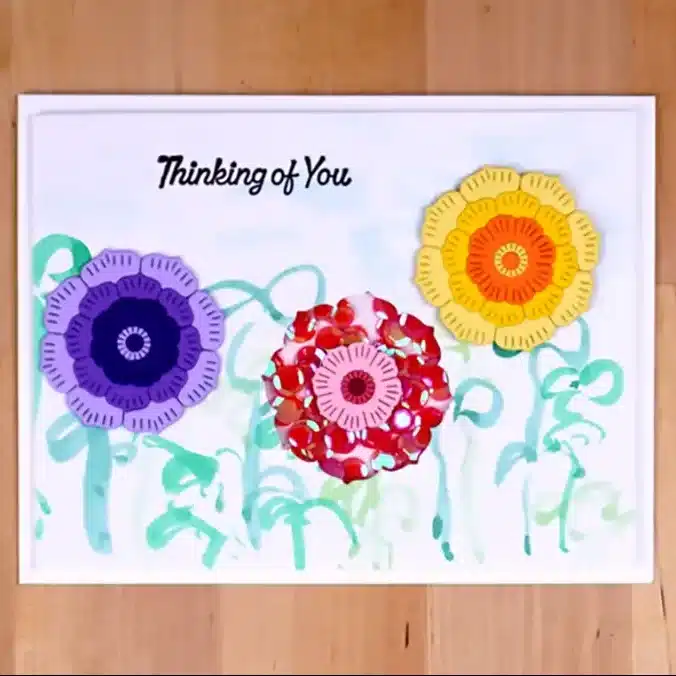
This pretty posey shaker card uses the layered floral die set (from the Crafty Advent Calendar Day 10) a little differently than usual. We create a shaker with it for one of our flowers. And then, we use the bright pink iridescent sequins that are behind the door for Day 10 as our shaker bits.

It is a fun, unique card. Here's how you make it.
Steps To Create The Pretty Posey Shaker Card
Flower Assembly
- Die-cut three flowers as follows
- Purple flower
- Light purple – the largest die and the second to smallest
- Medium purple – the second-largest die
- Dark purple – The third largest or middle die and the smallest one
- Yellow flower
- Light yellow – the largest die and the second to smallest
- Medium yellow – the second-largest die
- Orange – The third largest or middle die and the smallest one
- Pink flower (shaker element)
- Dark pink – the smallest die
- Medium pink – the second to smallest
- Light pink – The third largest or middle die and the smallest one
- We will die-cut the largest flower die from the card panel just above one of the stems that we painted in the first step
- We are not using the second largest die for this flower
- Purple flower
- Assemble the flowers using liquid glue
Posey Shaker Assembly
- Hand paint stems and leaves in different shades of green across the bottom of a white A2 size (4 1/4″ x 5 1/2″) card panel with watercolor paints. Then, use light blue squiggles to paint the sky.
- Once the paint is dry, trim the card panel to 4″ x 5 1/4″
- Decide on your arrangement and then stamp the sentiment with black ink
- Die-cut a piece of acetate for your shaker front with a 2″ circle die
- Use a pencil to lightly mark the tips of the flower petals onto a white A2 card base. We will use them as guides for attaching the card panel.
- Fasten the acetate to the back of the card panel over the die-cut flower with 1/4″ double-sided adhesive tape
- Die-cut a foam ring that is big enough to fit the large flower inside it. I like to use a Connected Circles Shaker die to do this but you could use two of the circle dies to do the same thing. A double-sided adhesive foam sheet works perfectly for this application.
- Remove one side of backing paper and attach the foam ring to the card base so that it is around the guide marks (so you can see them).
- Use a foam sheet or foam tape around the edges of the card panel and in between the ring and the foam on the edges so that the card front doesn't sag
- Sprinkle some of the pretty pink sequins inside of the ring (add enough so that they color most of the flower)
- Remove the backing paper from the foam sheets/tape. Making sure that the card panel is centered and square with the card base, lower the card front down onto the card base using the pencil marks as a guide.
Card Assembly
- Add the little pink center centered in the shaker window with liquid glue
- Use different thicknesses of foam squares to pop up the other two flowers.
WANT TO SEE PROJECTS FOR THE OTHER DAYS?
- Advent Calendar – Day 1 – a cute car tag
- SPELLBINDERS 2023 CRAFTY ADVENT CALENDAR – DAYS 2 – 5
- SPELLBINDERS CRAFTY ADVENT CALENDAR – DAY 6 TURTLE
- SB CRAFTY ADVENT CALENDAR – DAY 7 GEO STENCIL
- ADVENT CALENDAR DAY 8 – MAGICAL MUSHROOMS


