Watercolor painting is so beautiful! Do you want to learn how? We share hints, tips, and links to help with your water coloring.
Don't put it off, learn now.
Inspiration for the cards in this article comes from an advanced watercolor class from Altenew called Botanical Illustration Inspired Watercolor. You can find more on the course and Altenew's Educator Certification program later in this article.
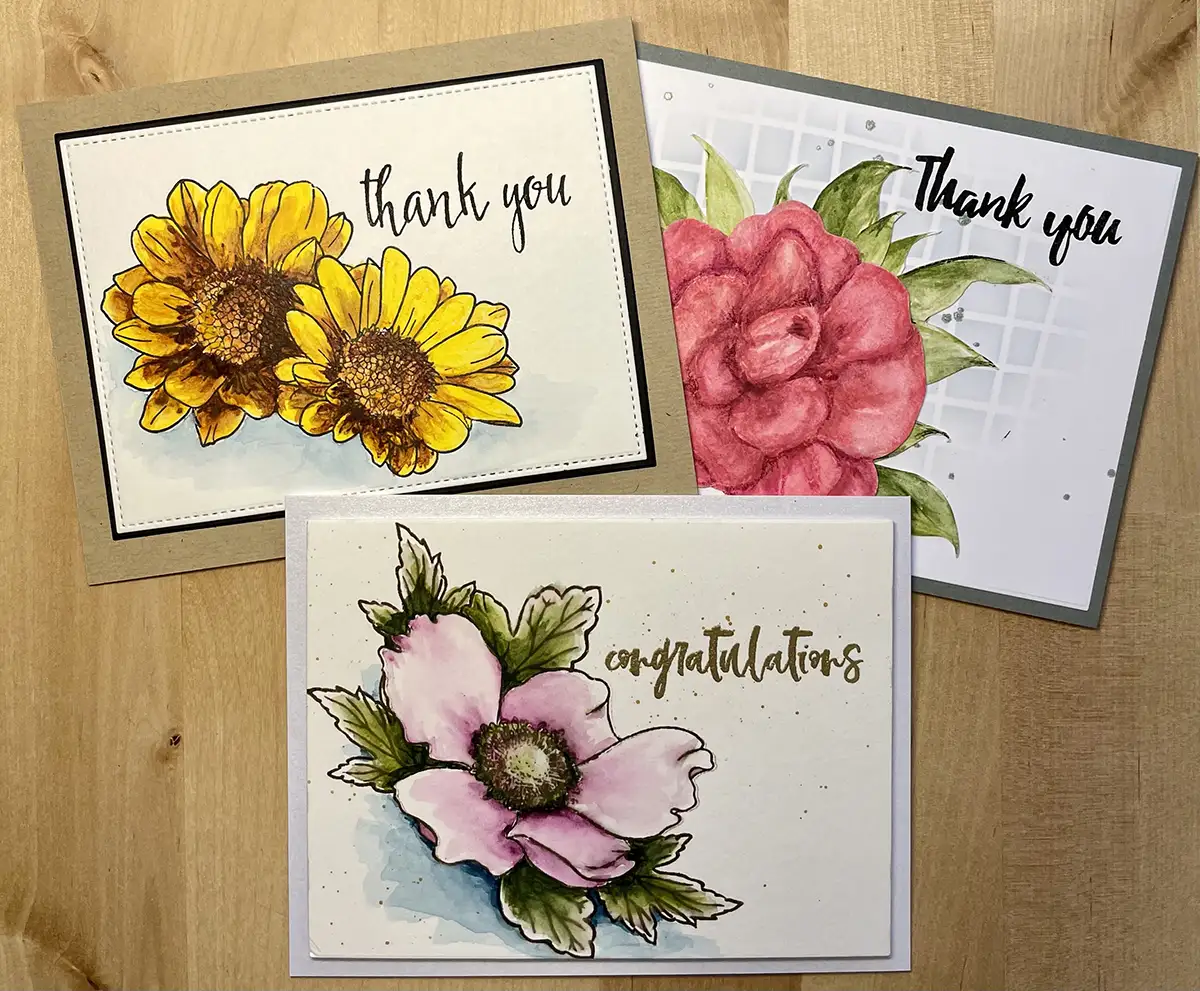
Congratulations Card – Wet-On-Wet Watercolor


Stamping Images for the Congratulations Card
This card is created by using a beautiful, layered stamp set. Hint: we're simplifying the watercolor painting process by using the first layer, the outlines, to create the floral images for our card.
We'll be masking some of our images. We won't be covering how to use the masking technique here because we're this is an “advanced topics” article. However, we will publish an article on the topic shortly after this one is published and will update this article with a link when it is available.
Now, we'll use multi-media ink so that the ink doesn't bleed when we add the watercolors and watercolor paper. And, we'll mask as we go until we've got the entire design stamped.
Watercolor the Images
We'll remove all of the masks once the stamping is complete. Hint: the masks can be used again so we'll just stick them to the acetate that our stamps are attached out.
We're using a wet-on-wet technique for this card. And, we'll do this by working on one petal at a time, we'll paint water onto the card panel. Next, we'll pick up some pigment with our brush and touch it to the card panel in the location where shadows will exist.
Then we'll draw the color out towards the tip of the petal ensuring that the color fades as we do so. We'll repeat this process for each of the petals, leaves, the center of the flower, and the background. Hint: Don't add too much water, there should be a sheen on the watercolor paper rather than a pool of water.
And finally, we'll add some splatter with metallic watercolors to give it some pizzaz.
Once the coloring is complete we'll heat emboss the sentiment with gold embossing powder directly onto the card panel. And then we'll use pearlescent cardstock that has a gold sheen to frame the card by attaching the pearlescent cardstock to the card base. Then we'll pop up the card panel with a double-sided adhesive foam sheet and center it on the base.
Supplies
The following list may contain affiliate links. If you purchase something by following a link on this page, I may receive a small commission at no extra cost to you. Thank you for supporting my blog.
- Cardstock: Card base – Neenah Classic Crest 110lb Solar White; Card panel – Canson XL, Color Layer – Tonic Pearl White
- Stamp: Altenew Build-A-Flower Anemone; Altenew Inked Lotus
- Ink: Gina K Designs Amalgam Ink Obsidian: Versamark Watermark Ink
- Watercolor Paints: Altenew 36 pan; Altenew Metallic
- Embossing Powder: Altenew Antique Gold Crisp
- Adhesive: Masking paper – Gina K Designs Masking Magic; Scrapbook.com Double-sided adhesive foam sheets; Gina K Designs Dot Adhesive Runner
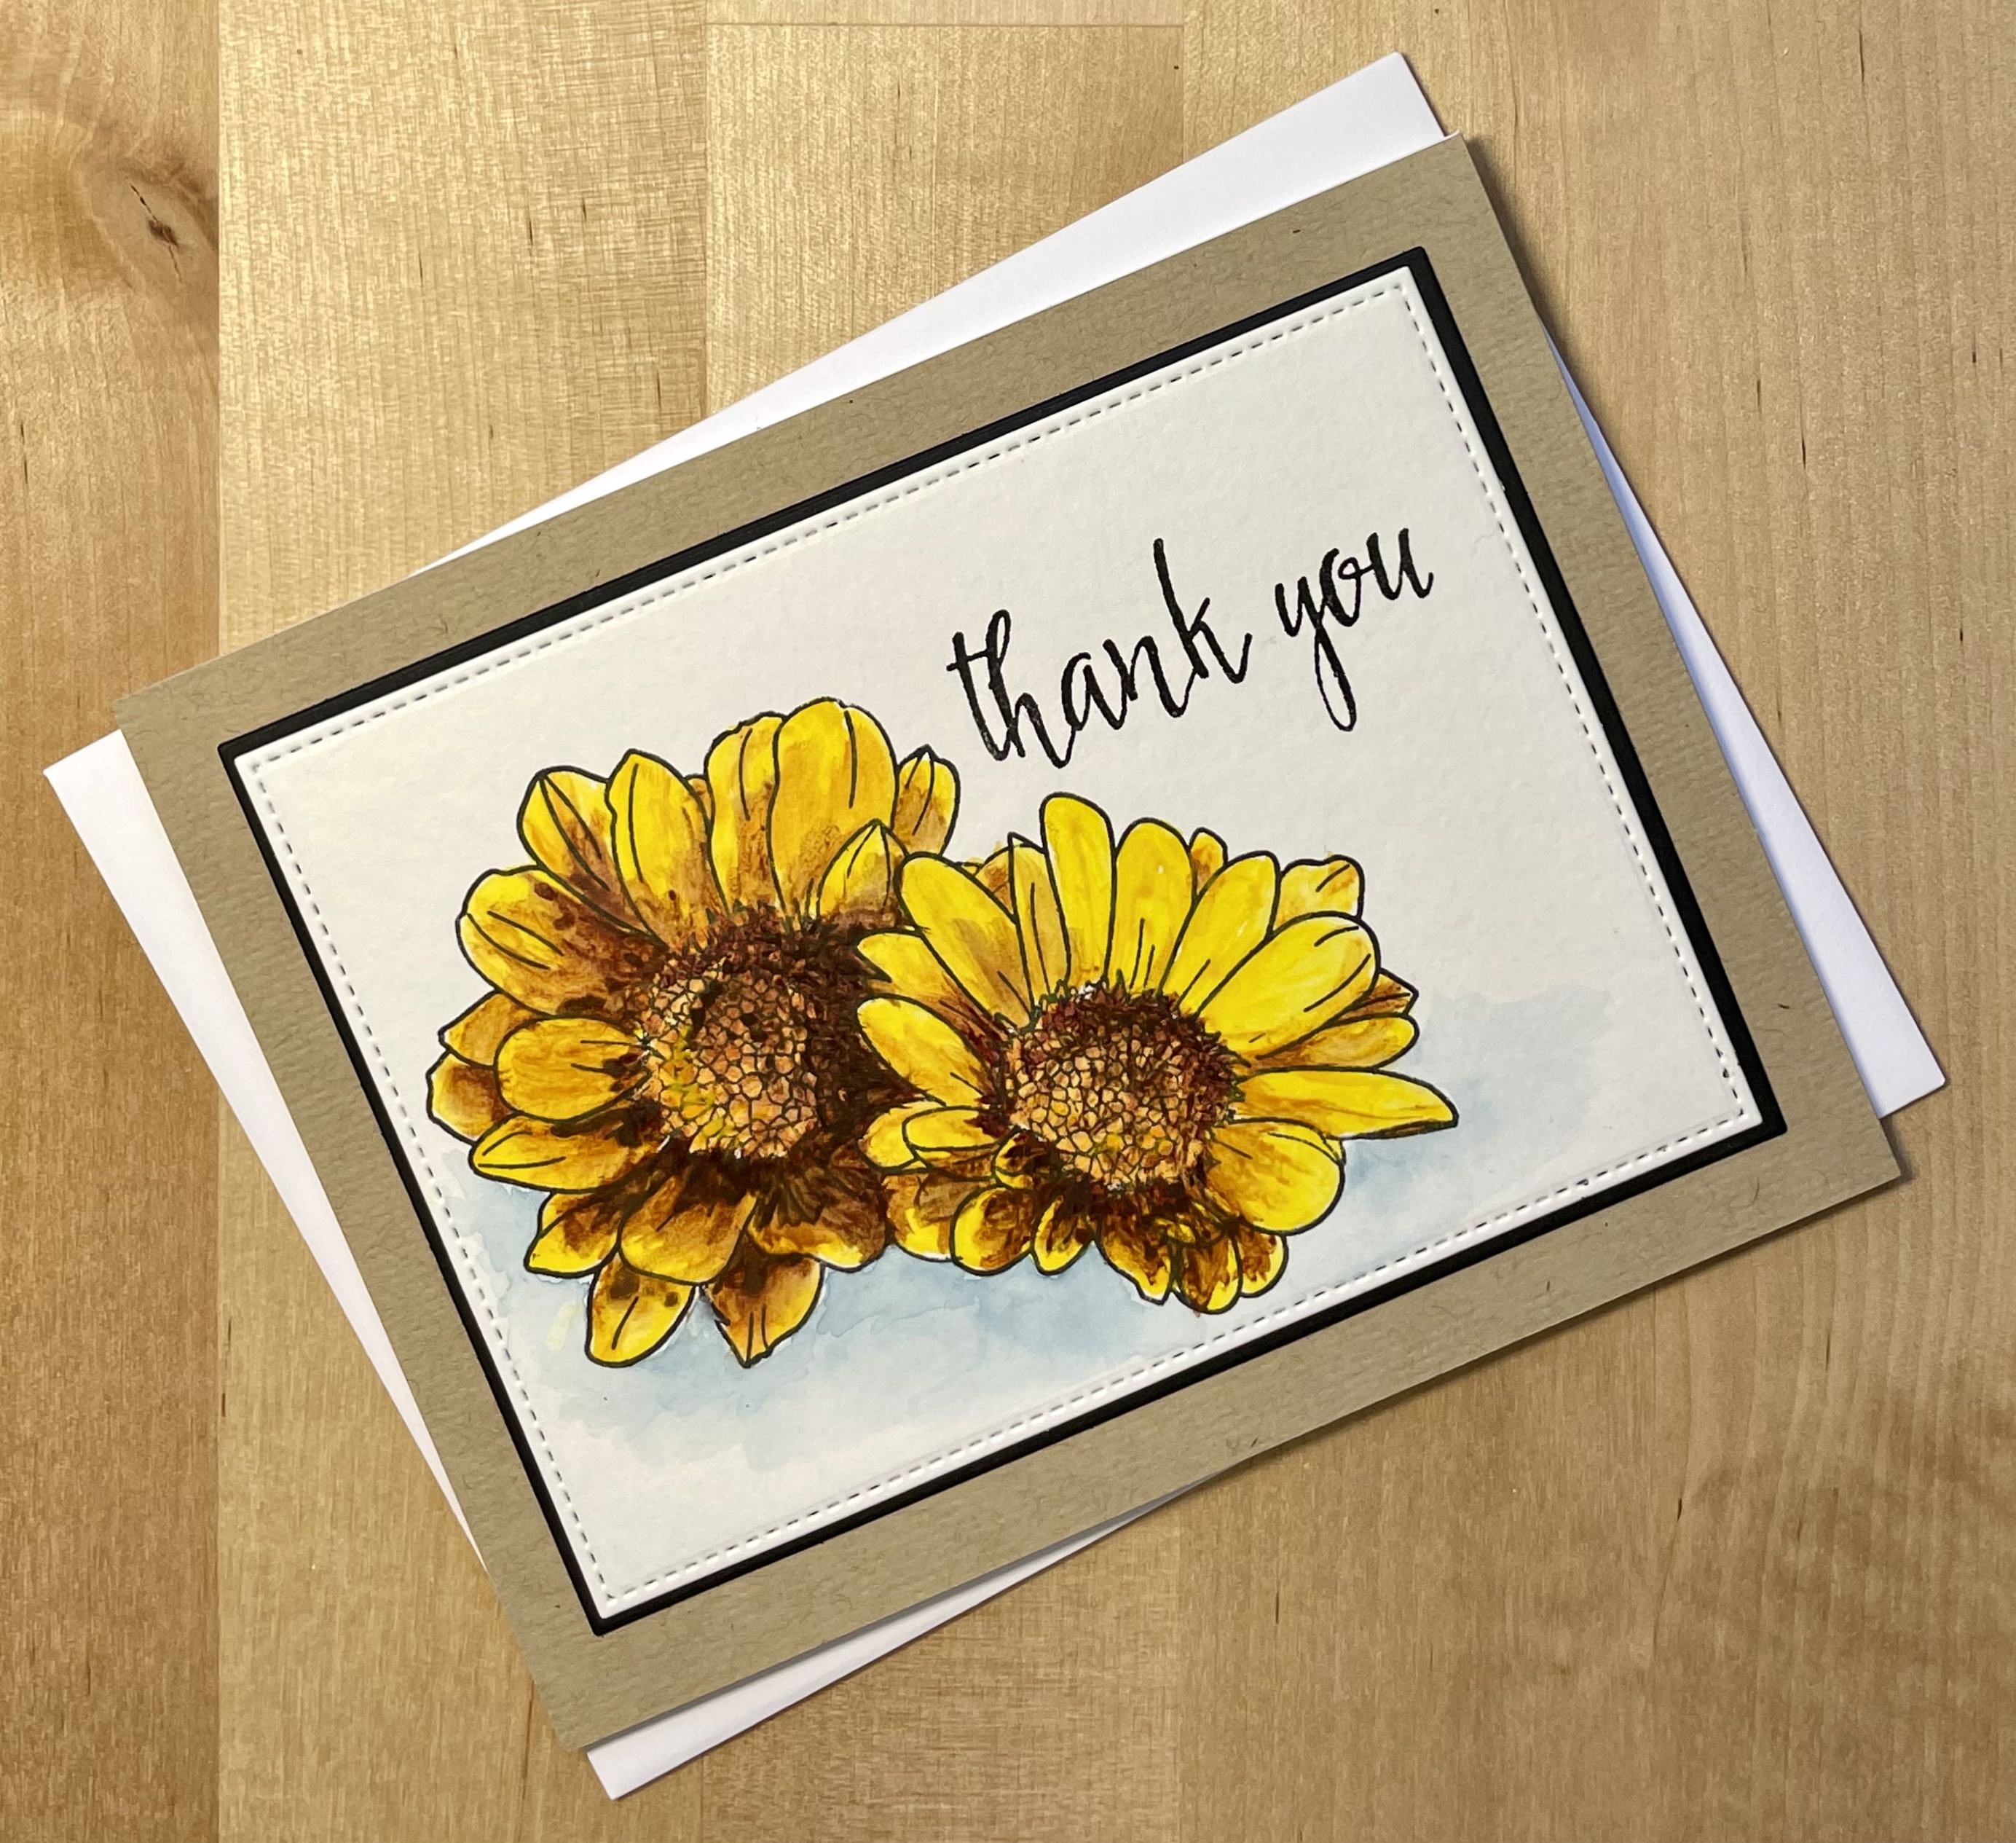
Watercolor Sunflower Card


This card is another example of using the same techniques that were used on the first card. But, for this card, we changed the stamp set and colors that were used.
Supplies
The following list may contain affiliate links. If you purchase something by following a link on this page, I may receive a small commission at no extra cost to you. Thank you for supporting my blog.
- Cardstock: Card base – Gina K Designs Kraft; Card Panel – Canson XL; Color layer – Gina K Designs Black Onyx
- Stamp: Altenew Spring Daisy; Altenew Many Thanks
- Dies: Gina K Designs Master Layouts 2
- Ink: Gina K Designs Amalgam Ink Obsidian: Altenew Pigment Ink Obsidian
- Watercolor Paints: Altenew 36 pan
Color Swatching and Watercolor Painting
Did you know that you can create more than 648 colors with a 36 pan set of watercolor paints? Isn't that amazing? You do so by mixing them. And, this is where swatching comes in. There is nothing like a sample to help with making decisions on the colors to use in our projects.
Swatching Watercolor Paints
Jaycee Gaspar the instructor of Botanical Illustration Inspired Watercolor explains how to swatch your paints, so we won't do so here. However, we will go through some tips and tricks while doing making a swatch chart and using our swatches.
Depending on the methods you use, a swatch chart can provide a lot of information about the paints in your set. Some components about the paint to consider are its name, transparency, and how its gradation as one draws the color from the pigment.
Using too much paint for swatches results in dark swatches that may not be useful for what you need them for. Just pick up a tiny bit of pigment of each color and try to show some gradation in the swatch. Consequently, each swatch gives us a variety of tones that we can use with that one color.
There is no way around it, creating a swatch chart is a time-consuming process. It took three days working a couple of hours at a time to complete one for Altenew's 36 pan set. But once completed, the swatch chart can be used and reused for as long as the paints last. And an added benefit to creating the chart is what is learned and the experience gained while creating it.
Watercolor Painting


Watercolor painting requires a lot of practice and improves with that practice. Just like with the swatching, the more one paints the more one learns about how the paints react and how to use them.
There are times, especially when we are trying to create realistic representations such as botanical illustration, that we want the colors we use to match as close as possible. Matching colors also takes practice, however, it becomes easier with the use of a swatch chart.
Creating a Card Using Our Swatch Chart to Match Colors
We'll illustrate a Camelia for the front of our card. And, we're using one from my yard to use for reference, as shown above on the left. Additionally, we'll use a camelia stamp set to help with the design. Before we begin stamping and painting, we'll observe the flower.
The first thing we notice is that the flower is different than the images in the stamp set. The other thing to note is all the different colors that are produced by the light and shadows on the flowers and the leaves.
We'll start by stamping the outlines with no-line ink so that we can make some adjustments to make them look a little more like the flower.
Color Matching
Next, we'll begin to work on our color matching. We'll use our swatch chart to help us find colors that come close to matching those in the flower and its leaves. The chart gives us a general idea of the pigments that we can use.
But then we'll experiment with mixing them in different colors until we get the colors we're trying to create. Hint: cut a bunch of 1/4″ strips of watercolor cardstock to try out and document different combinations.
We end up using several different combinations of cotton candy, cosmic berry, rubellite, and grapevine for the flower, and for the leaves, we'll use forest glades and evergreen. Now that we have our colors we can begin to paint.
Painting
The most notable difference between the flower and the flower stamps is the very center of the flower. The petals in the center of the stamp are completely open and there is more like a bud in our live flower. And, the leaves are much larger and more twisted in real life than the stamps.
Now we'll begin by adding our darkest tones where the darkest shadows are and then draw the color out from there. And we'll do this for the entire flower and the leaves.
Finishing the Card
When we're done with coloring all of the images, we'll fussy cut them out after we're sure that they are dry.
We'll create a fun background by blending a color that contrasts with the flower over a wavy stencil. Then we'll splatter metallic paint over it to add some interest, and we'll stamp the sentiment using pigment ink.
Finally, we'll use liquid glue to attach the flower and leaves.
Final Review
Jaycee does a wonderful job of showing and explaining several techniques to use for watercolor painting. He goes through each one in detail so that you not only understand what you need to do but how to do it as well.
In the final analysis of this last card, the color matching is successful. But the perspective is off on the adjustments that we made to the flower. And the painting is very grainy. Nothing that continued practice won't help to resolve.
And, until we improve we should use the stamp as it is rather than adjusting the design.
Watercolor painting is amazing, truly magical. If you have been putting it off as I have, give it a try, you'll love it!
Supplies
The following list may contain affiliate links. If you purchase something by following a link on this page, I may receive a small commission at no extra cost to you. Thank you for supporting my blog.
- Cardstock: Card base – Neenah Classic Crest 110lb Solar White; Card panel – Canson XL, Color Layer – Gina K Designs Moonlit Fog
- Stamp: Altenew Build – Flower: Camelia
- Ink: Ink On 3 No Line; Altenew Pigment Ink Obsidian: Distress Oxide Spedled Egg
- Stencil: Altenew Wavy Grid
- Watercolor Paints: Altenew 36 pan; Altenew Metallic
- Colored Pencils: Prismacolor Magenta PC930, Tuscan Red PC937
Educator Certification Program
Altenew has a wonderful program called the Altenew Educator Certification Program (AECP). They provide it to help “crafting enthusiasts perfect their skills, gain recognition in the crafting community, and teach Altenew workshops”.
There are three levels to the program. The first two consist of ten pre-defined classes each with a challenge exam at the end of each. For the third level, the student selects five classes that they will take. And then they have to demonstrate design team and teaching experience as well as to pass an exam.
My AECP Journey
I am participating in the program and at this instant, I am working on the third level. The classes that I have chosen to take are those that challenge me, that I need help with, and that will push me to the next level of my capability. I am very happy with what I've learned to date.
The third level classes I am or have taken coupled with the articles I have written after taking them:
- Botanical Illustration Inspired Watercolor Advanced Watercolor Techniques Online Class – this article
- Progressive Cardmaking – How To Create 3 Fantastic Floral Greeting Cards.
- Stencils unleashed; Advanced Stencil Techniques – How to Create Optical illusions With Graphite.
- Transcending Tattoo Techniques – How to Make Cards using Tattoo for inspiration
- Creative Coloring with Erum – Advanced Techniques – this is the class that I am currently working on. Watch for the related article to publish in the next week or two.
To date, I have taken twenty-four Altenew Online classes as part of the AECP program; ten first level, ten-second level, and four of the third level. Even though I have been crafting for a very long time, I have learned a lot!
If you are interested in brushing up on your techniques or learning some new ones you might consider taking a class or two; after all, you don't have to be in the program to take them and they are great value for the money.


