Happy Mother's Day Mom!
Mom, you are such a beautiful person inside and out. Thank you for loving me so much and for always being there for me! No one has ever made me feel as wonderful as I do when you tell me you love me!
I am so very lucky! I not only have the sweetest, most wonderful Mom but I am also blessed with a sister, two sisters-in-law, two daughters-in-law, three granddaughters, and a granddaughter-in-law that are or have been beautiful Moms in my life.
Over the past week and a half, I have been adding to this article because of all these special people in my life, and hope that you have gotten some ideas to honor Moms in your life too.
Mother's Day is a special day! We get to honor our Moms. Check out this article each day until May 14th for a different card.
Happy Mother's Day Mom!
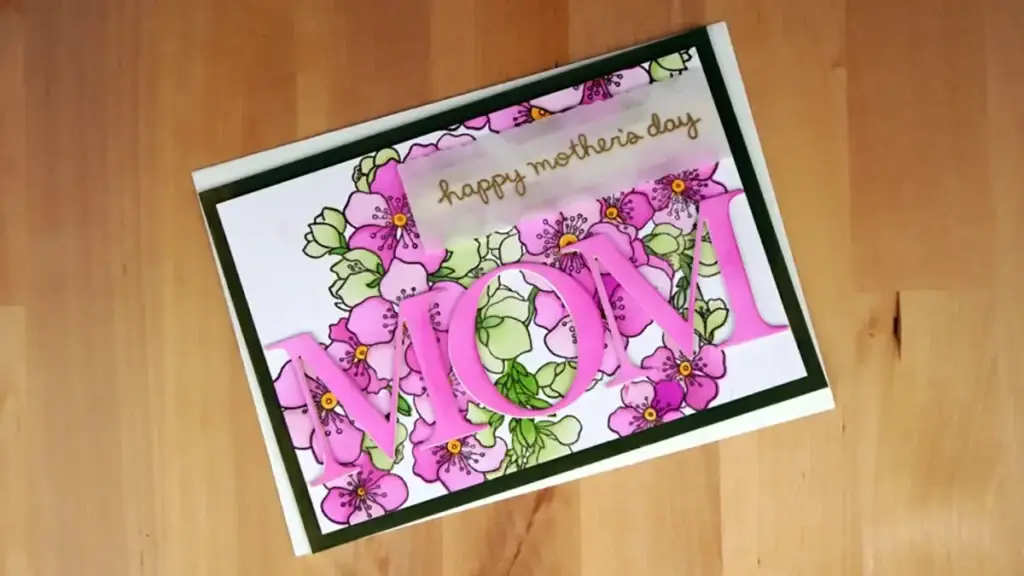
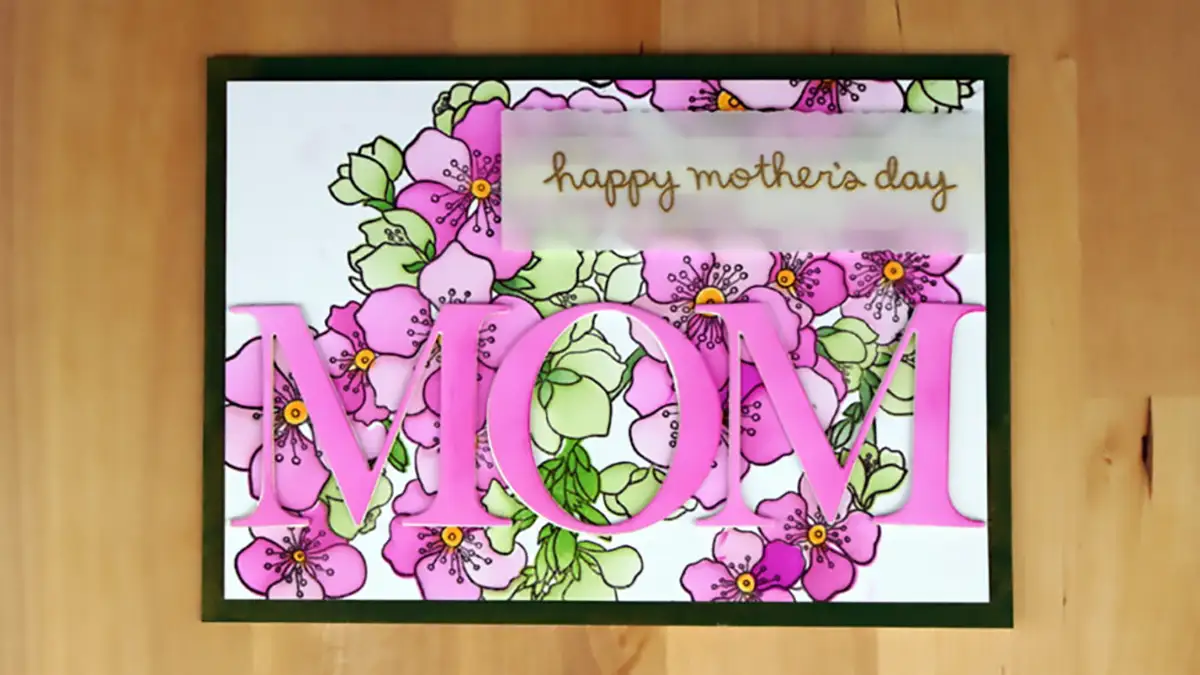
This card represents my Mom beautifully in so many ways.
As complicated as this card looks, it's really quite simple to make.
Stenciling
To begin, we'll stamp the large floral image on a half sheet (5 1/2″ x 8 1/2″) of white cardstock with black waterproof pigment ink. HINT: It can be difficult to get a good image with large stamps like this. You may have more luck if you fasten the back of the stamp to a surface such as a glass mat or a sticky mat such as the one on the new Altenew Stampwheel. And then, ink up the stamp and place your card panel on top of the stamp, and press or rub it with your fingers to get a good transfer. Lastly, carefully lift the cardstock off of the stamp and set it aside to dry.
It is imperative that the ink is dry before we go on to the next step. So, to make sure that it is we'll heat set it with our heat tool. And next, we'll blend over the coordinating layered stencil following the layering guide included with the stencil. And, we'll also use all of the dye inks listed in the guide.
Sentiments
We're using two techniques to create the sentiments. First, we'll blend the medium pink onto a piece of white cardstock. We do this because we want the sentiment to perfectly match the background that we have just stenciled. Next, we'll die-cut two giant “M”‘s and a giant “O” from the cardstock we just blended.
While we're at it, we'll go ahead and cut four more “M”s and two “O”s from white cardstock. And then, we'll layer the two white layers together using liquid glue (you should end up with two white “M”s and a white “O”. Now, we'll add a little glitz by brushing a gold shimmer pen around the edges of the white letters.
While that is drying, we'll lightly blend the right edges of the pink letters with the dark pink. We're doing this because it will help them to stand out better on the card front. When everything is dry we'll attach the white letters to the back of the pink ones with liquid glue.
To create the rest of the sentiment, we'll heat emboss “Happy Mother's Day” on a strip of vellum using gold embossing powder. Use your shimmer pen on the edges of the strip and then add it to a larger piece of vellum that has been trimmed using a deckle trimmer using double-sided adhesive.
Happy Mother's Day Mom Card Assembly
To finish the card, we'll trim a dark green piece of cardstock to 5″ x 7″ and brush its edges with our gold shinner pen. When it's dry we'll attach it to a white 5″ x 7″ card base with a tape runner. Next, we'll add a foam sheet to the back of the stenciled panel and pop it up centered on the card front.
Now, we'll use a T square while we fasten the letters to the card front using liquid glue. And finally, we'll pop up the vellum sentiment using 1/4″ foam tape right behind the letters so you can't see it.
Supplies
- Cardstock: Card base – Neenah Classic Crest 110lb Solar White; Card panel – Neenah Classic Crest 80lb Solar White; Color Accent – Gina K Designs Christmas Pine – this cardstock isn't available right now, but Hero Arts Shamrock would be a great replacement; Vellum – Hero Arts Classic Vellum Layering Paper
- Stamp and Stencil: Altenew Captivating Blooms Bundle
- Stamp: Lawn Fawn Celebration Scripty Sentiments
- Ink: Pigment Ink- Altenew Obsidian; Dye Ink – Altenew Pink Diamond, Pinakalicious, Rubellite, RazzleberryFirefly, Grass Fields, Shadow Creek, Mountain Pine, Snapdragon
- Stamp and Stencil Positioning: Altenew Stampwheel
- Blending Brushes: Altenew Mini Blending Brushes; Altenew Detailed Blending Brushes
- Die-cutting and Embossing Machine: Spellbinders Platinum 6
- Adhesives: Liquid Glue – Bearly Art Glue; Altenew Double-sided Adhesive Sheets; Tape Runner: Spellbinders Tape Runner; Foam Sheet – Scrapbook.com Double-sided Adhesive Foam Sheet; 1/4″ Foam tape – Scrapbook.com 1/4″ Double-sided Adhesive Foam Tape
- Shimmer Pen: Tonic Studios Nuvo Midas Touch
- Anti-Static Tool: Cottontail
- Embossing Powder: Hero Arts Gold
- Heat Gun: Sizzix Dual Speed
- Deckle Trimmer: Tim Holtz Deckle Trimmer
- T-square: Mis-T Ruler
Mother's Day Card #9: Tulips
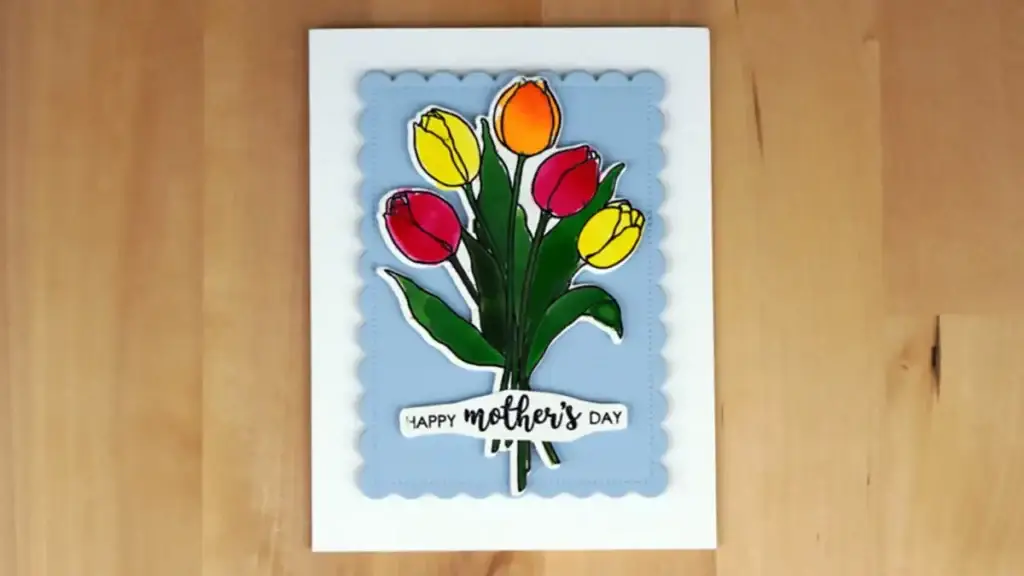
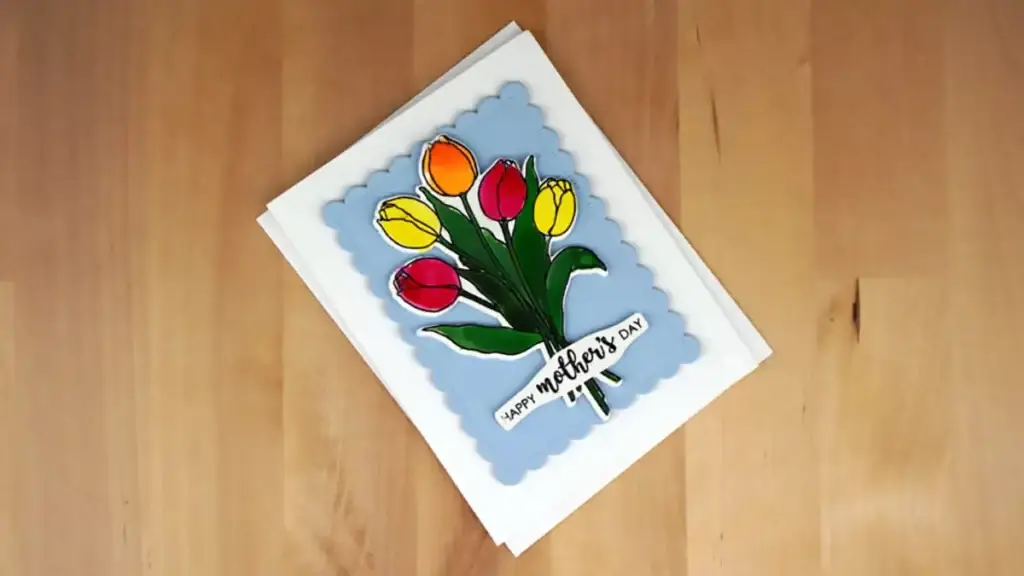
This stamp is a beautiful sketch of a pretty little bouquet of tulips. And, you can use it for cards anytime throughout the year.
We're keeping it simple to make this card. We'll begin by heat embossing the tulip stamp on white cardstock with black embossing powder. And then, we'll paint the image with watercolor paints. I use Gansai Tambi watercolor paints to produce the pretty, bright colors that the tulips have. Go ahead and heat emboss the sentiment in black too while you have your heat embossing supplies out
Make sure that the paint is completely dry before using the coordinating die to cut out the tulips. And, we'll also die-cut our pretty scalloped background from light blue cardstock.
All that is left to do is to assemble the card. And we'll pop up the background and the tulips with foam sheets. And then, we'll also use a couple of little scraps of the foam sheet on either side of the sentiment with a little dab of liquid blue in the middle. This will allow the sentiment to sit up nicely over the stems.
Supplies
- Cardstock: Card base – Neenah Classic Crest 110lb Solar White, Card panel – Spellbinders Raindrop; Flowers and sentiment: Neenah Classic Crest 80lb Solar White
- Stamp & Die: Hero Arts Tulip Bundle
- Die: Lawn Fawn Sunflower Greetings, this die must have been exclusive for an event but Lawn Fawn Fancy Scalloped Rectangle Stackables would be just as cute.
- Anti-Static Tool: Cottontail
- Embossing Powder: Hero Arts Black Detail
- Heat Gun: Sizzix Dual Speed
- Watercolor Paints: Gansai Tambi
- Paintbrush: Silver Black Velvet Round Size 2
- Adhesives: Foam Sheet – Scrapbook.com Double-sided Adhesive Foam Sheet; Liquid Glue – Bearly Art Glue
Mother's Day Card #8: Watercolor Peonies
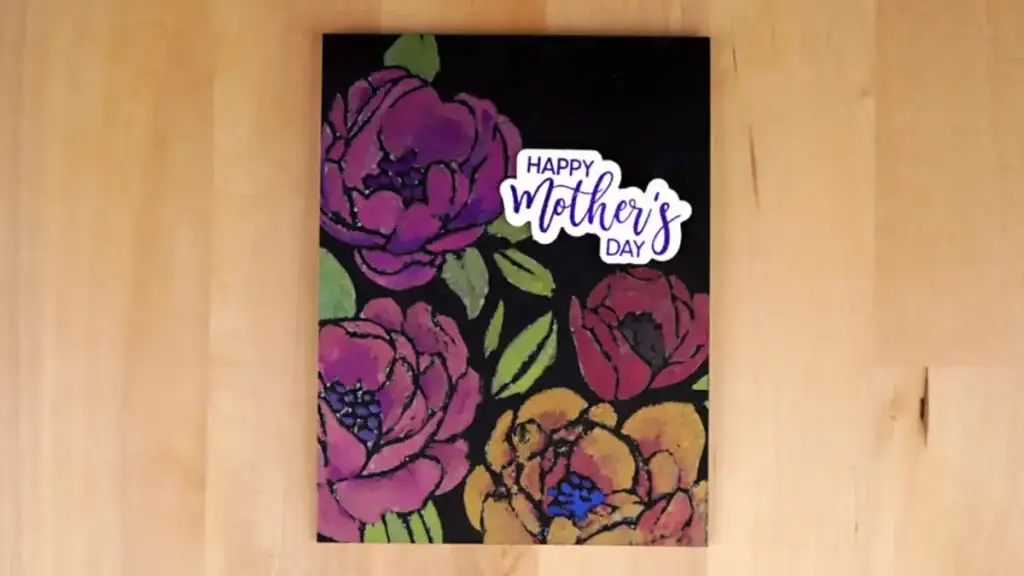
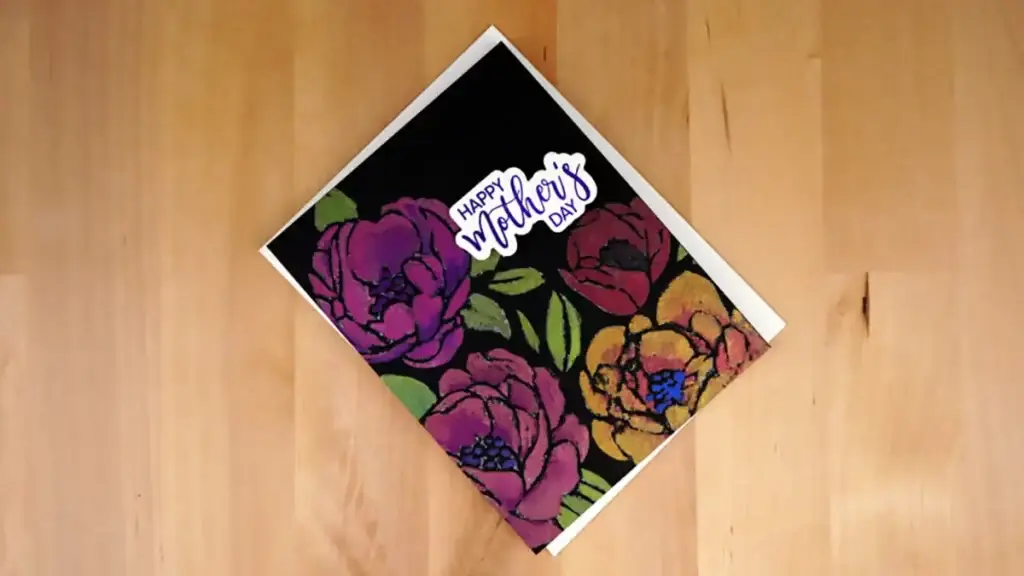
I love this card so much! And, I owe it all to @KristinaWerner. She recently did a video on this technique and that is what I use for this card. Kristina is so talented! Here is the video:
If you don't already follow Kristina, I strongly recommend that you do!
So, the video provides the technique for this card. Now, to make the card, dig through your stash and find a stamp that provides nice solid images. That is what I did for this card and found, Peony Bouquet, a cling rubber stamp from Simon Says Stamp.
Let's Make This Card!
I get my black watercolor paper in 9″ x 12″ pads and then cut each sheet in quarters (unless I'm making a card that is larger than A2. I do this because you have a piece that is slightly larger than what you need. This comes in handy when you need to tape the paper to a board or your work surface. And then, you can just trim off the areas that don't get painted.
The other thing I like to do is to make sure that I like where the image lands on the cardstock. For example, sometimes if I am not sure how it will look I will stamp the image onto scrap copy paper until I am happy with the location of the images. That is what I did with this stamp. And, I ended up having the stamp turned by almost 45 degrees.
You want to make sure that the ink is dry before you begin to paint. To be sure, zap it with your heat gun (on the low setting if you have one). And then the fun begins. I use a larger round paintbrush than Kristina does, not sure why. Maybe it's because I don't intend to be as precise with my painting as she was with hers.
If you haven't seen these metallic watercolor paints, they are magical. They are kind of pricey though, so a perfect way to try them out is to get the dot cards. I've included Kristina's link to them down below in the supplies list. However, when I bought the Vol.1 Master Quarter Set Handmade Color shift watercolor paints and that is what I use for this card.
Finishing and Assembly
While the paint is drying (doesn't take long) you can pick out a color that matches. For example, I picked purple in the center of one of my flowers and stamped the sentiment on white cardstock. And then, I heat-embossed it with clear embossing powder. Following that, you can die-cut it out with the coordinating die.
I really love how the painting turns out. So much so that I think that a different background would take away from it. So I just trim it to A2 size (4 1/4″ x 5 1/2″) and attach it to a white A2 top folding card base with a tape runner.
And, to finish it off we'll pop up the sentiment with a little foam tape and we're done. SO PRETTY!
Supplies
- Cardstock: Card base – Neenah Classic Crest 110lb Solar White; Card panel – Legion Stonehedge Aqua Black Watercolor Cardstock
- Stamps: Simon Says Stamp Peony Bouquet – Unfortunately it looks like Simon doesn't carry this one anymore. Hopefully, you have something in your stash. If not, look for stamps that have large surfaces to be inked.
- Stamp and Die Set: Waffle Flower Essential Celebrations
- Ink: Distress Oxide Hickory Smoke; Catherine Pooler Grape Crush; Watermark Ink – Versamark
- Heat Gun: Sizzix Dual Speed
- Metallic Watercolor Paint: Iuile Watercolors Dot Cards, Vol.1 Master Quarter Set Handmade Color shift watercolor paints
- Paintbrush: Silver Black Velvet Round Script 8
- Adhesives: Tape Runner: Spellbinders Tape Runner; Foam Tape – Fun Stampers Journey
- Anti-Static Tool: Cottontail
- Embossing Powder: Spellbinders Clear
Mother's Day Card #7: Coneflowers
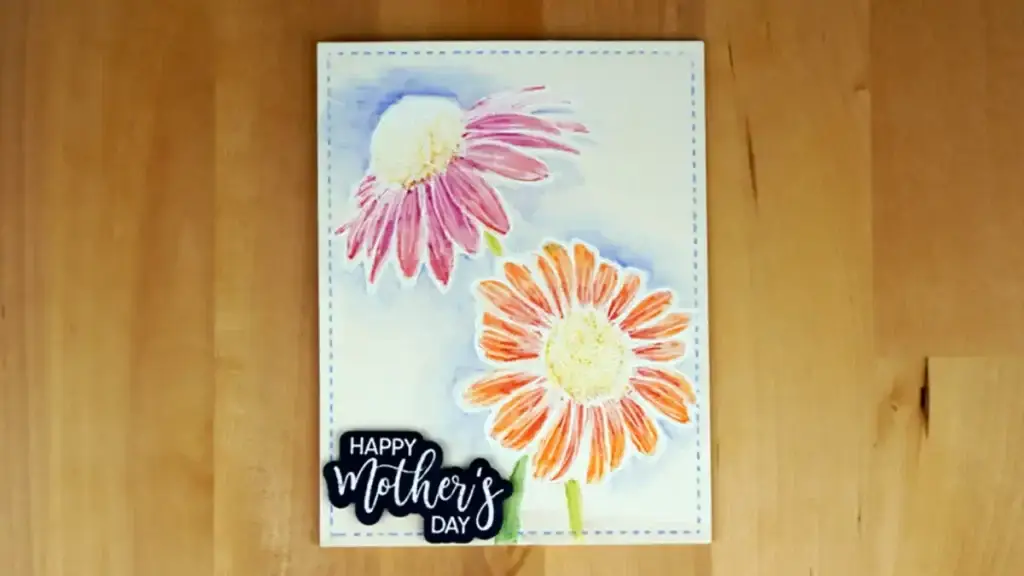
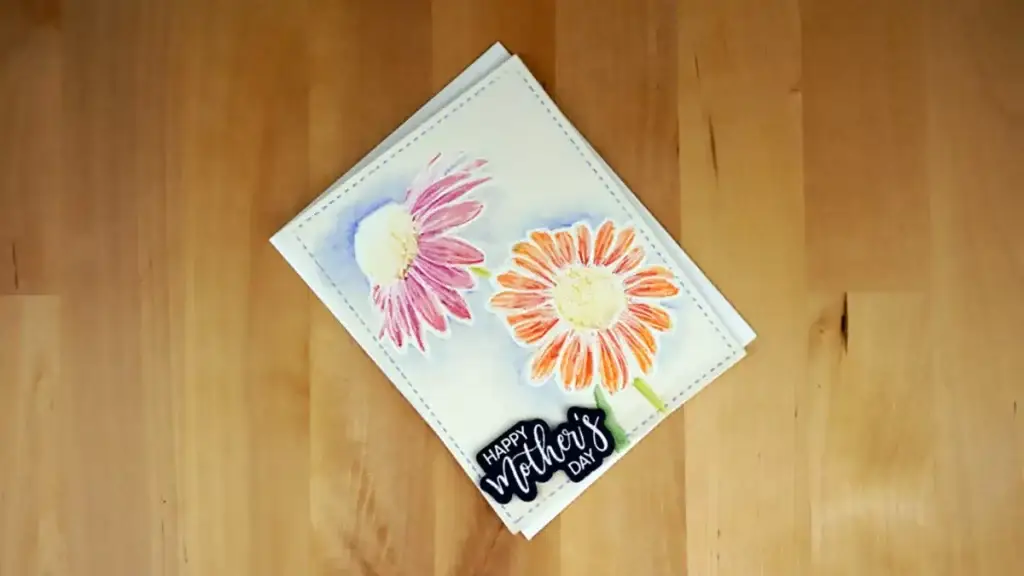
OK, this is another quickie card that produces beautiful results!
To make it just position the two giant coneflowers from Gina K's Colossal Coneflower stamp set in your Misti and stamp them onto a white A2 (4 1/4″ x 5 1/2″) with watermark ink. And then heat-emboss it with white embossing powder. Let's go ahead and stamp our sentiment on a scrap of blue cardstock and heat emboss it while we have our heat embossing supplies out.
Next, we'll color the flowers with watercolor pencils. I like to use a darker color on the petals toward the center. And then, a lighter color on the other end. Similarly, we can use a lighter color to go over the whole center of the flower and then add a darker color around the edge or on one side of the edge to create some shading.
Rather than masking and stamping the stems, I just drew them on with my watercolor pencils. Additionally, we'll add a little blue around the flowers as a background to make them stand out. And, we'll add a little brown at the bottom of the panel to ground the images.
Once we've got all our coloring done, then we will use a watercolor brush marker loaded with water to make our coloring come alive. HINT: Make sure to clean your brush on a piece of paper towel in between colors.
Mother's Day Card #7 Finishing and Assembly
It doesn't take long for our watercolors to dry. While we are waiting we can go ahead and die-cut our sentiment with the coordinating die. And then, we'll also add some foam tape to the back of it so we can pop it up later.
Once we're sure our card panel is dry, we'll die-cut it with a stitched rectangle die. Following that, we'll add some punch to the stitching by going over it with a pastel blue gel pen that matches our watercolor painting.
And finally, we can put it all together. We'll fasten the card panel to a white card base using a tape runner. And, we'll add the sentiment and we are done.
Supplies
- Cardstock: Card base – Neenah Classic Crest 110lb Solar White; Card panel – Neenah Classic Crest 80lb Solar White
- Stamp: Gina K Designs Colossal Coneflower
- Die: Waffle Flower A2 Lacy Layers
- Watermark Ink – Versamark
- Anti-Static Tool: Cottontail
- Embossing Powder: Hero Arts White Detail
- Heat Gun: Sizzix Dual Speed
- Tim Holtz Distress Watercolor Pencils: Shaded Lilac, Peeled Paint, Salty Ocean, Rustic Ocean, Candied Apple, Seedless Preserves
- Watercolor Brush Marker: Altenew DIY Watercolor Brush Marker
- Die-cutting and Embossing Machine: Spellbinders Platinum 6
- Gel Pens: Kaisercraft Pastel & Glitter
- Adhesives: Tape Runner – Spellbinders Tape Runner; 1/4″ Foam tape – Scrapbook.com 1/4″ Double-sided Adhesive Foam Tape
Mother's Day Card #6: Pretty Quickie Card
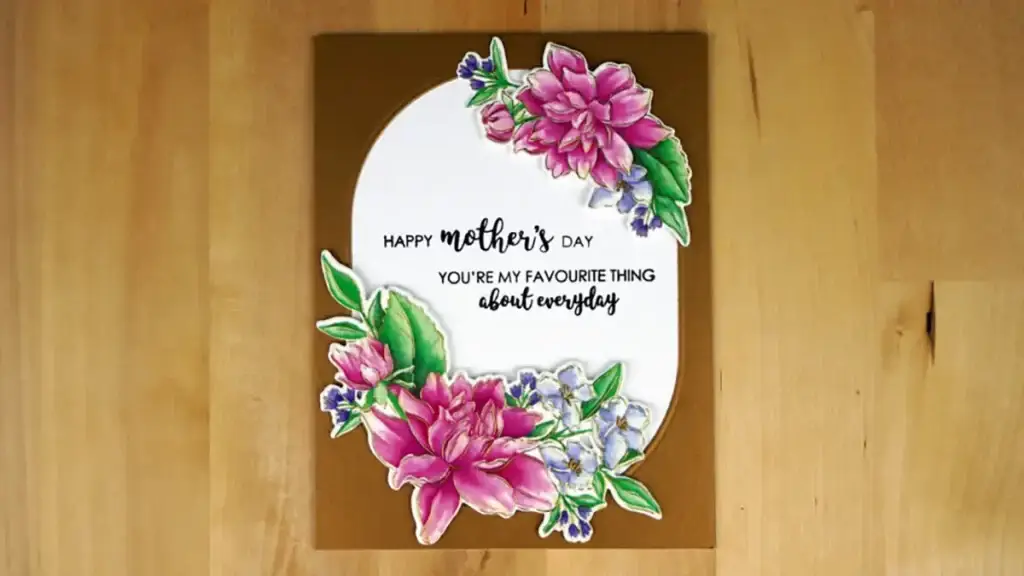
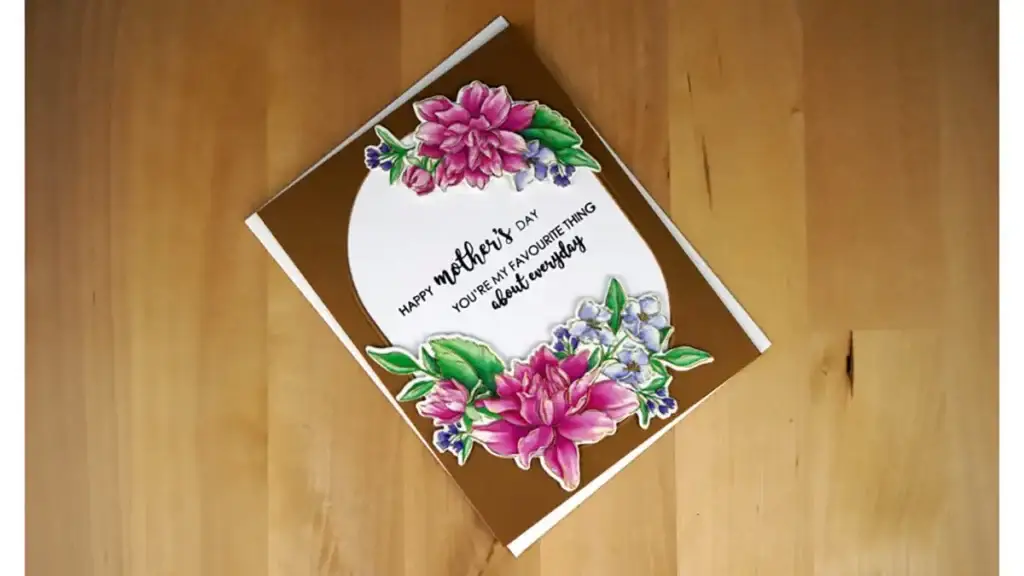
Don't have a lot of time to make a card, but want something special? This is the card for you!
Pinkfresh has these wonderful products that all coordinate together. You can get stamps, dies, stencils, hot foil plates, and even washi tape to create beautiful cards.
We are using the washi tape and die set from one of the newer sets called Artistic Dahlia. So, we'll begin by attaching the washi tape to white cardstock. Being that the die is all in one piece you'll want to make sure that the designs on your washi tape match the ones on the die. For mine, I had to cut a partial piece before I could cut the whole image.
The dies match the pattern on the washi tape beautifully. And, it helps to use a little bit of low tack tape to keep the die from shifting. And then, just run it through the die-cutting machine.
While we have the die-cutting machine out, we'll go ahead and cut out the frame if you haven't done so already. I use the one that was created when I cut out the stylish oval for card #4.
Mother's Day Card #6 Sentiments and Assembly
Now, we'll set an A2 (4 1/4″ x 5 1/2″) card base in our stamp positioning tool. And then, we'll arrange the frame and washi how we want it to be. We do this so we can determine where to stamp the sentiments. Once we've got a good location for them, we'll pick them up with the lid of the stamp positioning tool. Following that, we'll ink up the stamps with a nice crisp black ink and stamp them onto the white card base.
We'll then attach the frame to the card base using a tape runner. And then, we'll pop up the flowers with scraps of foam sheets. And, that is it. Isn't that fun?
Supplies
- Cardstock: Card base – Neenah Classic Crest 110lb Solar White; Card panel – Gina K Metallic Gold; Flowers – Neenah Classic Crest 80lb Solar White
- Washi Tape: Pinkfresh Artistic Dahlia
- Dies: Pinkfresh Artistic Dahlia; Dies: Spellbinders Essential Stylish Ovals
- Stamp: Paper Roses Mother's Day Quotes
- Pigment Ink: Altenew Obsidian
- Adhesive: Low tack Tape – Scrapbook.com Mint tape; Tape Runner: Spellbinders Tape Runner; Foam Sheet – Scrapbook.com Double-sided Adhesive Foam Sheet
- Die-cutting and Embossing Machine: Spellbinders Platinum 6
- Stamp Positioning Tool: Misti
Mother's Day Card #5: Collage
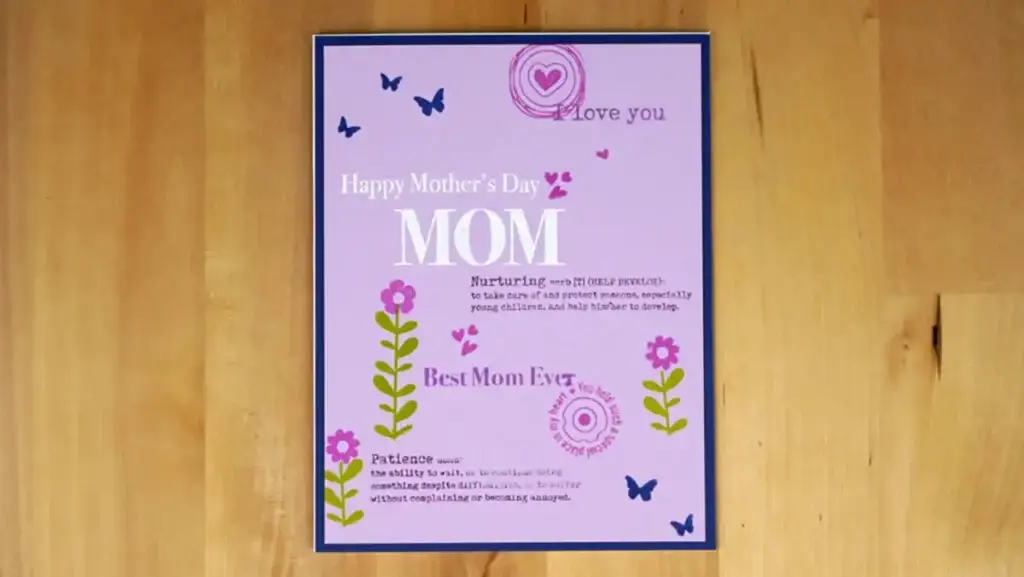
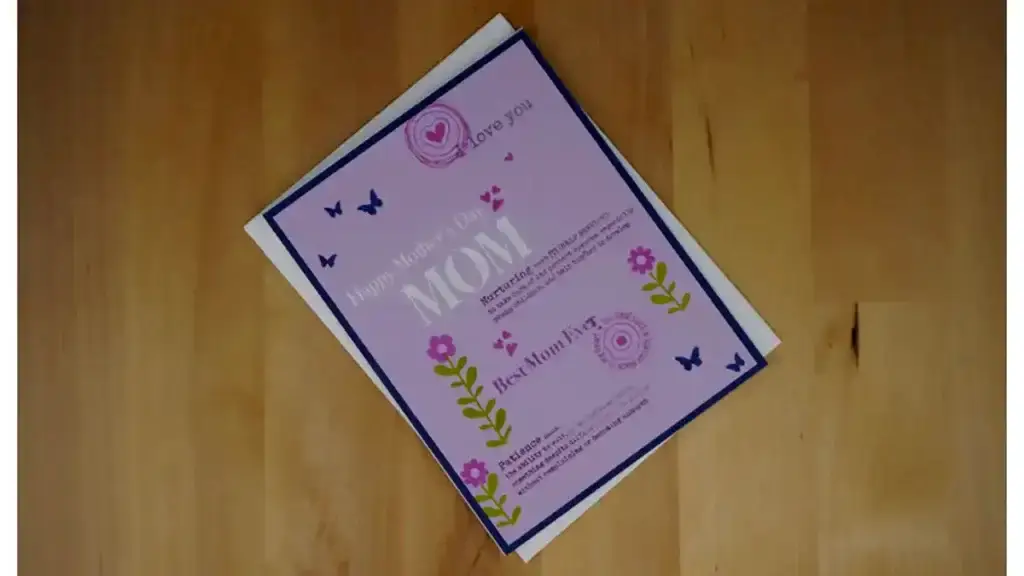
To be honest, I didn't think I was going to like this card style. But, oh my I love this card! It's inspired by Angie Hunt over at #LDRS_Creative who taught a class on the technique during the Crop and Create Delivered for Cardmaking put on by Scrapbook & Cards Today last March.
This card is all about picking the right colors to use. And then, stamping the right image in the right place. To begin, we use beautiful lilac cardstock for the card panel. And we do this to show off all of the images that we will be stamping.
Next, we'll decide what we want to be our focal point. In this case, I choose the stamps Happy Mother's Day and Mom. I decide where I want it to be, but I wait with it because it will be heat embossed and I want it to cover anything that it might overlap.
Then, I want the definitions of patience and nurturing to have some prominence. So I ink them up with dark purple ink. And, I find that using a stamp positioning tool is helpful to ensure that the sentiments are straight, but we'll use acrylic blocks for everything else.
Have Fun!
The placement of the stamps and the colors that you use is really up to you. The original plan for this card is to go with just pink and two shades of purple in addition to the white heat embossing. But as I begin to stamp the little butterflies and flowers I decide to add green and blue. And, they are perfect!
When all the stamping is done, then we can heat emboss our main sentiments and assemble the card. I trim an A2 piece of denim blue cardstock by a scant 1/16″ on one long side and one short side to leave a sliver of white showing on the top and left side. I don't think I will do that again.
Then we'll trim the card panel to 1/8″ shorter than the blue one on all four sides. Lastly, we'll layer them all together with a tape runner.
Supplies
- Cardstock: Card base – Neenah Classic Crest 110lb Solar White; Card panel – Gina K Designs Lovely Lavender; Color Accent – Gina K Designs Blue Denim
- Stamp: LDRS Creative Mother's Day Collage, part of the Spring Stamp Bundle
- Ink: LDRS Creative Fandango, La La Lavender, Grape Ape, Dark Wash Jeans, Key Lime Pie; Watermark Ink – Versamark
- Anti-Static Tool: Cottontail
- Embossing Powder: Hero Arts White Detail
- Heat Gun: Sizzix Dual Speed
- Stamp Positioning Tool: Misti
- Adhesives: Tape Runner: Spellbinders Tape Runner
- Acrylic Blocks: Gina K Designs 1 1/2″ x 1 1/2″, 1 1/4″ x 3 1/2″
- Paper Trimmer: Tim Holtz Rotary Media Trimmer
Mother's Day Card #4: Fun Floral
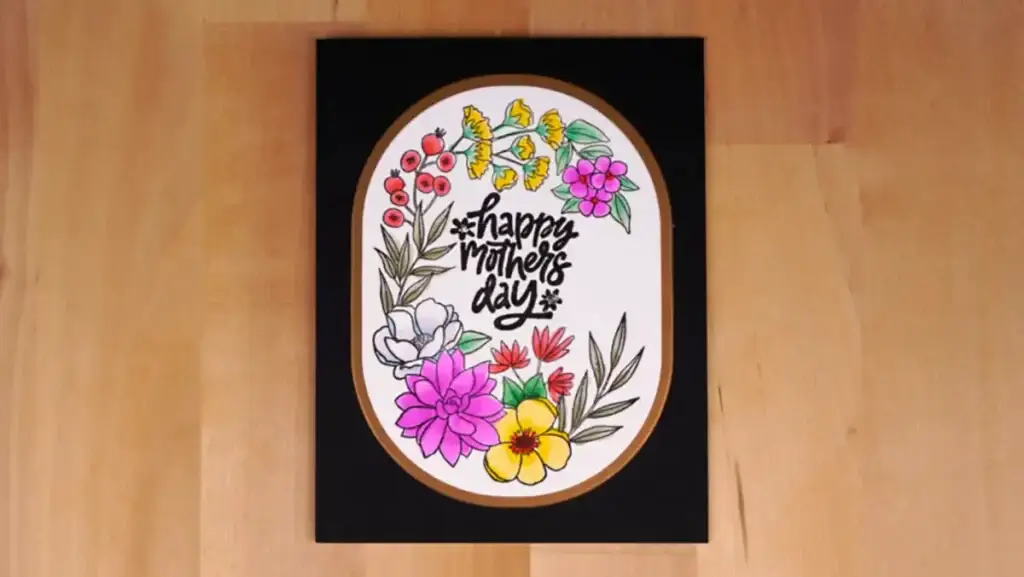
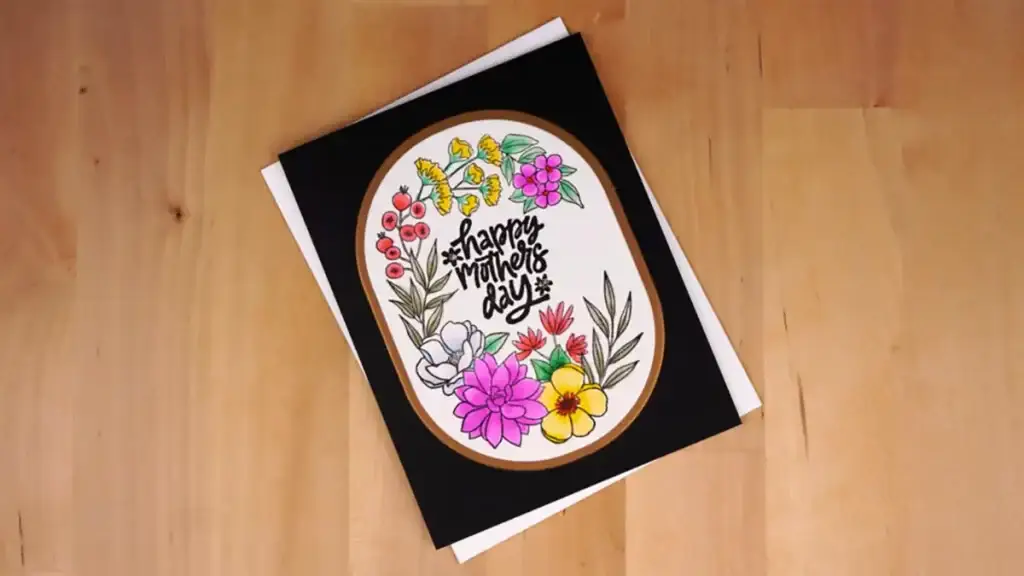
For this card, we use a black background to make our focal point really pop.
This is a quick and easy one. The products that we'll use are from the Stylish Ovals Collection in Spellbinder's latest release. To begin we'll stamp our pretty floral image onto a piece of white cardstock with black multi-media ink.
And then we'll color it with bright colors to give the card a fun vibe. OLO markers are perfect for doing this, especially when you want to add just a little bit of shading. When we're done with the coloring we'll die-cut it out with a Stylish Oval die. And, we'll use the next size up to cut an oval from metallic gold cardstock.
The last thing we do before we assemble the card is to stamp a fun sentiment in crisp black ink.
Mother's Day Card #4 Assembly
To assemble the card we'll use a tape runner to attach a black A2 (4 1/4″ x 5 1/2″) card panel to a white card base. HINT: Using Altenew's new Stampwheel is an awesome way to make sure that you get the card panel set in the perfect position on the card base. Just remove the pad so nothing is in it. Then add the card base in the corner. Add the adhesive to the back of your card panel. Holding the top right corner, carefully move the card panel into the lower left-hand corner until it is snug. And then lower the card panel down onto the card base.
We'll also layer the panel with our focal point onto the metallic gold oval with a tape runner and then attach it to the card front. And then, to pick up the gold in the frame, we'll add a couple of dots of gold Stickles in the centers of the flowers in the sentiment. And that is all there is to this card.
Supplies
- Cardstock: Card base – Neenah Classic Crest 110lb Solar White, Card panel – Spellbinders Black, Color Accent – Gina K Metallic Gold
- Stamp: Spellbinders Oval Birthday Wishes; Brutus Monroe Occasional Greetings
- Dies: Spellbinders Essential Stylish Ovals
- Ink: Ink: Hero Arts Intens-ified Black, Pigment Ink: Altenew Obsidian
- Alcohol Markers OLO Markers V0.3, Vo.4, Y2.2, Y2.4, R0.3, R 0.4, G0.1, G 0.4, YG 8.3, YG 8.t5, B0.3, C-G1
- Stamp and Stencil Positioning: Altenew Stampwheel
- Adhesives: Tape Runner: Spellbinders Tape Runner
- Embellishments: Stickles Goldenrod
- Stamp Positioning Tool: Misti
- Stamp and Stencil Positioning: Altenew Stampwheel
Mother's Day Card #3: Let's Celebrate You!
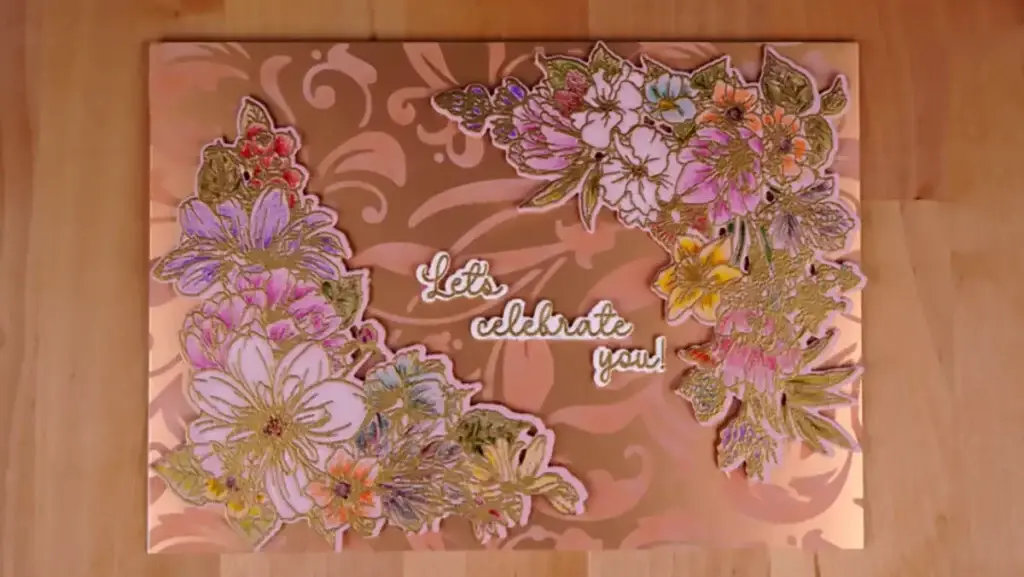
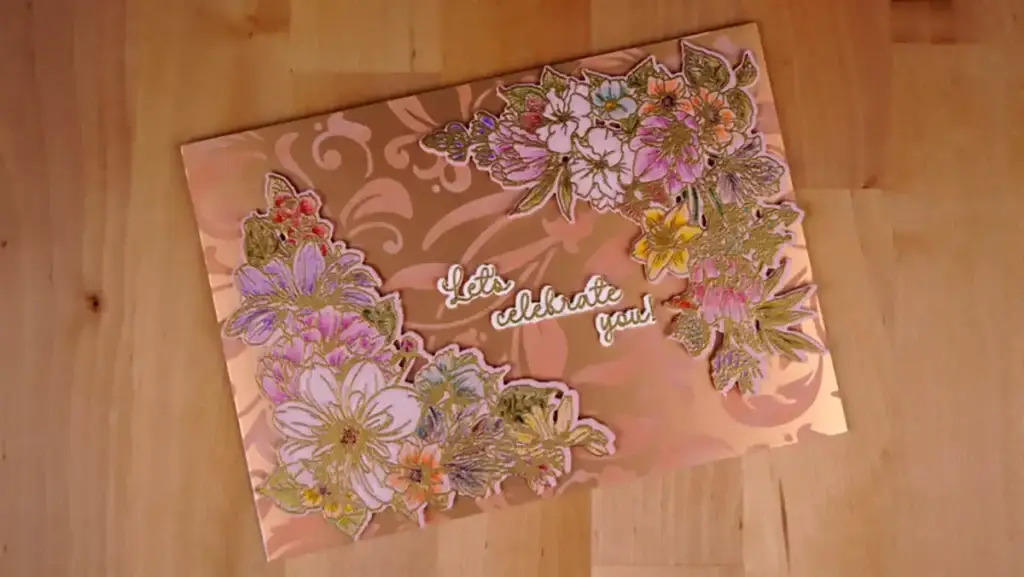
Isn't this an elegant card? Perfect for letting Mom know just how special she is!
To create it, we'll use a technique that I haven't seen used before. We're going to stencil pigment ink onto mirror cardstock. You want to be very careful with this because the ink will smudge if you're not careful. And, you want to make sure that it is dry before you do anything else with it. HINT: I recommend letting the ink dry for at least 24 hours and then hit it with your heat gun just to make sure it's dry.
Next, we'll heat-emboss all of the images that we are using with gold embossing powder. The floral corners are embossed on pretty pink cardstock and the sentiments are embossed on white. And then we'll color the flowers with colored pencils.
When we're done coloring, we'll die-cut out the floral corners and sentiments using the coordinating dies.
To assemble the card we'll trim the stenciled cardstock to 5″ x 7″ and attach it to a white 5″ x 7″ card base using a tape runner. HINT: this step could be done before stenciling to eliminate any possibility of scratching your stenciled images.
And then, we'll pop up the corners and sentiments using scraps of foam sheet. HINT: I snipped the words of the sentiment apart.
Supplies for the Let's Celebrate You Card
- Cardstock: Card base – Neenah Classic Crest 110lb Solar White; Card panel – Tonic Studios Mirror Card Honey Gold; Floral – Concord & 9th Ballet Slipper
- Stamp: Colorado Craft Company Floral Corners
- Die: Colorado Craft Company Floral Corners
- Ink: Versamark; Pigment – Gina K Designs Ivory
- Stencil: Stamperia Rose Parfum Texture
- Anti-Static Tool: Cottontail
- Embossing Powder: Hero Arts Gold
- Heat Gun: Sizzix Dual Speed
- Colored Pencils: Prismacolor Premier
- Die-cutting and Embossing Machine: Spellbinders Platinum 6
- Scissors: Cutter Bee
- Adhesives: Tape Runner: Spellbinders Tape Runner; Foam Sheet – Scrapbook.com Double-sided Adhesive Foam Sheet
Mother's Day Card #2: Flower Heart
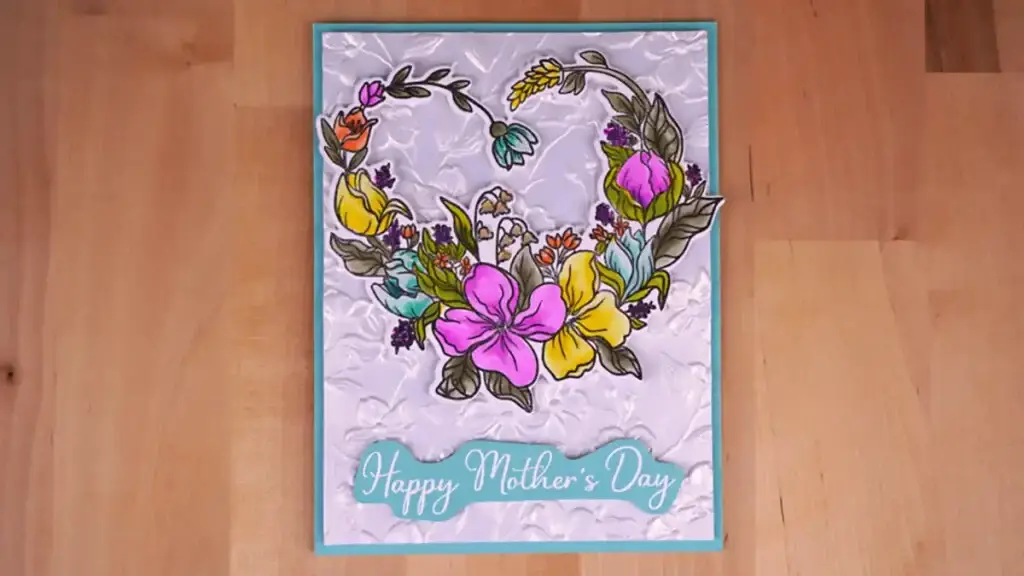
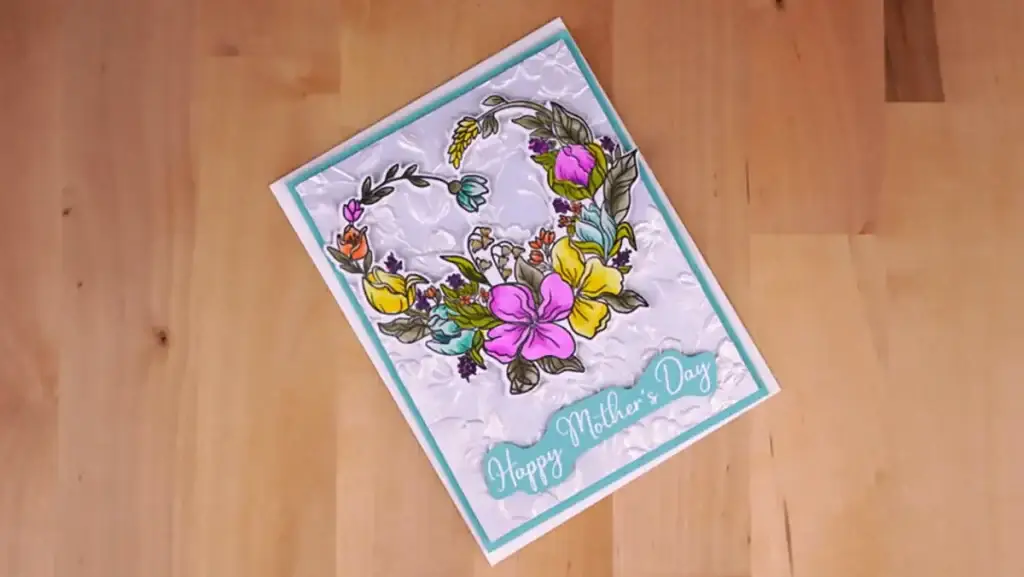
Before I knew what it was, I had to have this stamp set! Isn't it awesome? And, even though it was released for Mother's Day, you can use it for anything!
To create the card, you can start by stamping the image onto a piece of white cardstock with black multi-media ink. And then, use alcohol markers to color the flowers. HINT: I try to use each color three times to keep it pleasing to the eye. Once you have the coloring complete, cut out the image using the coordinating die.
Next, we'll emboss the background using a dogwood embossing folder with gold pearl cardstock. Set that aside to dry while we heat emboss the sentiment. We're going to do so with white embossing powder on light teal cardstock. And then, when it's cool we'll fussy cut it out.
To finish the card, we'll trim a piece of teal cardstock that matches what we use for the sentiments to A2 size(4 1/4″ x 5 1/2″). And then, we'll fasten it to a white A2 card base with a tape runner. Check to make sure the background is dry (if you spritzed it before running it through the embossing machine as I do). If not, hit it with your heat gun for a couple of seconds.
Now, we'll trim the embossed background to 4″ x 5 1/4″ and pop it up on the card front using a double-sided adhesive foam sheet. And then we'll pop up the flower image and the sentiment using foam tape.
Supplies
- Cardstock: Card base – Neenah Classic Crest 110lb Solar White; Card Panel – Crafter's Companion Luxury Centura Pearl Snow White Gold; Color Accent- Gina K Designs Sea Glass
- Stamp and Die Set: Simon Says Stamp Mother's Day Dogwood
- Ink: Hero Arts Intens-ified Black
- Embossing Folder: Honey Bee Stamps Dogwood Blooms
- Alcohol Markers: OLO
- Anti-Static Tool: Cottontail
- Embossing Powder: Hero Arts White Detail
- Heat Gun: Sizzix Dual Speed
- Adhesives: Foam Sheet – Scrapbook.com Double-sided Adhesive Foam Sheet; Tape Runner: Spellbinders Tape Runner; Foam Tape – Fun Stampers Journey
- Paper Trimmer: Tim Holtz Rotary Media Trimmer
- Die-cutting and Embossing Machine: Spellbinders Platinum 6
- Scissors: Cutter Bee
Mother's Day Card #1: Scandinavian I Love You, Mom
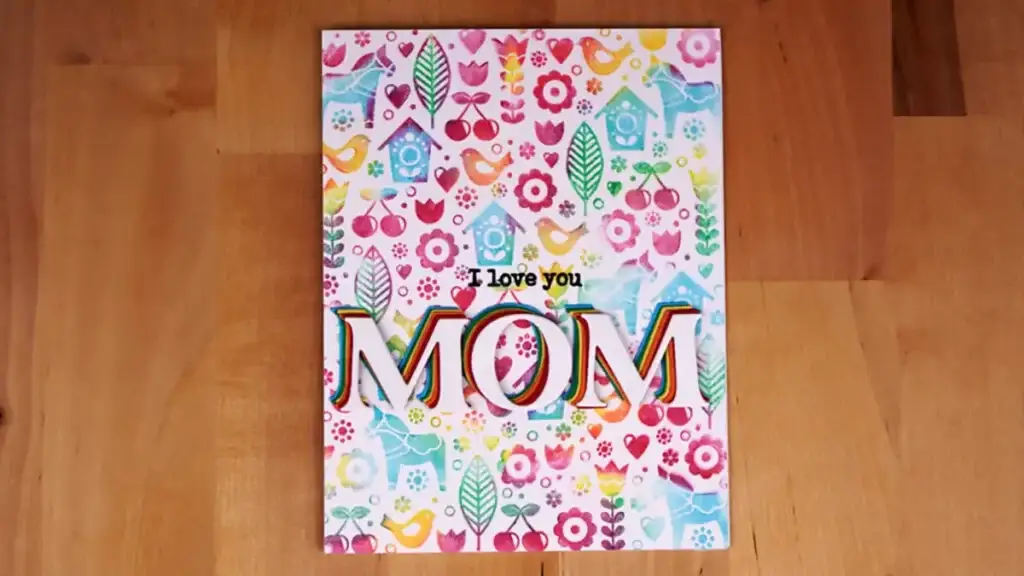
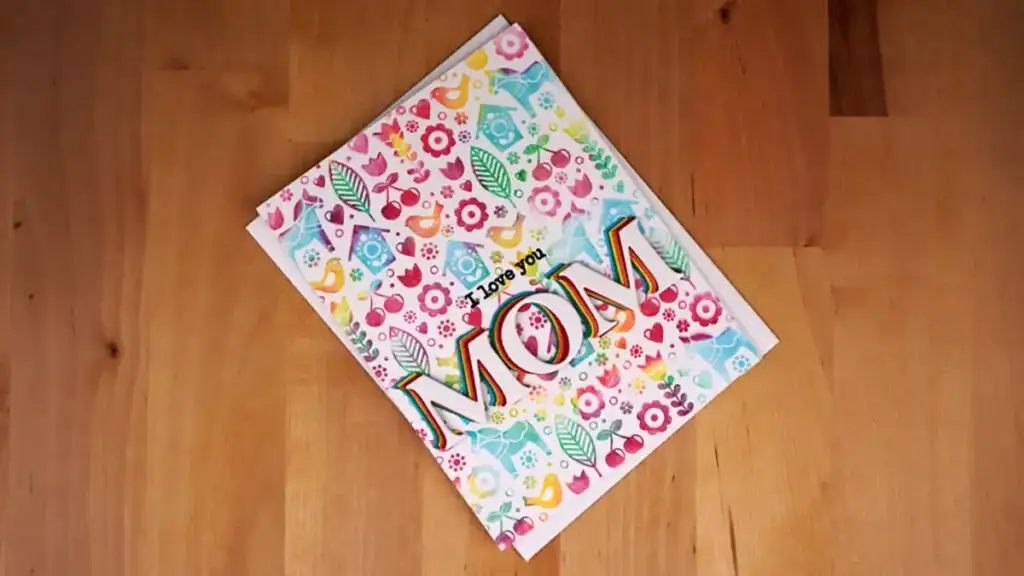
As soon as I saw this stamp I had to have it to make a card for my Mom. She is Norwegian, actually Scandinavian, and very proud of it! So a card with a Scandinavian print on it will be perfect for her.
Coloring for Mother's Day Card #1
The coloring is fun. Just lay the cling stamp down on its back on your work surface. HINT: I use it on a glass mat so that it sticks to it. And then, using mini blending brushes add different colors to the stamp. I suggest using juicy inks to get good color coverage. And, don't worry about overlapping colors because the blending of those colors creates a new one. For example, the red and yellow make a beautiful orange.
You want to work quickly so that the ink doesn't dry on the stamp. Once you've got all your color down then lay a white A2 (4 1/4″ x 5 1/2″) card panel down onto it. And, lightly rub the cardstock onto the stamp to get the ink to transfer. Then, carefully lift the cardstock up off the stamp. I hope you love yours as much as I do mine!
Sentiment
The card panel is so pretty that we'll just keep the sentiment simple to let it all shine. We're going to die-cut Mom from white cardstock using dies from a fun Alphabet Die Set. And to really make it pop we're also going to to cut the letters M O M from scraps of cardstock to match our background.
For the card in the photo, we use rainbow colors: red, orange, yellow, green, and blue to match the ink that we used on the stamp. And then we'll layer them up, slightly offset (so you can see the colors) with liquid glue.
Before we fasten the letters to the card panel, we need to determine where to stamp the rest of the sentiment. I like to use my Misti to do this, by setting the panel into the stamp positioning tool. And then, put the letters where I want them to be. HINT: The rule of thirds works well with this step. For example, I set my letters about a 1/3 from the bottom of the panel.
Once you decide where the letters are going to be then, you can decide where to stamp “I love you”. Place the stamp where you want it and pick it up with the lid of your Misti. Remove the M O M letters and Ink up the stamp with black ink. And then, carefully stamp your sentiment. HINT: Don't press too hard on your stamp or it will distort the image. Instead, stamp multiple times to get a darker or crisper image.
Assembly and Finishing
To finish up the card, we'll attach the card panel to a white A2 size card base with a tape runner. And then, we'll attach the letters M O M to the card front using liquid glue.
And that is it.
- Ink: Catherine Pooler Rockin'Red, Fiesta Blue, In the Park, Limoncello; Pigment Ink: Altenew Obsidian
- Cardstock: Card base – Neenah Classic Crest 110lb Solar White; Card panel – Neenah Classic Crest 80lb Solar White
- Blending Brushes: Gina K Designs Mini Blending Brush Set of 4.
- Dies: Scrapbook.com Classic Type Alphabet Set
- Adhesives: Liquid Glue – Bearly Art Glue; Tape Runner: Spellbinders Tape Runner
- Stamp Positioning Tools: Stamp Positioning Tool: Misti, Stamp and Stencil Positioning: Altenew Stampwheel
- Stamp: Taylored Expressions Scandinavian Spring Background, LDRS Creative Mother's Day Collage Stamp Set from the Spring Bundle
Can't Wait Until Tomorrow For Another Mother's Day Card?
Check out How To Make A Butterflower Mother's Day Card.
