
6 cards were created with the wonderful new January Club Kits from Spellbinders in this article. You can learn how you can get them too.
January Club Kits: Large Die of the Month
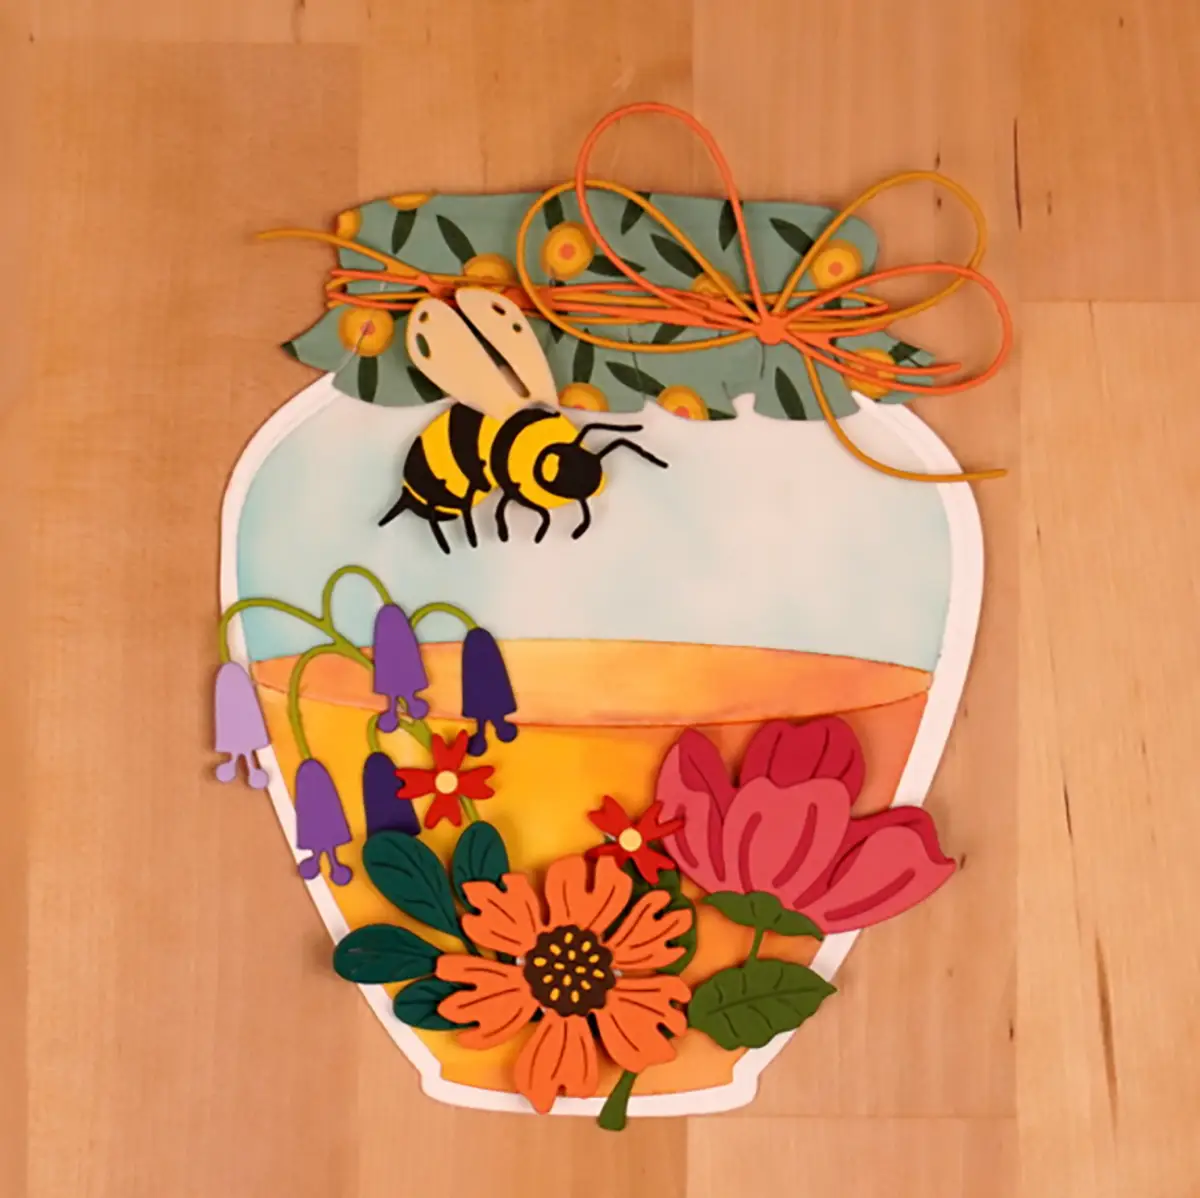
This card featuring the large die of the month, Honey Bee Jar, is just plain fun! The die set includes a huge honey jar that is big enough to make a card. I like to use vellum for glass because it is translucent. And, you get beautiful tonal qualities when you color it on the backside. I like to use alcohol markers and painting with inks to create variations of colors that you find in glass. I use Copic sketch markers:
- YR24
- YR27
- YR23
Use scraps from the vellum for the bee’s wings along with bright yellow and black cardstock.
I love bright colors, and that is what I use for the flowers as follows:
- Poppy Field
- Dahlia
- Wild Berry
- Persimmon
- Sunkissed
- Chamomile
- Fern
- Blue Spruce (no longer available)
- Peridot
- Purple Mist
- Lilac Blossom
- Royal Amethyst
You see honey alot at fairs. And many times when you see it with the tops covered with a pretty piece of cloth. And then, it’s tied on with twine or ribbon. That is easy to replicate with patterned paper and the cool die. And, you can create additional interest by cutting two sets in two different colors of cardstock.
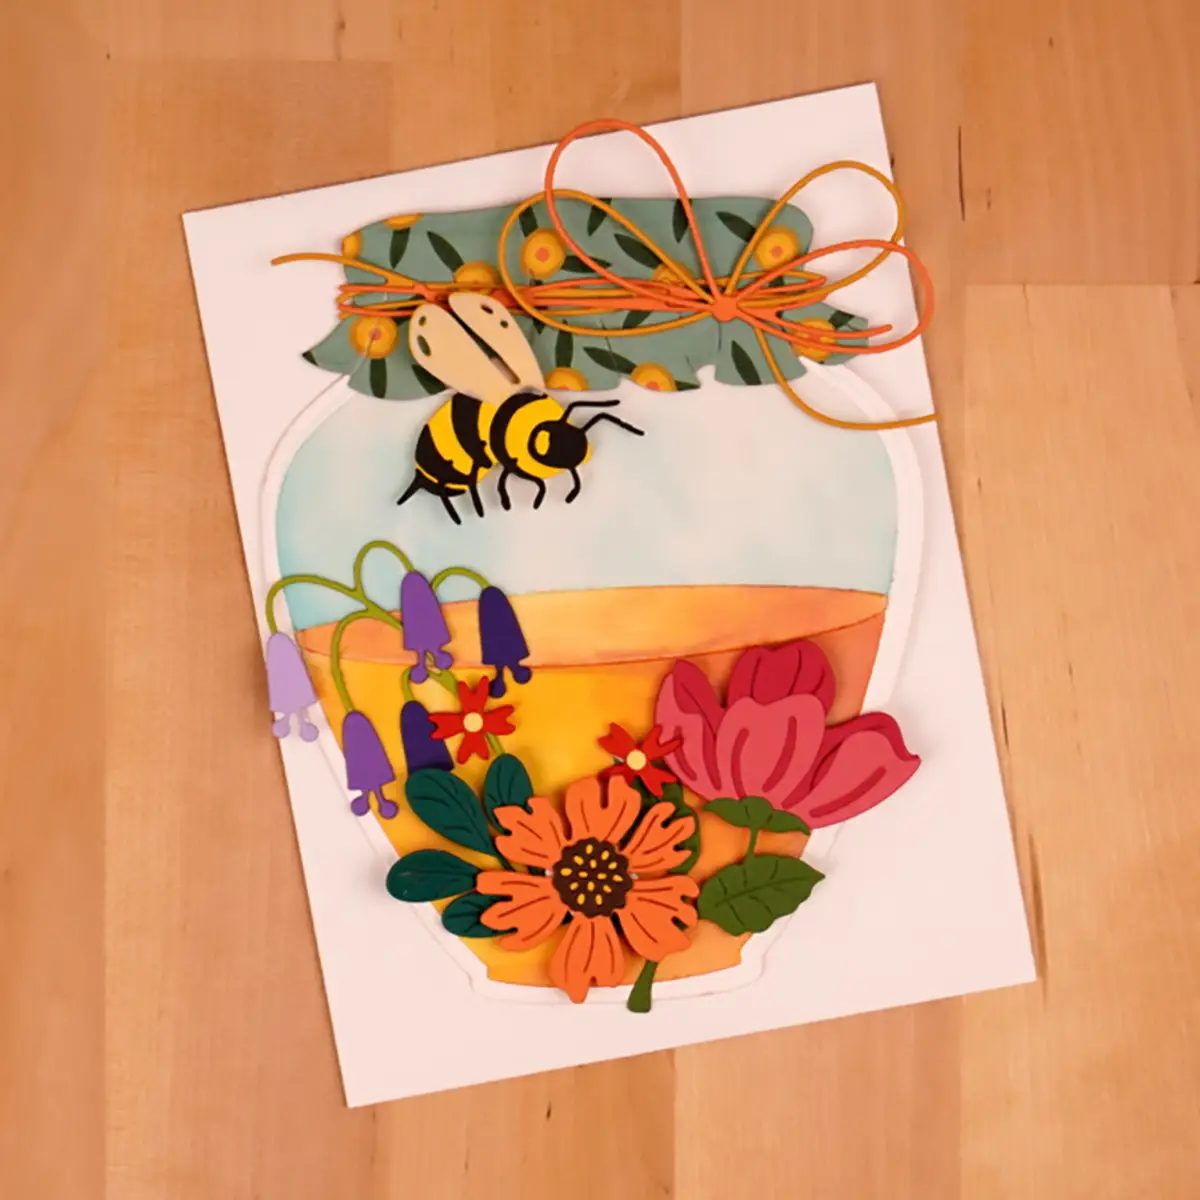
Like I said, this is a super fun card. I hope that you have fun making yours.

January Club Kits – Clear Stamp and Die of the Month
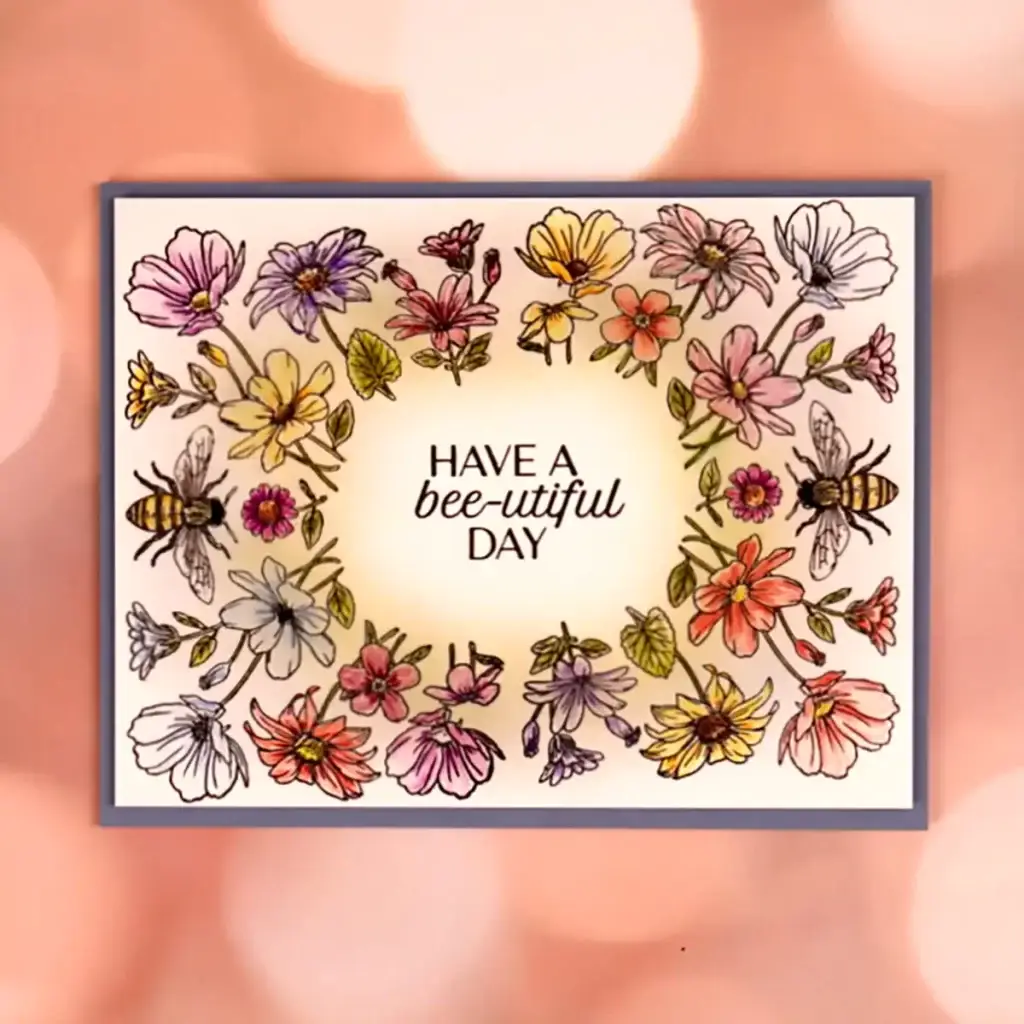
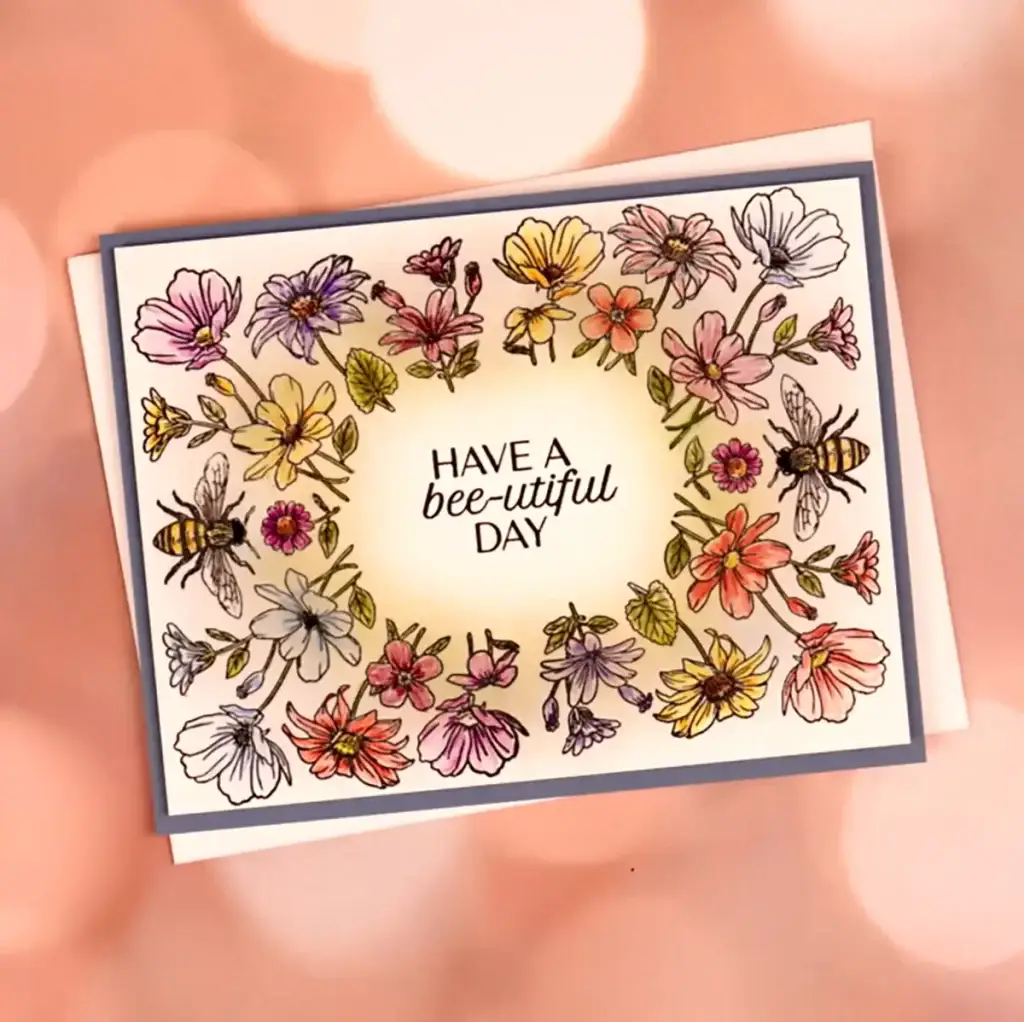
The January Clear Stamp & Die of the Month, Just Bee-utiful, is a beauty! And it’s oh so versatile too! Learn how in this article.
I only use the stamp for my project. It is in a beautiful U-shape that I stamped on either side of an A2-size card panel. However, the dies are made so that you can cut out portions of the image separtely. This way you can highlight them, pop them up, or to use separately. HINT: A2 size is 4 1/4″ x 5 1/2″.
I use a stamp positioning tool so that I can repeat as many times as I like. I use black pigment ink to stamp with on white cardstock. And, I also stamp my sentiment in the center. Always make sure that the ink is dry before going on to the next step. Otherwise it could smear and ruin your project.
Next, I’ll blend pale green ink around the inside of the ring created by stamping the image on both sides. And then I’ll blend a light blue, (like Tumbled Glass) ring around it.
Then, I color the flowers and stems using colored pencils.
To complete the card, I’ll make a white A2 size card base. To do so, I’ll trim a piece of heavy-weight white cardstock to 5 1/2″ x 8 1/2″. And then I’ll score it at 4 1/4″ along the long side. Next, I’ll trim a piece of blue cardstock to A2 size. Next, I’ll fasten it to the card base with a tape runner. Finally, I’ll trim my card panel to 4″ x 5 1/4″. And then I’ll fasten it to the blue panel on the top of the card.

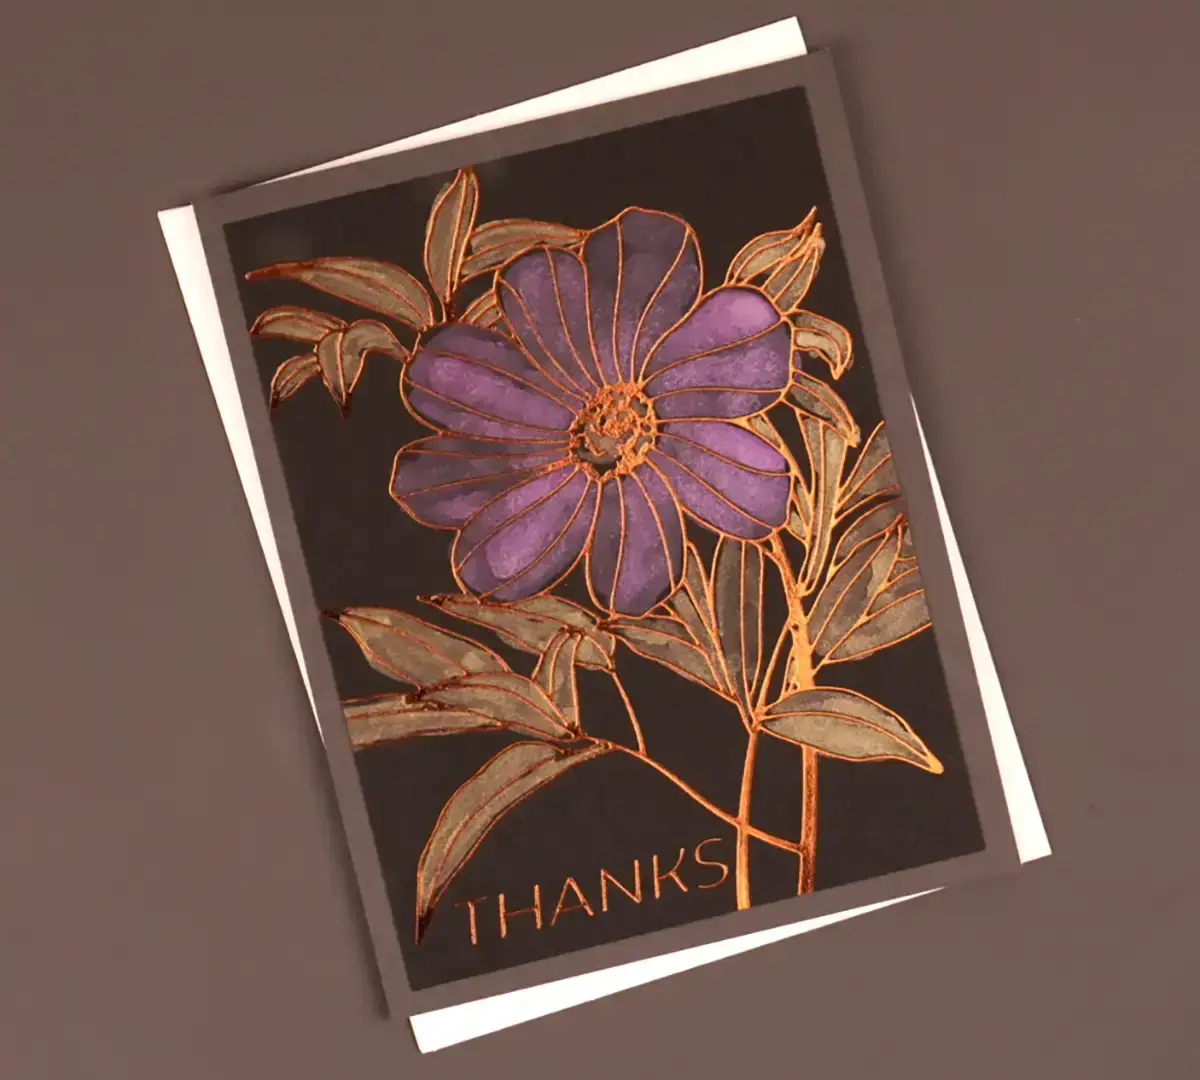
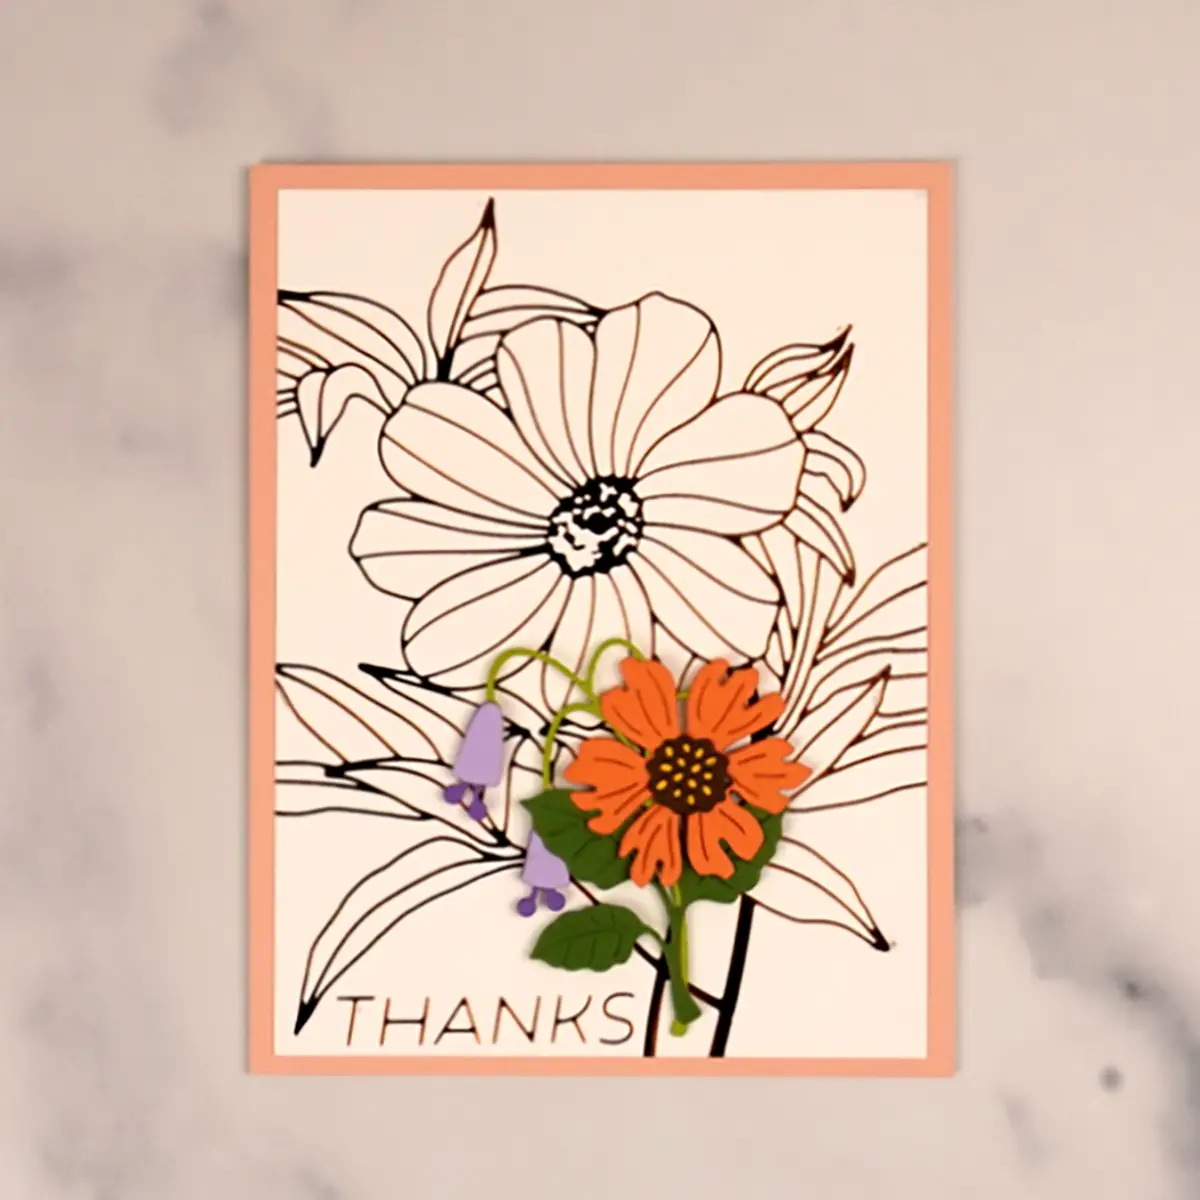
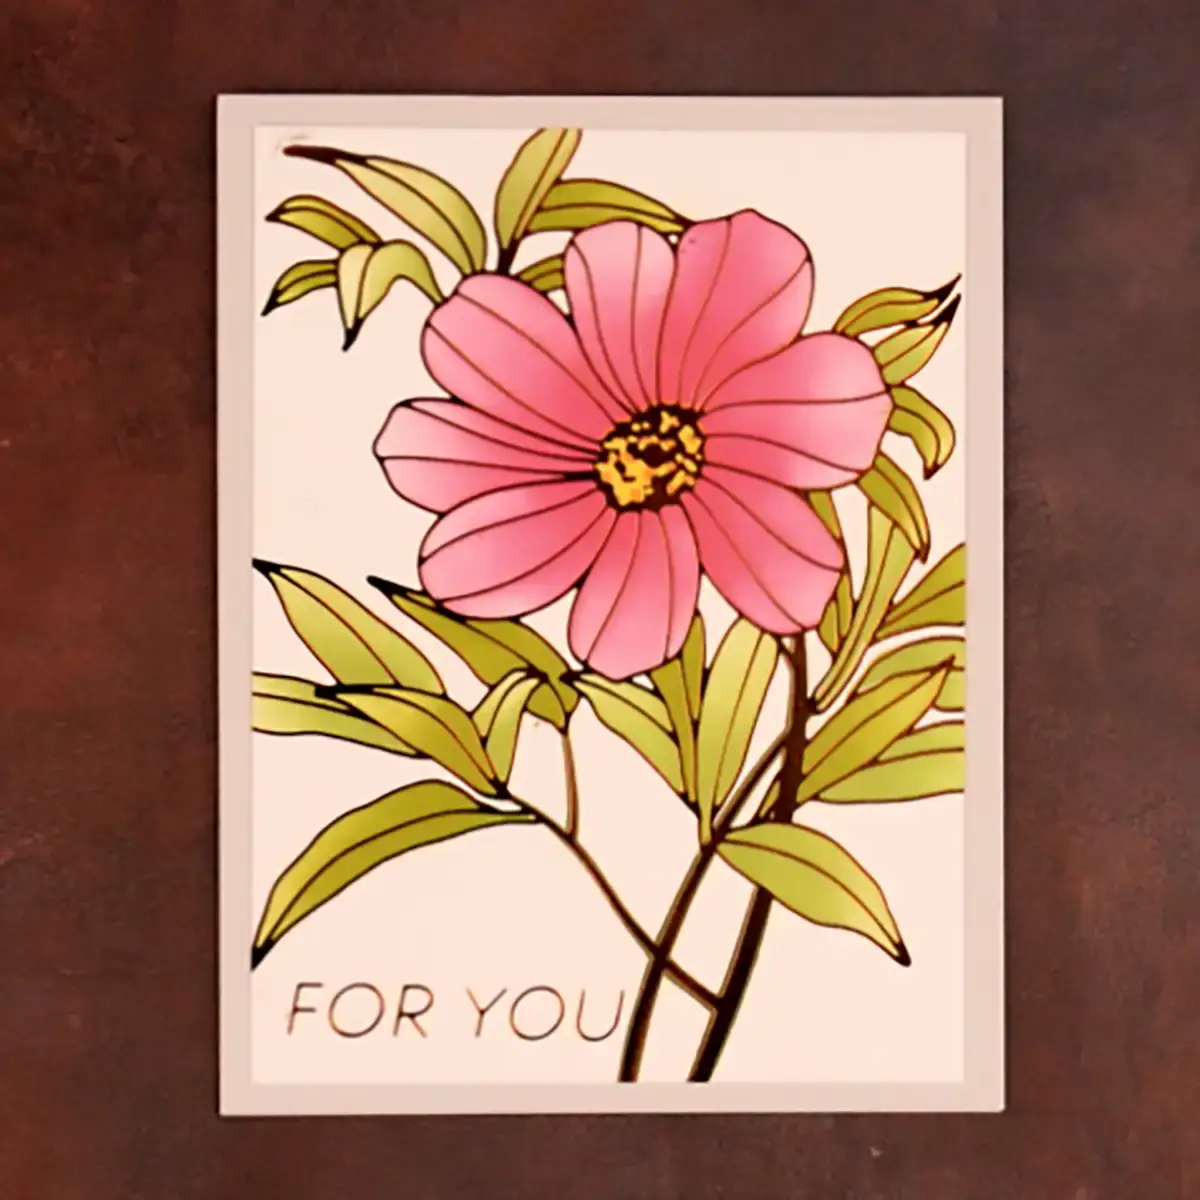
January Club Kits: Glimmer and Stencil of the Month
I made the first two cards before realizing that the monthly stencil coordinates with the Glimmer set of the month. So, of course I had to make one with both too.
I love to paint with metallic ink on black cardstock. That’s how I made my first project. But first I used copper foil and Card Front Foil, the Glimmer of the Month set. By the way, the foil roll is included with the kit. The second project is simply the hot foiled image in copper on white cardstock. And then you can use some of the die-cuts that you have left over from the first card.
The third project also uses copper foil, but I use this month’s Stencil of the Month, Lively Floral, to color it. I like to vary pressure when stenciling to create shading and that is what I did on this card. As a result, the flower center and the bottoms of the leaves are darker. I love the idea of having stencils that coordinate with Glimmer plates. It opens up a whole new world for coloring the beautiful images created with the plates.

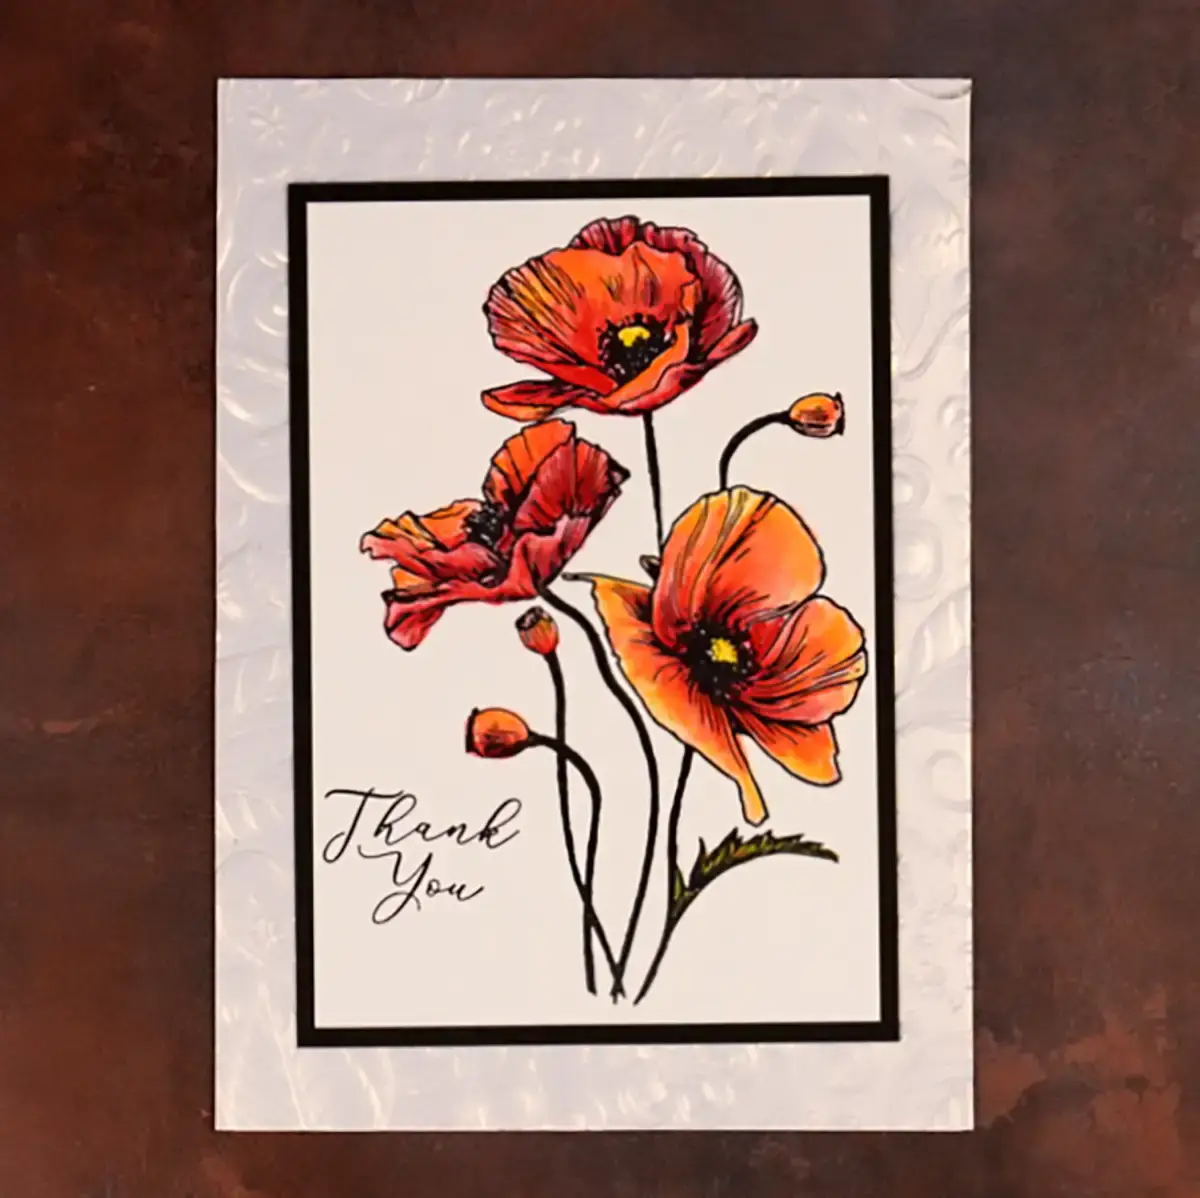
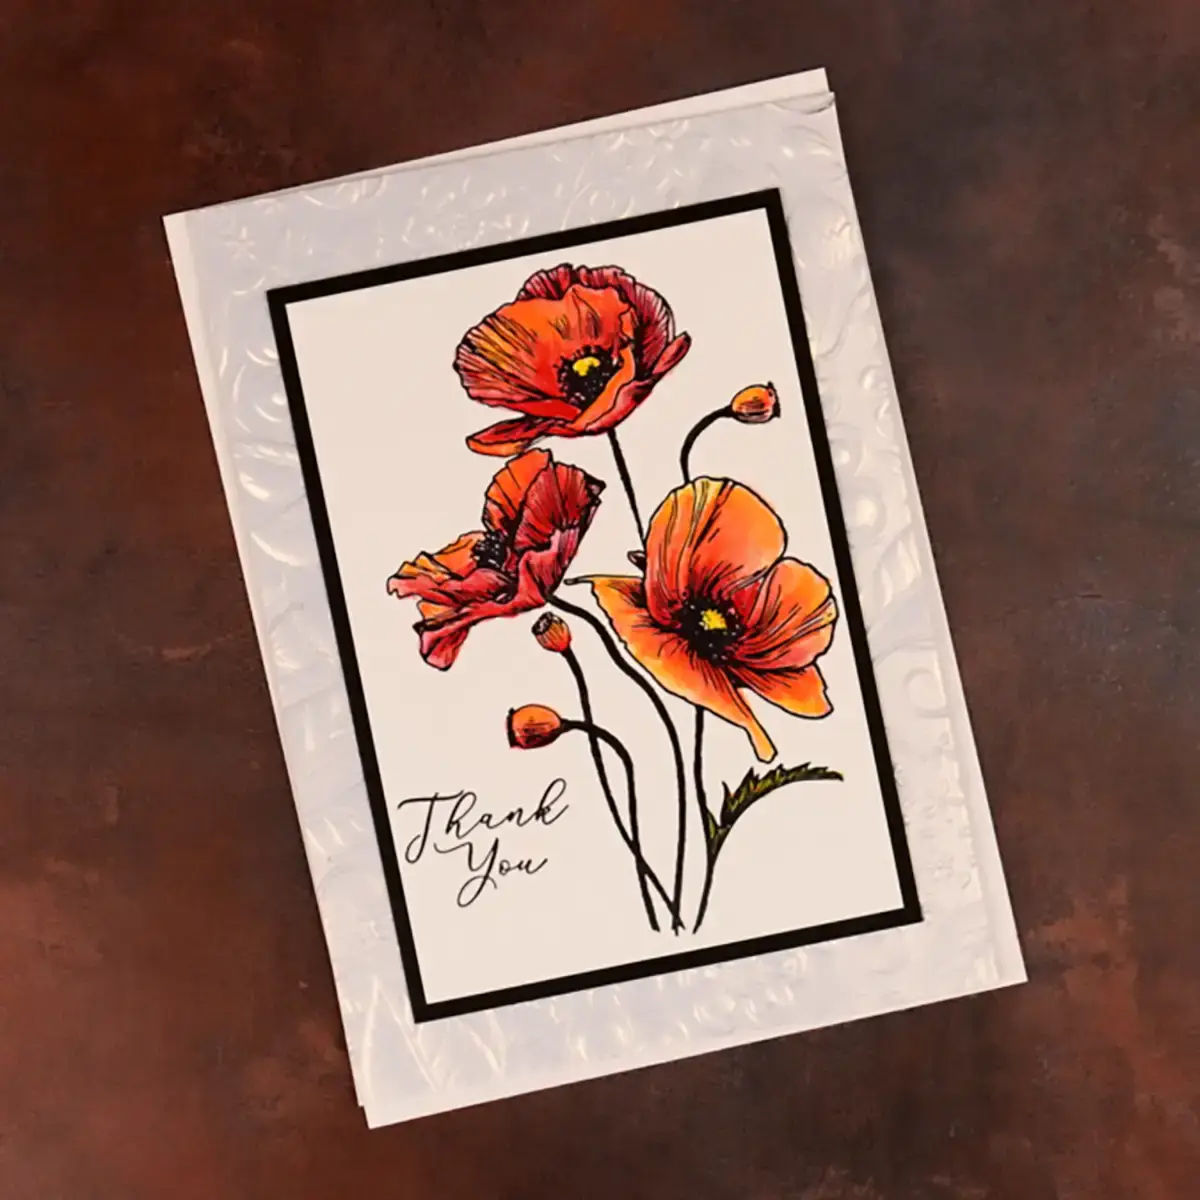
January Club Kits: Betterpress of the Month
This last project features the BetterPress and the 3D Embossing Folder of the Month to produce a gorgeous thank you card. It’s pretty straight forward. The plates are pressed with black ink on white cardstock. And then, water reactive colored pencils create beautiful, vibrant poppies.
The colors I use are:
- Cadmium yellow
- Golden yellow
- Tangerine
- Carmine pink
- Poppy red
- Hot red
- Light olive
- Leaf green
- Fern
And then, pearl cardstock embossed with a lovely floral embossing folder provide the perfect frame for the focal point.

In Case You’re Wondering How The Clubs Work
Folks like me create and share inspiration for you with products from the clubs during the first five days of each month. You can find it in our blogs, on social media, and even on the Spellbinders blog. You have five days at the beginning of each week to check out all of the cards that we’ve made. Then, you have between the 6th and the 27th to sign up. And, you can register for as many of the clubs as you like. You can cancel any time you like. Check out Monthly Card Making Subscription Clubs to learn more about subscriptions.
Are You Looking For Valentine’s Day Card Inspiration?
Check out projects from last months clubs:


