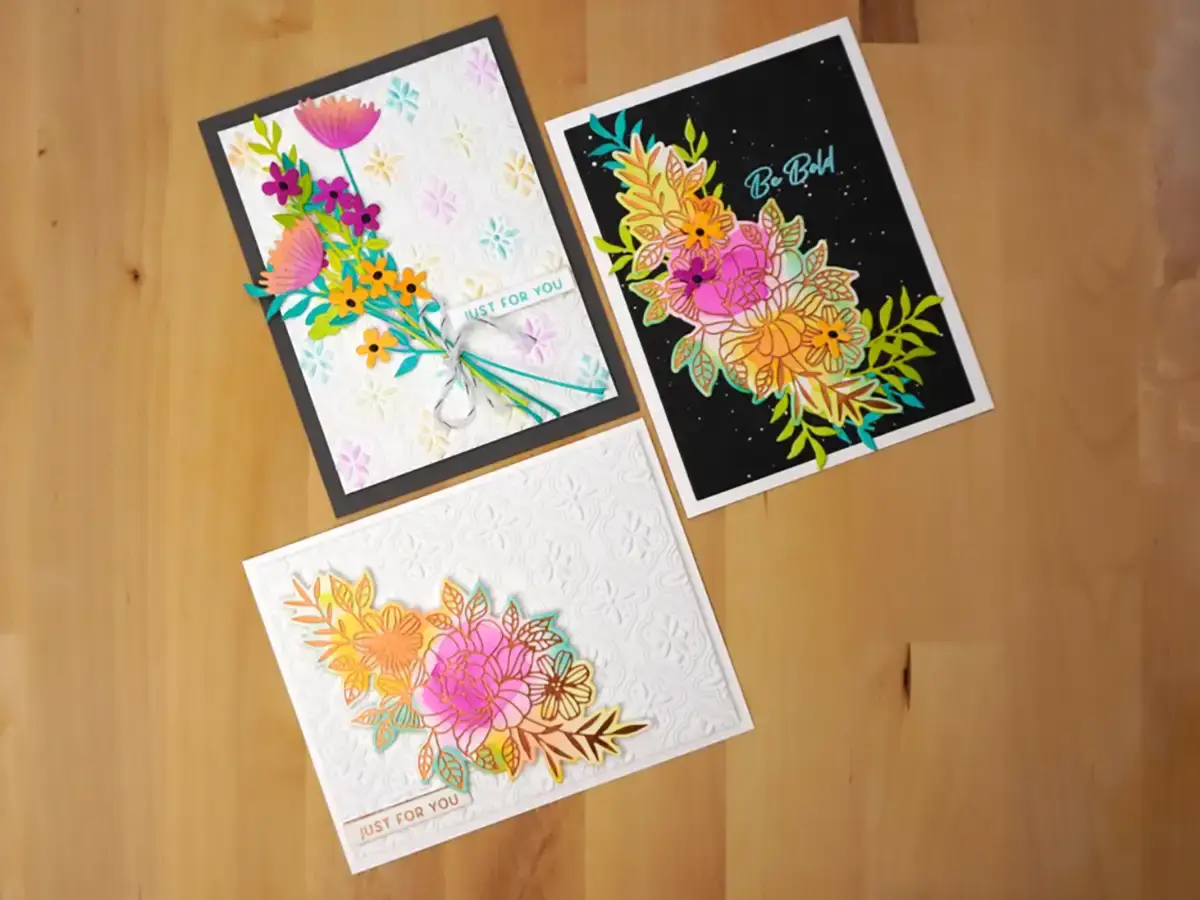
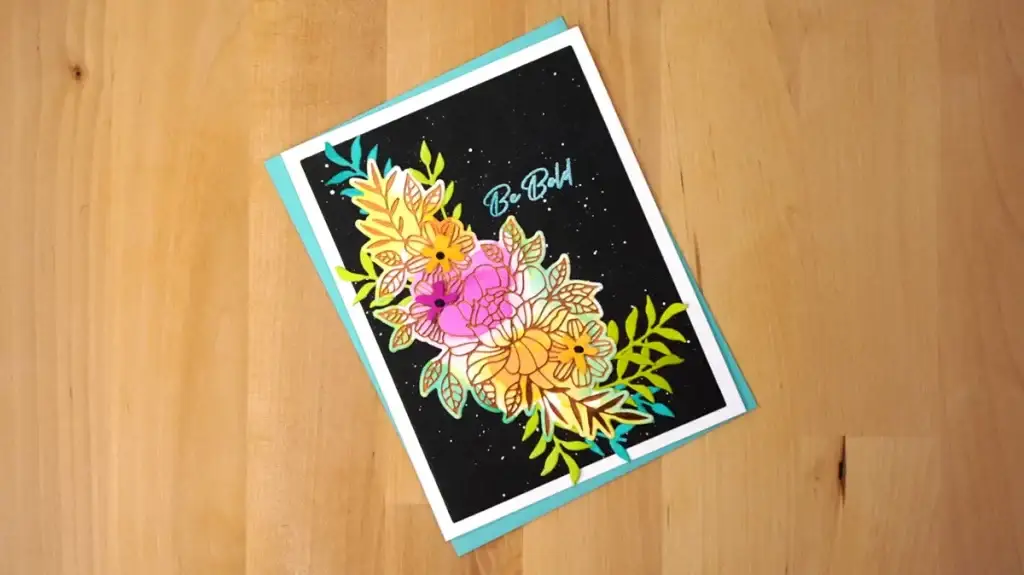
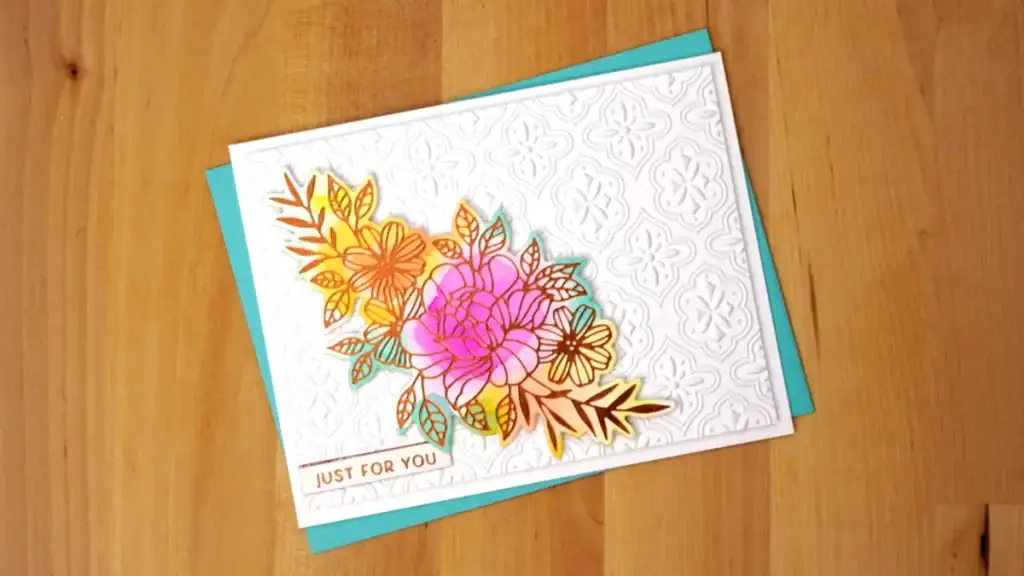
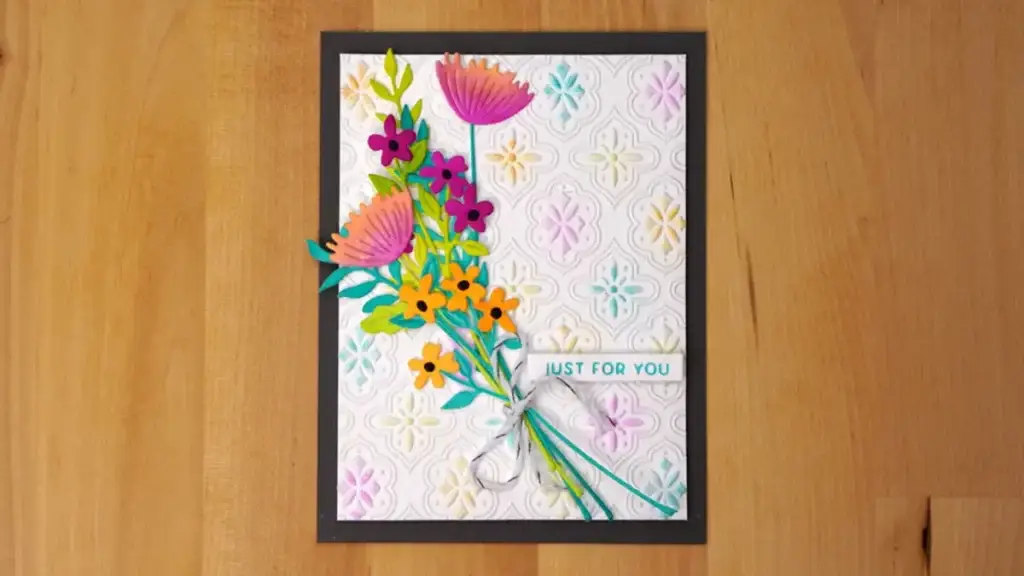
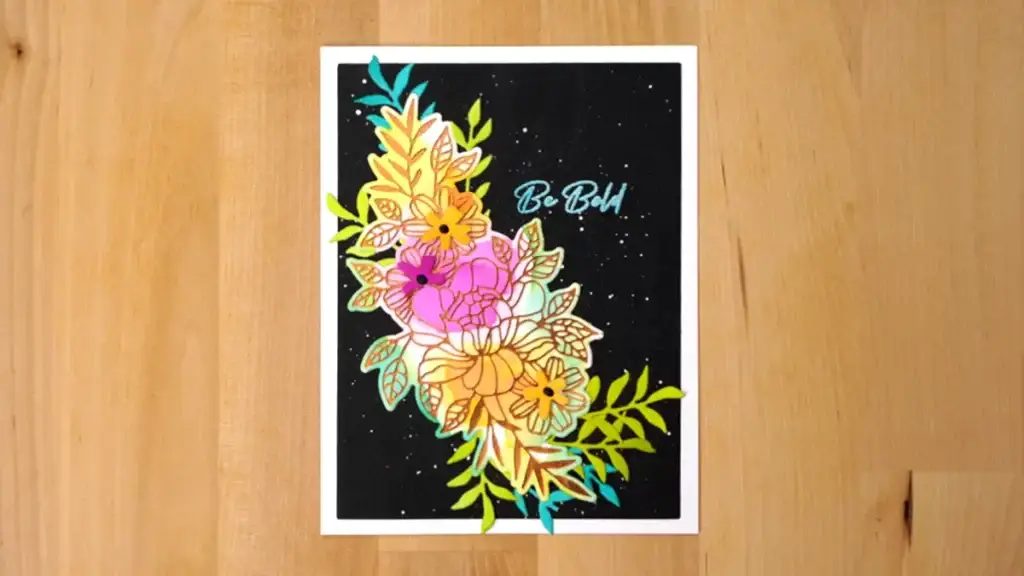
In this article we use products from the Spellbinders new release, Floral Reflections, to create these stunning cards.
To make these cards we're going to shake things up a little. Instead of making them one at a time, we're going to prepare everything for all three cards first and then assemble them.
Floral Reflections Watercoloring
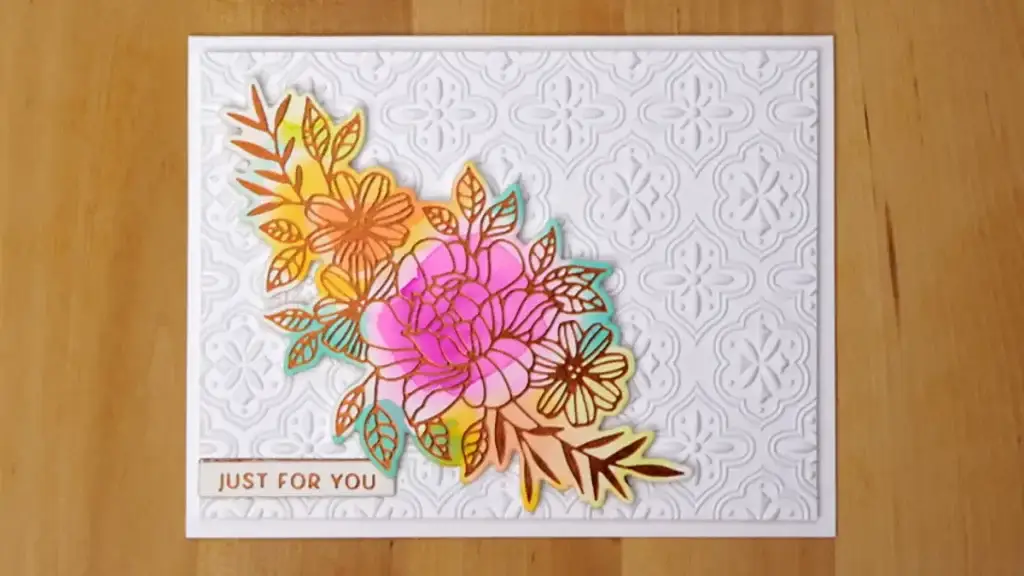
We're going to use a watercolored panel and add our a floral reflections foil image to it. To make it, we'll need some very smooth white cardstock, four shades of ink, a pencil, the Spellbinders Glimmering Just For You hot foil plate, a palette, a cup of water, a piece of paper towel, and a paint brush.
We'll begin by using the Spellbinders Glimmering Just For You hot foil plate as a guide. And we'll make light pencil marks around it onto the smooth white cardstock. We do this because it will give us an idea where the floral design elements are. And, we'll do this on two pieces of cardstock.
Next we'll smoosh each of our ink pads onto our palette or glass work surface. And, for each of the flowers and each of the leaf bunches we will use the following steps: load paint brush with water and brush it onto the cardstock in the approximate location of the flower or leaf bunch that you are going to paint. Add some water to the color that you want to paint the flower or leaf bunch and brush it in the same location that you just brushed with water. If you want it to be darker in areas, wait for the first layer to dry and then come in with a second coat. Repeat for all of the flowers and leaf bunches.
Make sure that the watercoloring is completely dry before going on to the hot foiling.
Hot Foiling
Turn on your hot foil machine and make sure it is good and hot before proceeding. Following the instructions that come with the Glimmer machine, when the light has turned to green, we'll place the hot foil plate onto the surface of the machine and then tap on the “Timer” button.
Cut a piece of foil slightly larger then the hot foil plate. And, when the timer button light turns green we'll place the foil pretty side down over the hot foil plate taking care to note where the flowers are located. And then, we'll place our watercolored cardstock down over the hot plate, add the two plastic foiling plates. Next, we'll run the whole sandwich through our die-cutting machine.
Hint: Only run the sandwich through once. Because, you risk having foil transfer in places that you don't want it to be if you run it through more than once.
Follow the same process to foil the sentiment for the white background card. And then trim it closely to the lettering.
Floral Reflections Backgrounds
We will be using the beautiful Reflection Embossing Folder to create the backgrounds for two of the cards. For this step we will need white cardstock, a water sprayer with water in it, blending brushes, and the four ink pads.
To begin we'll cut our cardstock to 8 1/2″ x 5 1/2″ for each of the two backgrounds that we'll be using this technique on. We'll emboss the backgrounds one at a time. first, we'll spray the cardstock with water on both sides. We do this because it will keep the cardstock from cracking. Then we'll place it inside of the embossing folder and then run it through the die-cutting and embossing machine according to the instructions for the machine. We'll set that aside to dry completely while we work on the last background.
To create the black background, we'll need a piece of black cardstock, metallic watercolor paint, a paint brush, a paper trimmer, an eye dropper or watercolor brush marker to add water to the paint, a cup of water, a piece of paper towel, a splatter box (or somewhere safe to splatter paint in), and an acrylic block. We'll begin by adding water to the paints we want to splatter with. We'll let that sit a minute or two and then we'll swirl it with our paint brush to pick up the pigment. Once we have our paintbrush loaded we'll tap it on the acrylic block over the cardstock. We'll repeat the process until we are happy with the coverage and have splattered all of the colors that we are using.
Finishing the embossed backgrounds
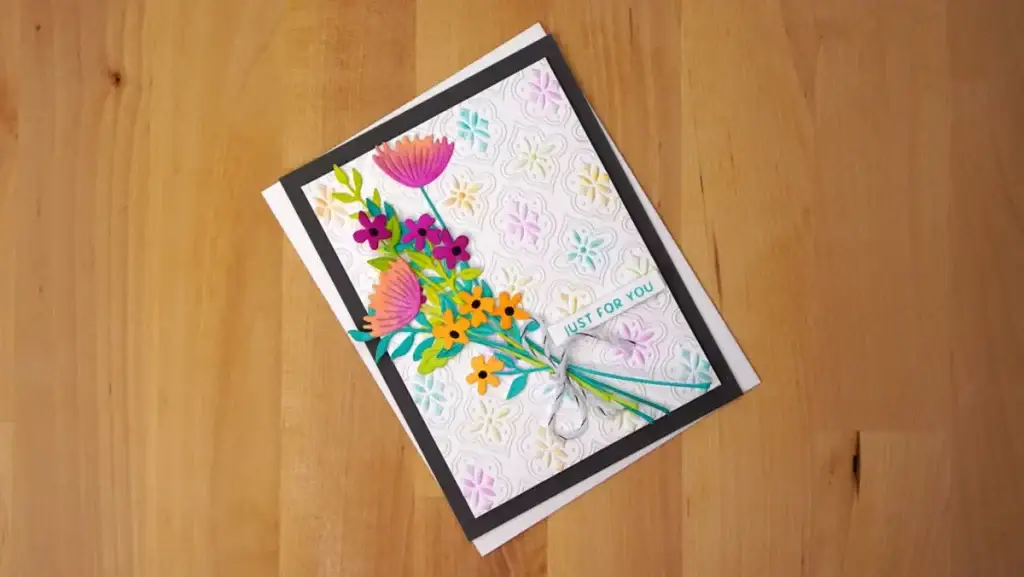
By now, we should be able to finish the other two backgrounds. For only one of them we'll use small blending brushes to add a bit of color to the design. We'll do this by loading the brush with ink and tapping it off on the paper towel. And then, with a very light hand and holding the brush at the very end we'll carefully add color where we want it. For this color we use all four ink colors and vary them to give a nice pattern.
We'll leave the other one plain white. Look at how crisp and beautiful the embossed designs are!
To finish all three backgrounds we'll trim them each down to 3 3/4″ x 5″.
Floral Reflections Die-cutting
For the die-cutting, we're going to make custom colored cardstock to match the colors we've used in our watercoloring and background. Using three A2 (4 1/4″ x 5 1/2″) pieces smooth white cardstock we will blend the blue and green inks on a separate piece for each. For the flowers we'll blend the pink on one end of the cardstock and the orange on the other and then blend them together where the two colors meet. Set them all aside to dry.
Find a scrap of black cardstock and cut three sets of the tiniest die (the one with the four tiny circles) from the Wildflowers die set. These are for the centers of the flowers. Now you can cut out the leafy pieces from the green and teal colored cardstock. I cut as many as I could from them.
And then cut the smaller flowers from the pink and orange blended cardstock. I like to die-cut the larger flowers from where the two colors meet.
Assembly
All White Background Card
To assemble the card with the background that is all white we'll pop up the background with a double-sided adhesive foam sheet centered on a white A2 size ( 4 1/4″ x 5 1/2″) card base. Now we'll add some foam tape or scraps of the foam sheets to the back of the watercolored foiled flower bunch. And then attach it to the card front.
Lastly we'll add a little liquid glue to the back of the sentiment. Lightly press the sentiment with your fingertips to ensure that the glue takes hold.
Black Background Card
Decide where you are going to place your floral bunch so that you can plan where to stamp your sentiment. Don't forget to brush the background with anti-static powder. Once you have, then stamp the sentiment onto your black background with watermark ink. Then sprinkle your teal embossing powder over the sentiment.
Let the powder sit on top of the watermark ink for a bit and then let the excess fall off and tap the cardstock to remove any that may have stuck to places that you don't want it to be. Heat the powder until it is smooth and melted.
When the powder is cool, attach the black background centered on a white A2 size card base with a glue runner. Add the teal and green die cut leaves to the back side of the watercolored foiled piece with liquid glue. Trim off any pieces sticking out that you do not need. Next we'll pop the whole thing up with foam tape or scraps of double-sided adhesive foam tape.
Finally we'll pop up a couple of the die cut flowers on our foiled image. And then we'll add the centers of the flowers to set them off.
Assembly for the Floral Reflections Card With The Colored Background
We'll start by trimming a gray piece of cardstock to 4 1/4″ x 5 1/2″ and add it to an A2 card base with a glue runner. Then we'll pop up the background on the card base just like we did for the card with the all white background. Next, we'll attach the flowers to the stems and the centers to the flowers with liquid glue.
Now we'll arrange the flowers, kind of like you would arrange a bunch of real flowers. Take care that none of the flowers are hidden. When we have the arrangement the way we want it, we'll fasten the stems together with liquid glue.
Once the glue has set, we'll tie a piece of twine around the stems and tie it in a bow in front. And then we'll fasten the flowers to the background taking care not to fasten down every flower. And lastly, we'll pop up the sentiment with a little scrap of foam tape.
Supplies for Floral Reflections Cards
The following list may contain affiliate links. If you purchase something by following a link on this page, I may receive a small commission at no extra cost to you. Thank you for supporting my blog.
- Cardstock: Card bases – Neenah Classic Crest 110lb Solar White; Card panels – Gina K Designs Black Onyx for the Be Bold card; Simon Hurley Stark White for the other two cards and for the watercoloring; Gray Color Accent – Spellbinders Graphite
- Dies: Spellbinders Sealed Wildflowers
- Hot Foil Plate: Spellbinders Glimmering Just For You
- Hot Foil System: Spellbinders Glimmer Hot Foil System
- Hot Foil: Copper
- Media Mat: Tim Holtz Glass Media Mat
- Ink: Altenew Crisp Dye Ink – Bamboo, Parrot, Snapdragon, Lagoon, Magenta; Watermark – Spellbinders
- Anti-static Powder Tool: Ranger Anti-static Pouch
- Embossing Powder: Ranger Ink Teal Tinsel
- Embossing Folder: Spellbinders Reflections
- Die-cutting and Embossing Machine: Spellbinders Platinum 6
- Spray Bottle: Tim Holtz Distress Sprayer
- Metallic Watercolor Paint: Altenew
- Blending Brushes – Gina K Designs Mini Blending Brush Set
- Adhesives: Double-sided Foam Sheet; Liquid – Bearly Art Glue; Glue Runner – EZ Dots
