Yes believe it or not you too can make your own cardmaking stencils. Read on to find out how.
I learned this technique while taking Altenew's Celebration Stencil Techniques class as I continue on my journey with the Altenew Educator Certification Program. There are several lovely techniques taught in this class.
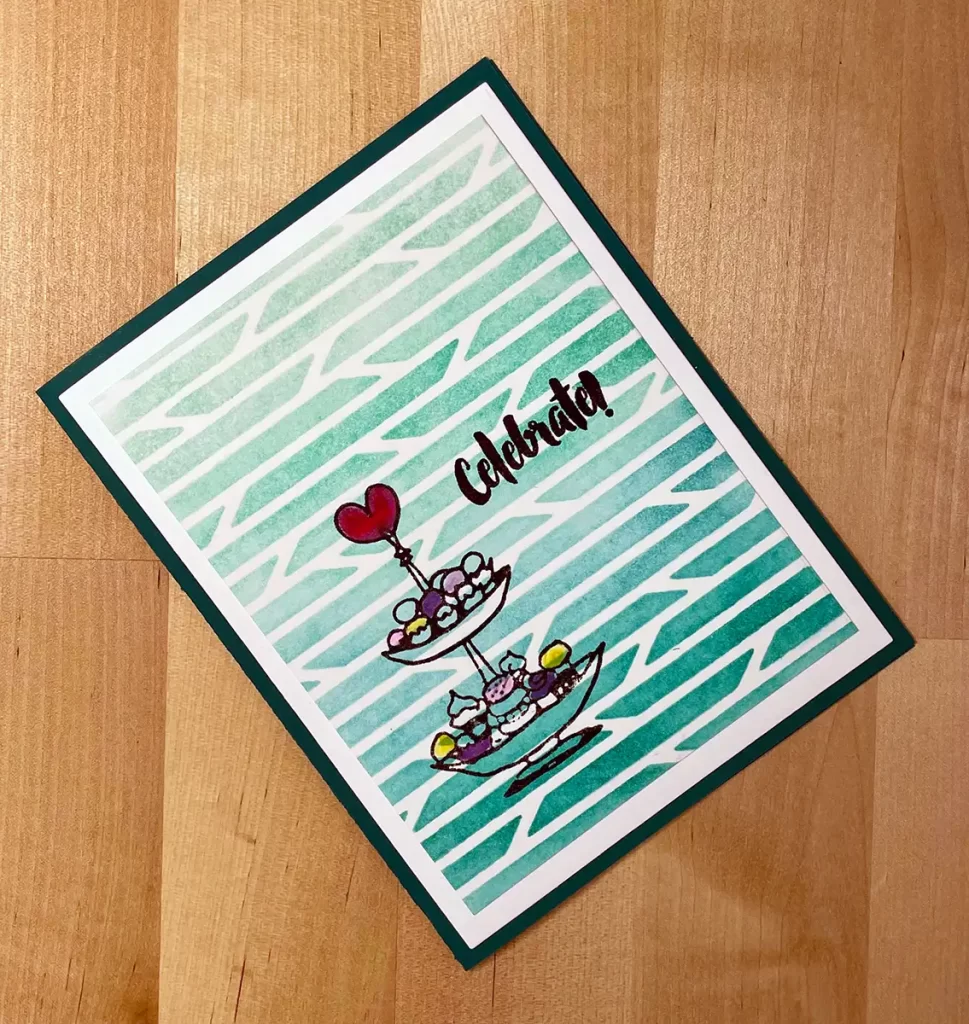
What is awesome about this technique is that it helps to make our cardmaking stash more versatile. Dies can be expensive however, we can improve the value of our investments in them when we use them more and in new and different ways.
To use our dies to make stencils we start by cutting out the image from a piece of heavyweight cardstock. Then after we punch out all the little pieces that we just cut out then we tape it to our work surface on one side only using low tack tape. We do it this way so that we can lift up our cardstock stencil to see our progress.
We then slide another piece of white cardstock under our new stencil making sure that it is straight.
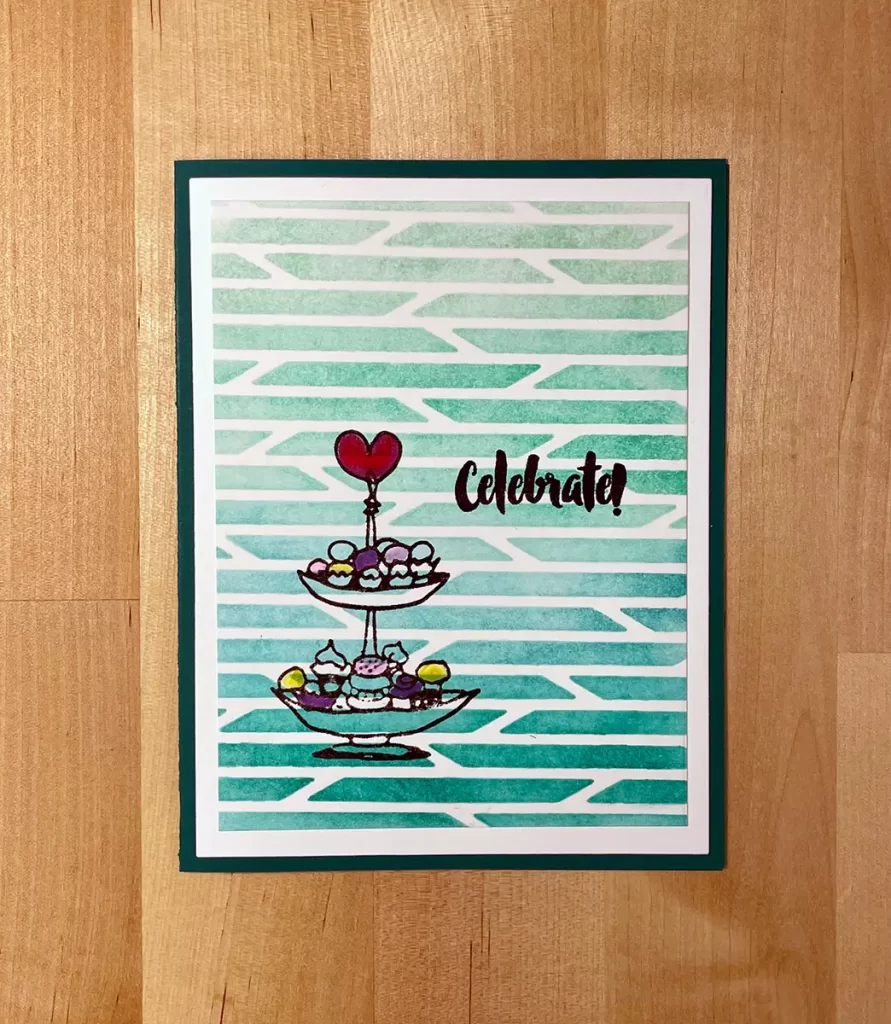
Now we can begin to blend over the stencil. For this card, we start with a very light teal at the top and then use three more variations of the color gradually getting darker. To ensure that the colors blend well we go back over the “seams” with the lighter colors.
That is all there is to create the background but let's save our stencil because we can either use it several more times to blend backgrounds for other cards or we can use it as part of another card (see below for how we do that).
Now we can stamp the image and the sentiment right over the top of our blending and then add a little color with alcohol markers and colored pencils.
Cardmaking Supplies
The following list may contain affiliate links. If you purchase something by following a link on this page, I may receive a small commission at no extra cost to you. Thank you for supporting my blog.
Cardstock: Card Base: Spellbinders 110lb Lagoon; card layer – Neenah Classic Crest 80lb Solar White
Stamp & Die Set; Altenew Celebrations
Die: Waffle Flower A2 Layers; Altenew Shutter Cover Die
Ink: Altenew Crisp Inks: Mountain Mist, Emerald, Lagoon, Volcano Lake; Hero Arts Intens-ified Black
Alcohol Markers: <a href="http:// “>Copic
Colour Pencils: Faber-castell Polychromos Artists Pastels Box Of 36
Adhesive; EZ Runner Grand

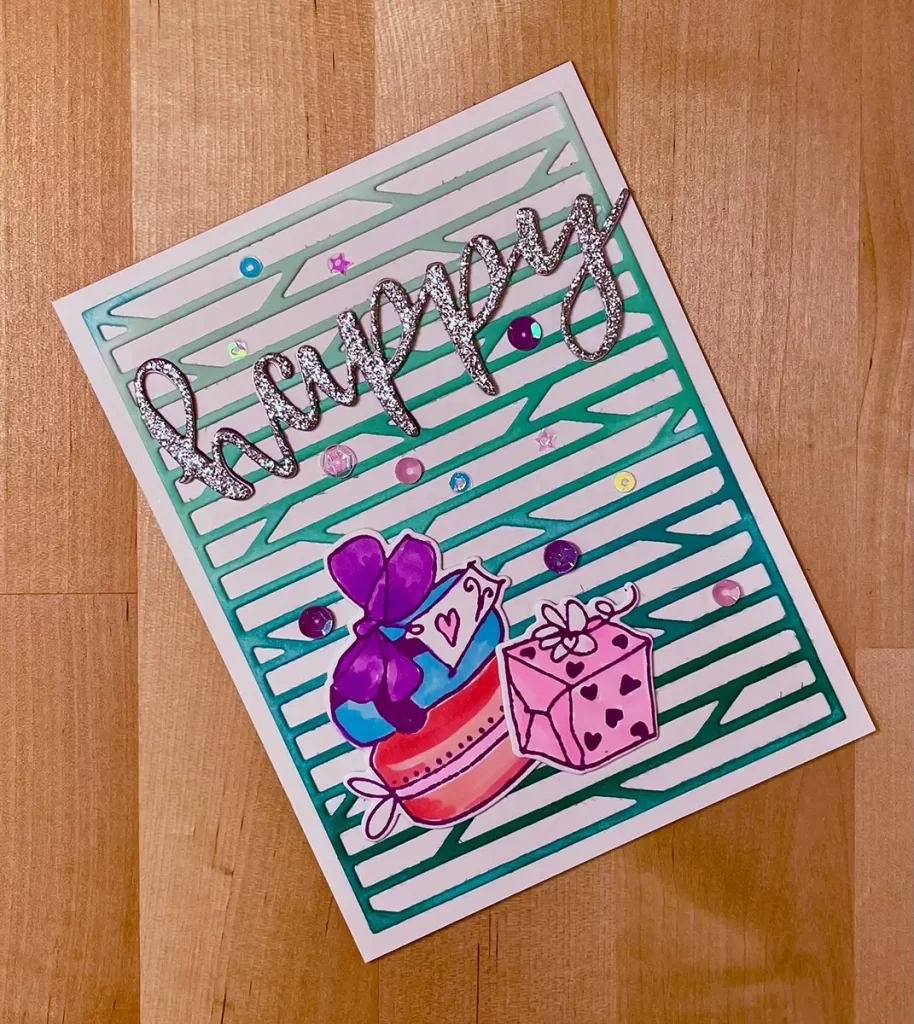
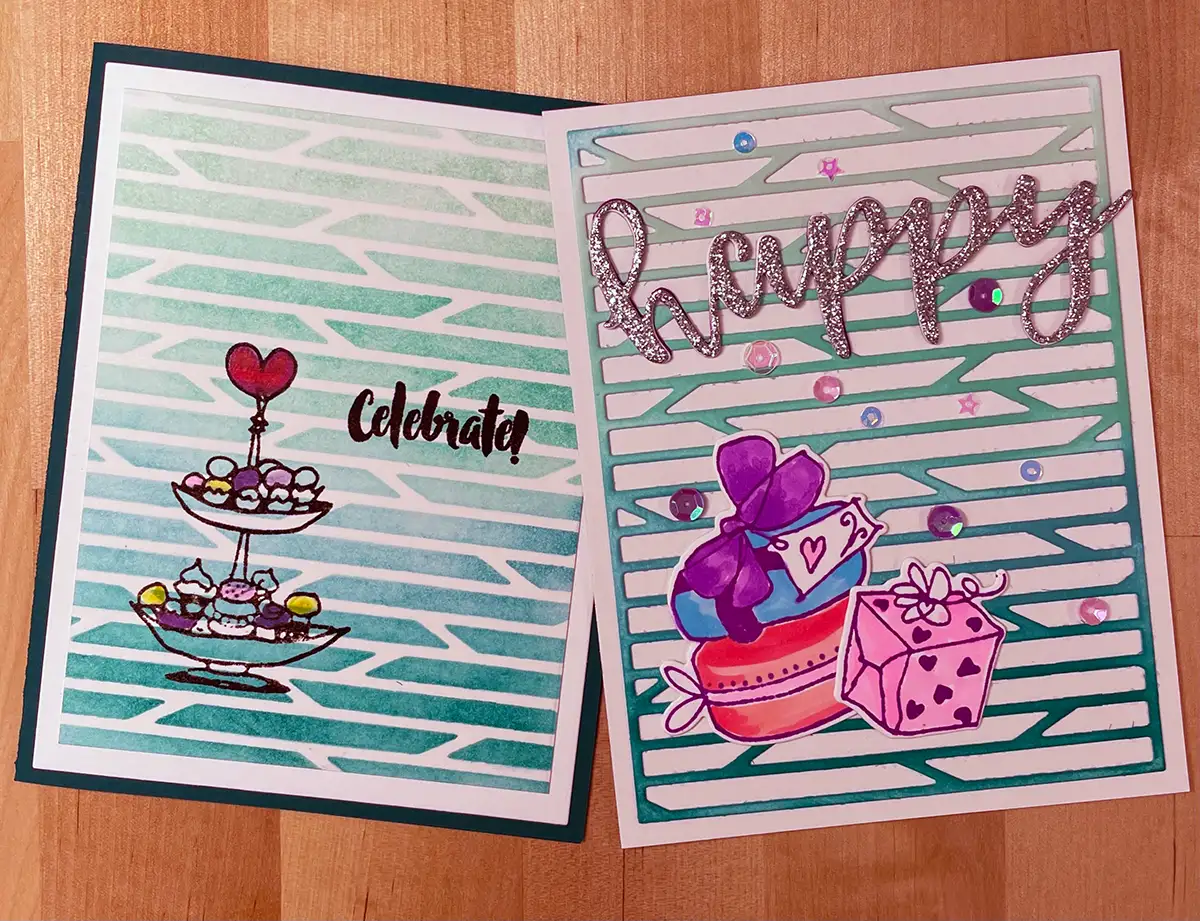
What's really cool about using dies for stencils is that you can make two cards; one with the stenciled image and one using the stencil as an image or background. This card uses the latter.
We attach the stencil to a new white card base using a replaceable glue runner.
Then we just stamp out a couple of images that we want to use to create the focal point for our card. This card is going to be a birthday card so we're using some whimsical presents to set the theme. We color them in using alcohol markers, arrange them on the card and attach them using liquid glue to make sure that they are attached securely.
Sparkles always create a party-type atmosphere so we're going to add some bling to our card. To begin we use a die to cut “Happy” out of glitter cardstock. We cut the “Happy” out of three more times, but this time from white cardstock. We do this to create some dimension by gluing all of the cut-out images together with the glitter cardstock on top. And then we attach it to the card as well.
We add a variety of sequins to add a little more bling and we end up with a beautiful, cheery, birthday card.
Cardmaking Supplies
The following list may contain affiliate links. If you purchase something by following a link on this page, I may receive a small commission at no extra cost to you. Thank you for supporting my blog.
Cardstock: Card Base: Spellbinders 110lb Lagoon; card panel <a href="http:// “>Opaque Digital 120lb white; Sentiment Tonic Studio Mixed Card Pack Silver Screen Glitter Card
Stamp & Die Set; Altenew Celebrations
Die: Altenew Shutter Cover Die; Altenew Happy Die
Ink: Altenew Crisp Inks: Mountain Mist, Emerald, Lagoon, Volcano Lake, Midnight Violet; Hero Arts Intens-ified Black
Alcohol Markers: <a href="http:// “>Copic; Altenew
Embellishments: Dress my Craft Fairy Mix Sequins
Adhesive; EZ Runner Grand; liquid – Bearly Art Glue
Looking for More Card Making Ideas Using Stencils?
For more cool ideas for using stencils use the following link: https://cutcolorandcreate.com/?p=671
