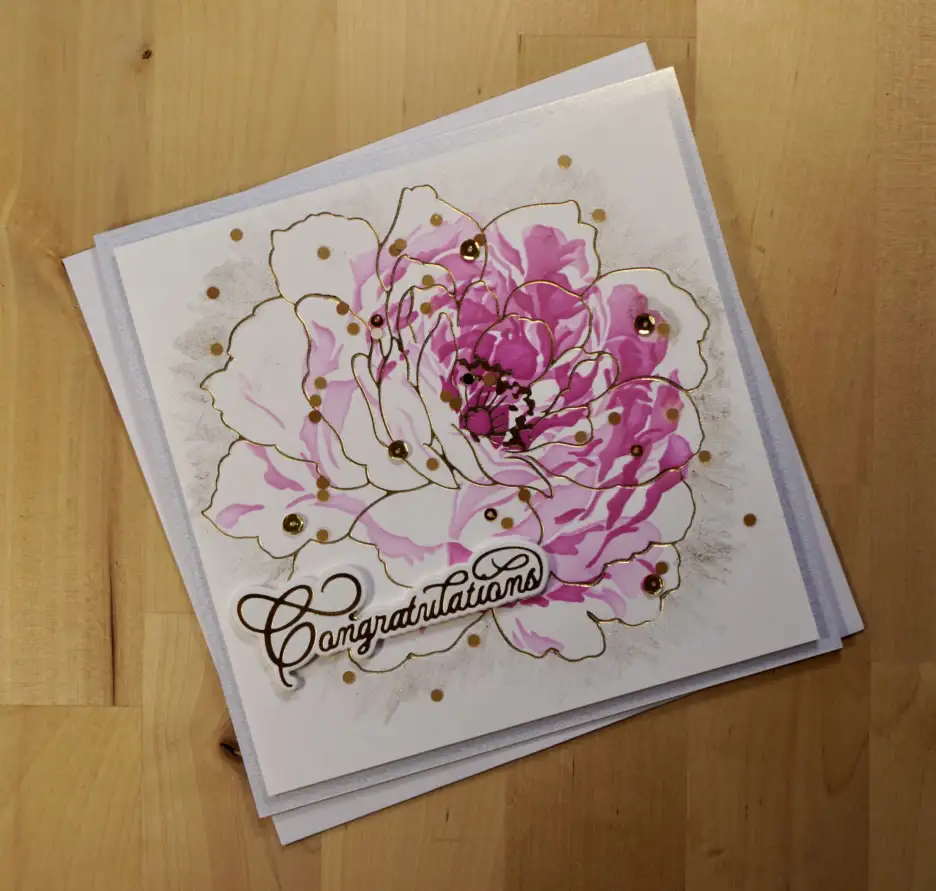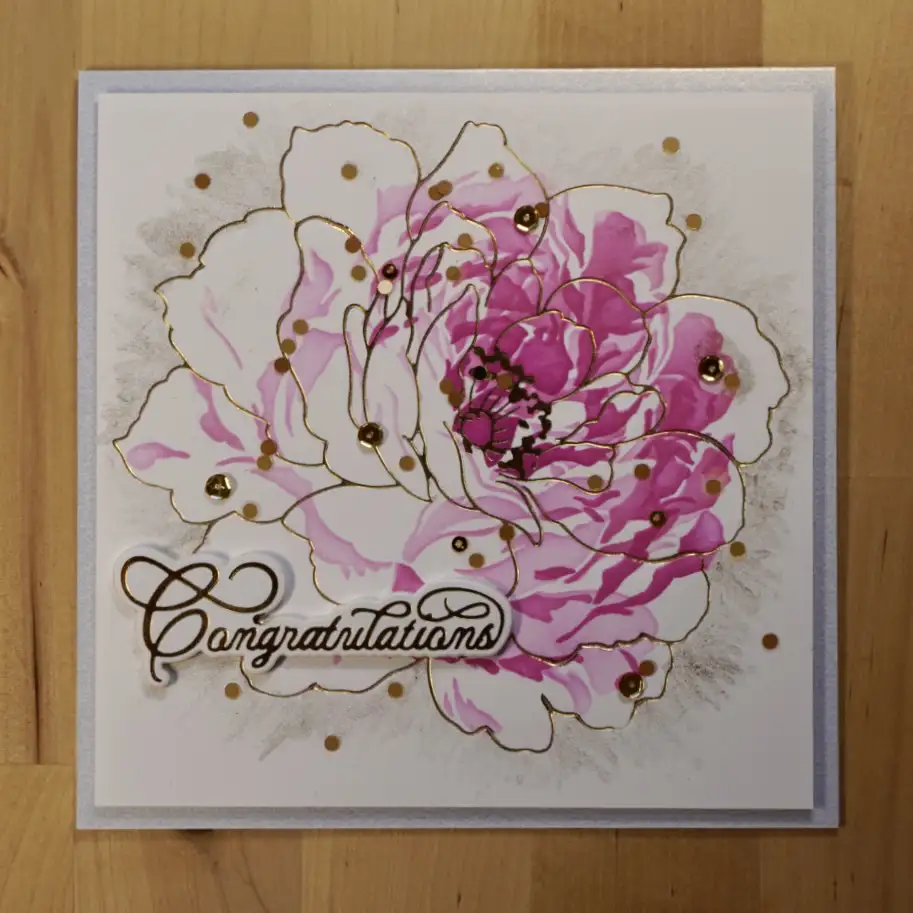
A handmade wedding card is perfect for such a special event! Want to learn how to make this card? We give you step-by-step instructions here in this article.
It's that time of year when a lot of couples tie the knot. And there isn't a better way to celebrate such a special occasion than with a luxurious handmade wedding card!
Our card for the occasion uses layered stenciling in order to add color and gold accents for sparkle.
Hot Foiling The Handmade Wedding Card
A couple of months ago Altenew came out with a couple of beautiful sets of stencils with coordinating hot plates that featured huge rose blossoms. We'll begin by using the Golden Days Hot Foil Plate to foil the outline of the blossom.
We'll do this by cutting off a piece of gold foil that is just a tiny bit larger than the image on the hot foil plate. And then we'll heat up the Hot Foil System. When it's ready, we'll put the hot foil plate onto the heated system flat side down and we'll lay the piece of foil pretty side down.
Next, we'll center a 6″ x 6″ card panel over the top and then we'll add the plastic shim and the top plate. And then we'll fun the whole sandwich through our die-cutting machine. Hint: Any unwanted foil that transfers can be removed with a mono sand eraser.
Wedding Card Coloring
Coloring is quick and easy with layering stencils. We are not using the stencils that coordinate with the hot plate we used, but we're using ones that go very well with it, Altenew's Gilded Rose. And then we're going to skip the first layer and start with the second one.
To do this we need to take care to ensure that the images that we'll be blending will fit inside of the foiled blossom. And that the most concentrated area is over the center of the foiled blossom. Then we'll blend the lightest pink using a circular motion both ways to get a good even coat of color.
Then we'll align the third layer over the second and blend with the medium pink, and then the third with the darkest pink. Now that we've got our coloring done we can move on to adding some more bling.
Adding Some Sparkle And A Sentiment
We're going to “paint” some sparkle radiating from the flower image with a shimmer pen. We do this because the thin sparkly color really helps to make the focal image pop. And then we'll sprinkle sequins over the top to really make our card shine.
We'll do some more hot foiling for the sentiment. Spellbinders' Elegant Occasion Sentiments' has a lovely version of Congratulations with a shadow that is perfect for our card. So we'll follow the same process that we used for the flower to foil the sentiment. And then we'll cut the shadow from the same white cardstock.
Liquid glue works best for sentiments. We'll add some glue to the back of the sentiment and then center it onto the shadow. And then we'll add the sentiment to the card with a scrap of foam tape or foam sheet to pop it up. We can use a T-square to make sure to get the sentiment straight.
Handmade Wedding Card Assembly
To finish the card we'll trim the card layer down to 5 1/2″ x 5 1/2″. And then we'll pop it up with a sheet of double-sided adhesive foam sheet. We'll do this by removing the backing paper from one side of the foam sheet and carefully centering it on the back of the card layer.
And finally we'll remove the backing paper from the other side of the foam sheet and center the Card layer over the 6″ x 6″ card base.
Handmade Wedding Card Supplies
The following list may contain affiliate links. If you purchase something by following a link on this page, I may receive a small commission at no extra cost to you. Thank you for supporting my blog.
- Cardstock: Card base – Crafter's Companion XXXXX; Card panel – Neenah Classic Crest 80lb Solar White
- Hot Foil Plate: Altenew Golden Days Hot Foil Plate; Spellbiders Occassion Sentiments Glorious Glimmer Hot Foil
- Stencil: Altenew Gilded Rose Layering Stencil Set
- Foil: Spellbinders Glimmer Hot Foil Gold
- Hot Foil System: Spellbinders Glimmer Hot Foil System
- Die Cut Machine: Spellbinders Platinum 6
- Ink: Altenew Crisp Dye Ink – Pink Diamond, Pinkalicious, Razzleberry
- Blending Brush: Gina K Designs
- Shimmer Pen: Nuvo Aqua Shimmer Pen – Midas Touch
- Embellishments; Altenew Sequins Satin Gold Sequins; Catherine Pooler Vegas Baby Sequins
- Glue: Barely Art Glue; Scrapbook.com Double-sided Adhesive Foam Sheet
- Eraser: Tombow Mono Sand Eraser
- T-square: Mis-T Ruler
For More Lovely Card Ideas
Please check out How to Make Homemade Cards Using Unique Die-cutting Techniques for more lovely card ideas. And sign up to receive our newsletters (over on the right panel)!


