Christmas seems so far away but it will be here before we know it! Read to the end to learn how to make 6 cards with coloring techniques
Making homemade Christmas cards is fun and so rewarding but it's a lot of work. If we don't get started making our cards now we may not get them done in time.
Last week I attended the Card Maker's Success Summit hosted by Brandi Mahon from https://stampmesomelove.com/. It was a fantastic four days filled with twenty-five presentations of a great variety of ways to make Christmas cards. This was Brandi's first time hosting an event like this and she did a fantastic job! And, the presenters delivered magnificent ideas for making unique cards.
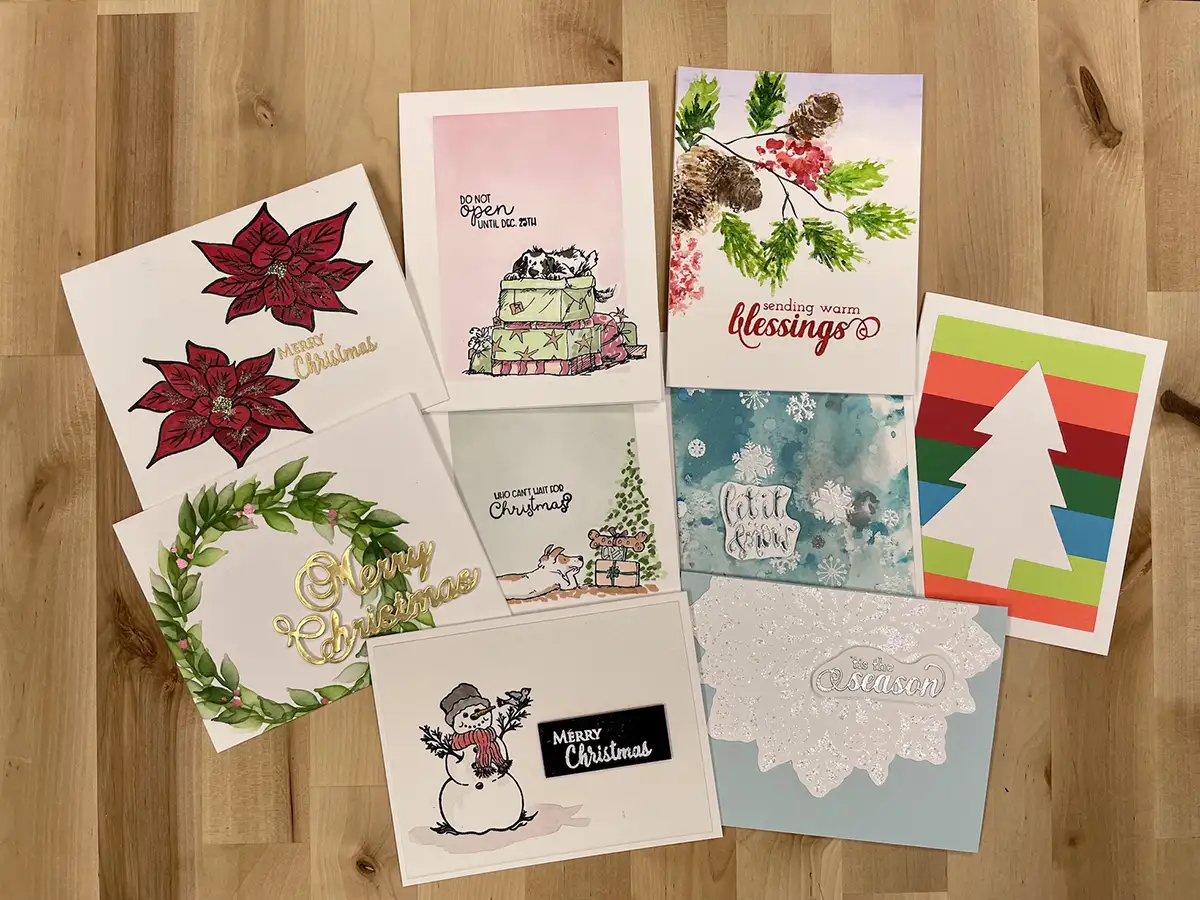
I am going to share some of the cards that I've made as a result of attending the Summit but there are so many that I am going to put them in two or three different posts. This first one showcases different coloring techniques used to make awesome Christmas cards.
Storybook Coloring

If you've ever watched any of Daniel West's videos you'll know that he is a genius when it comes to coloring with markers. You can find Daniel at https://www.delandartie.com/home. During the Summit he showed us how to use a technique he calls storybook coloring that is just delightful. The card is clean and simple and starts with stamping the image that will be the focal point onto a card base, masking over those images, and then masking off the top and two sides of the card base with washi tape. This is done in order to blend in a background with a very light touch. t
Then some quick coloring with Copic markers using Daniel's advice and I ended up with two darling, whimsical cards.
Supplies:
The following list may contain affiliate links. If you purchase something by following a link on this page, I may receive a small commission at no extra cost to you. Thank you for supporting my blog.
Cardstock: Neenah Classic Crest Solar White 110 lb
Stamps; Colorado Craft Company Anita Jeram Christmas Presents
Inks: Catherine Pooler – Spruce, Rouge; Hero Arts – Intens-ified Black
Alcohol Markers: Copic markers
Masking: Gina K Designs Masking Magic
Distress Background

The next card uses a background technique taught by Tiffany Solorio at https://www.tiffanysolorio.com/. I was so excited to learn this technique that after I saw the presentation I ordered all of the same sprays that Tiffany used and tried it myself. You really need to try it too, the picture really doesn't do it justice. This technique and Tiffany's color selections are just beautiful!
When we make Christmas cards it's always useful when we can make multiples at the same time and Tiffany's method does just that. It starts off with creating the background on a whole sheet of watercolor paper using distress oxide spray. Once it dries you can cut it into card panels and then heat emboss the snowflakes over the top of the background. A simple sentiment creates a perfect jaw-dropping card.
Supplies:
The following list may contain affiliate links. If you purchase something by following a link on this page, I may receive a small commission at no extra cost to you. Thank you for supporting my blog.
Cardstock: Card base: Neenah Classic Crest Solar White 110 lb; Card panel: Canson XL Watercolor Paper
Stamps: Sentiment – Pink Ink Stamp Designs Sleigh Bells Ring
Distress Oxide Sprays: Salvaged Patina; Weathered Wood; Peacock Feathers
Water Sprayer: Distress Sprayer
Alcohol Markers: Copic markers
Adhesive: EZ Runner Grand
Embossing powder: Hero Arts Embossing Power Silver
Stamping Tool: Mini Misti
Watercoloring

I have wanted to learn how to watercolor for as long as I can remember. To be honest, I've been waiting to learn until after I retire because I thought it was so difficult. Laurel Beard's presentation was inspiring to the point where I gave it a try. She is so fun to watch! You can find Laurel at https://www.laurelbeard.org/
Laurel loves snowmen and in her presentation, she created a beautiful pair of snowmen for her card. I tried to copy what she did, but my snowmen didn't turn out quite as nice as hers did so I used a stamp set and then used the watercolor techniques that Laurel taught during her presentation to create a beautiful card.
Supplies:
The following list may contain affiliate links. If you purchase something by following a link on this page, I may receive a small commission at no extra cost to you. Thank you for supporting my blog.
Cardstock: Neenah Neenah Classic Crest Solar White 110 lb
Watercolor Paper: Canson XL Watercolor Paper
Stamps: Impression Obsession Snow Friends
Watercolors: Altenew Watercolor Set
Embossing Powder: Hero Arts Embossing Powder White
Adhesive: EZ Runner Grand

Another really cool and oh so gorgeous technique is what Preeti Chandran https://www.itsapreetiworld.com/ calls the Faux Watercoloring technique. You use watercolor brushes to color by painting the colors onto stamps, spraying the stamps with water, and then stamping them onto watercolor paper. It creates a beautiful image that is very similar to watercolor. Layered stamps work extremely well with this method, you just need to make sure to let each layer dry before doing the next one.
Supplies:
The following list may contain affiliate links. If you purchase something by following a link on this page, I may receive a small commission at no extra cost to you. Thank you for supporting my blog.
Cardstock: Neenah Classic Crest Solar White 110 lb
Watercolor Paper: Canson XL Watercolor Paper
Stamps: Rubbernecker Winter Bouquet; Sentiment – Altenew Warm Blessings
Watercolor Brushes: Arteza Real Brushes
Water Sprayer: Distress Sprayer
Adhesive: EZ Runner Grand
Two Cards with Stenciled Coloring

I fell in love with stenciling after attending Verity Biddecombe's presentation. I created two different cards using the same stencil and like Verity, I layered the stencil to give the wreath a full, filled-out wreath. On the red card, I used the stencil and just blended the berries over the top of the wreath. And then, like Verity, I flicked metallic watercolor over the top of everything however it is hard to see the little bits of sparkle in the photo. I painted the berries onto the gold card using metallic watercolor. Both are spectacular, simple cards.
Supplies:
The following list may contain affiliate links. If you purchase something by following a link on this page, I may receive a small commission at no extra cost to you. Thank you for supporting my blog.
Cardstock: Card base: Neenah Classic Crest Solar White 110 lb Card panel: Neenah Classic Crest Solar White 80 lb, Tonic Gold Mirror, Lawn Fawn Chili Pepper
Stencil: Altenew Wonderful Wreath
Inks: Altenew Crisp Dye Inks -Frayed Leaf, Forest Glades, Evergreen; Berries on the red card: Catherine Pooler Designs Ink – Samba
Dies: Red sentiment: Catherine pooler Designs Merry Christmas die: Gold sentiment: Frantic Stamper Merry Christmas die
Watercolor: Altenew Metallic Watercolor
Adhesive: – Bearly Art Glue
Blending Brushes: Gina K Designs Blending Brushes and Stand
Multi Media Mat: Waffle Flower Water Media Mat
Magical Multiples
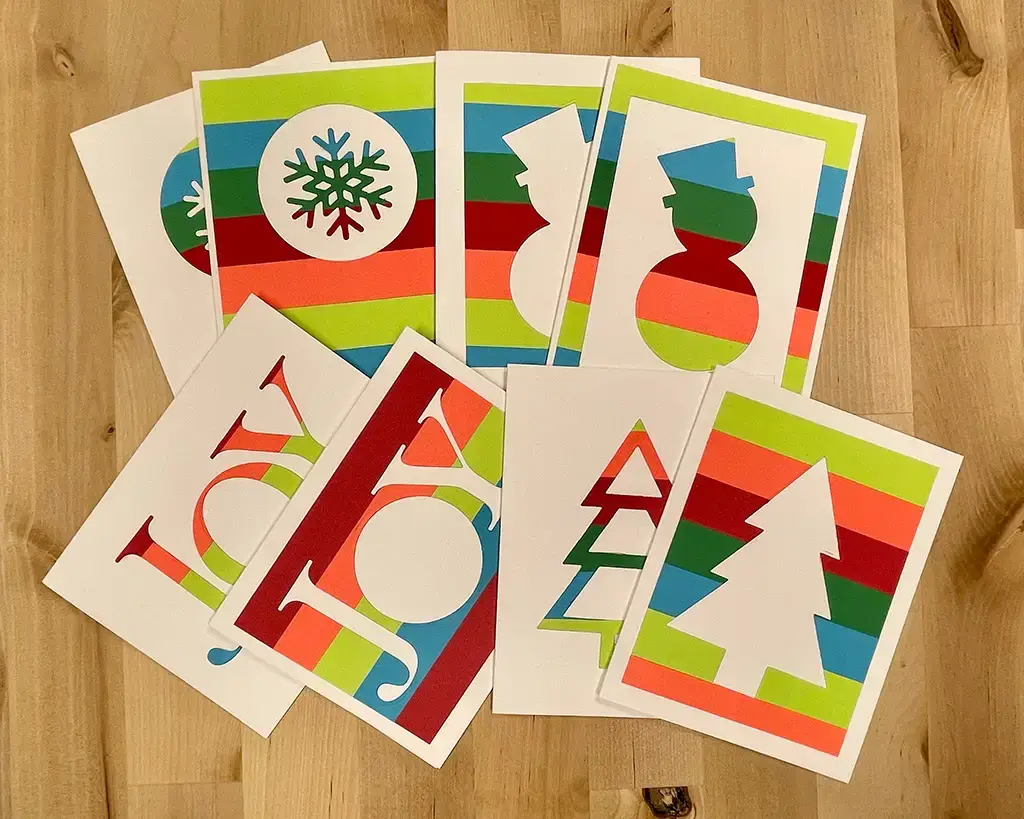
Ardyth Percy – Robb's ingenious idea for creating many cute cards in just a short time is awesome. I like it so well that I bought three of the four dies that she used for her cards.
She uses strips of different colored cardstock to color her cards. Getting set up takes the most time, but that isn't much if you figure out how many strips you need and then cut them all at the same time. You just stick the strips onto a piece of copy paper. Then you can cut out four card panels from each piece copy paper with the colored strips glued to them.
From there you use a die to cut an image out of each card panel. What is so great about this is that you get two cards for every die cut that you make: one using the positive image and one with the negative image. To assemble the cards you just glue each image to your card bases and you're done. If you want to make your card even nicer you can add a sentiment to the inside of your card bases.
I made thirty-six cards in less than two hours! Amazing!
You can find more of Ardyth's projects at https://ardythpr.blogspot.com/, .
Supplies:
The following list may contain affiliate links. If you purchase something by following a link on this page, I may receive a small commission at no extra cost to you. Thank you for supporting my blog.
Cardstock: Neenah Classic Crest Solar White 110 lb Red Cardstock; Green Cardstock Other colored cardstock
Stamps: Sunny Studios Inside Greetings – Holiday
Dies: Jillian Vance Design – Sam E Snowman Die Set; Jillian Vance Design Snowflake Die; Frantic Stamper-Shaker Christmas Tree Die; Altenew – Classic Alphabet M Die Set.
Adhesive: – Bearly Art Glue; Stick-it Double Sided Adhesive
What's Next?
Now you can see why I am so excited about what I learned at the Card Maker Success Summit. There are so many wonderful, beautiful things to try on any kind of card not just for Christmas.
I've provided you with links to each of these special presenters where you can find more of their fantastic ideas…please go check them out!
Now, keep an eye out for my next post where we will look at several unique ways to take your Christmas cards to the next level with Heat Embossing.
Supplies Used on All Coloring Projects
Score Board – Altenew Crafter's Essential Scoring Board
