What am I talking about? The Altenew Educator’s “Secret Card Recipe Blog Hop’ is going on now. If you just came from Nandini Karmarkar‘s site then you already know all about it. But if not, you can check it out on Altenew’s blog post HERE
Welcome to the Altenew Educators’ “Secret Card Recipe” Blog Hop and Linky Party + Giveaway!
This is so exciting! There are $130 in total prizes! Altenew is giving away a $20 gift certificate to 3 lucky winners and a $15 gift certificate to 4 winners! To win, please comment on the Altenew Card Blog and/or each designer’s blog post on the blog hop list below by 10/30/2022.
There’s MORE! Join our party! We have included an Inlinkz at the Altenew blog for you to enter your beautiful, Altenew “Secret Card Recipe” creations.
We will pick one of our favorite handmade creations from those who joined the linky party, and they will receive a $10 Altenew gift certificate!
Altenew will draw 5 random winners from the comments left on each blog hop stop and announce the winners on the Altenew Winners Page on 10/31/2022.
This hop is closed.
Secret Card Recipe – Dancing In The Rain
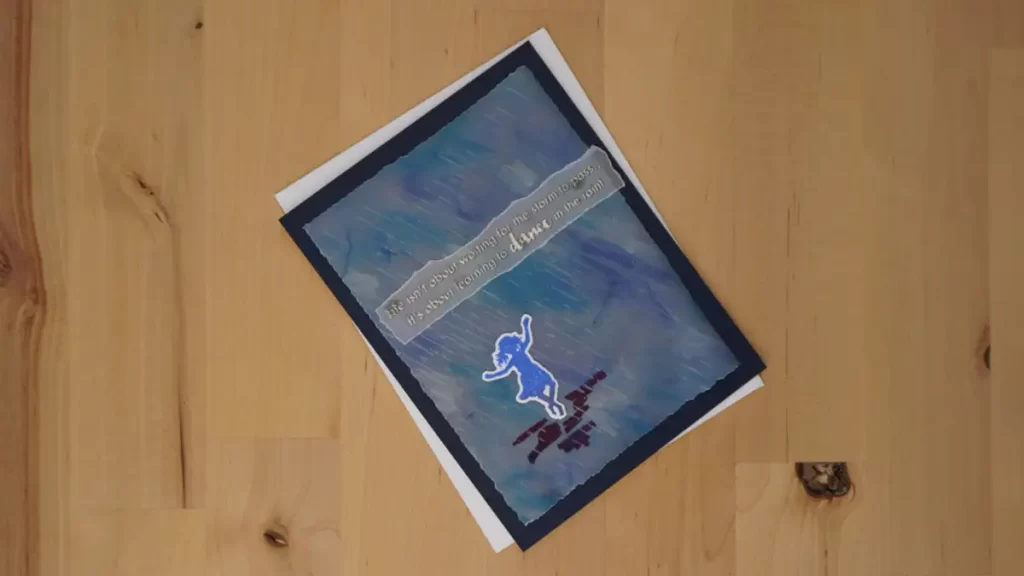
What’s my secret card recipe? Well, it starts with my secret weapon, vellum. I’m hooked on its velvety transparent qualities. And then, we step it up by using watercolor brush markers on it, so stunning!
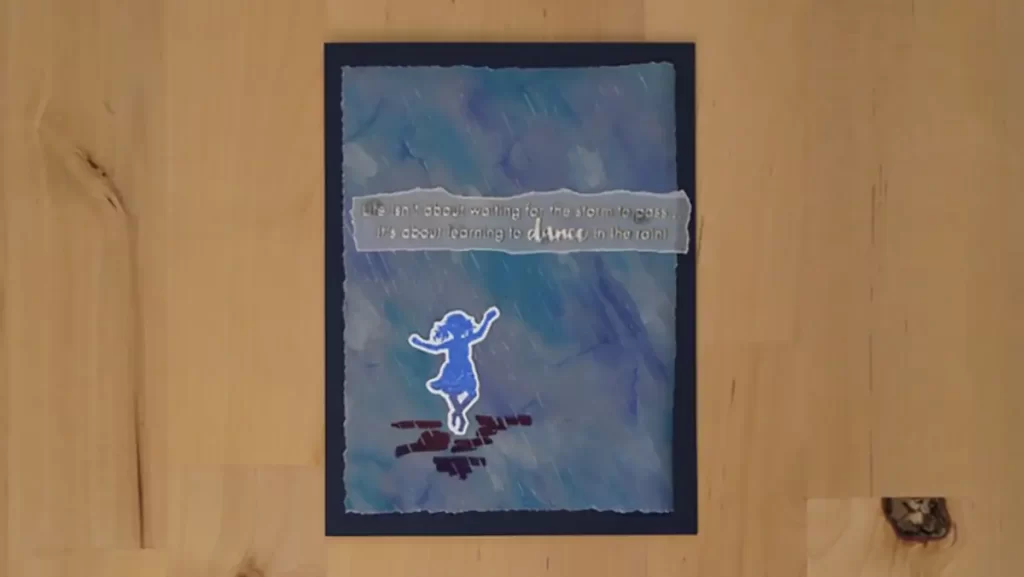
My first project is an inspirational card, and we’ll create it using Altenew’s Dancing In The Rain stamp set.
To give the impression that it is raining, we’ll heat emboss the “rain” stamp from the set with clear embossing powder on an A2 piece of vellum. And, we’ll have to use the stamp several times to ensure that the rain covers the entire surface of the vellum.
We’ll also heat emboss the sentiment on a piece of vellum. But, for it, we’ll use platinum embossing powder instead.
Secret Card Recipe
Next, we’ll turn the vellum over and add several different colors of blue with watercolor brush markers. And, we’ll do so randomly over the whole back side of the card panel. And then we’ll use a watercolor brush filled with water to blend the colors together.
Hint: you may need to get the paper quite wet. The vellum will be warped once it dries which adds to the “rain” theme of the card. When it’s dry, we’ll trim it to 3 3/4″ x 5 1/2″ by tearing the vellum or using a deckle trimmer.
Now, we’re going to stamp the little dancing girl onto a scrap of white cardstock by loading the stamp first with light blue ink. And then, dabbing the darker blue ink at the bottom of the stamp.
Assembling the Card
To assemble the card we’ll attach the card panel to the card base using a glue runner. Next, we’ll tear out the sentiment and attach it to the watercolored background with glue dots. And then we’ll decide where to add the little girl and attach her with glue dots too.
Now we’ll turn the whole thing over and add more glue dots behind the ones attached to the other side. And then, we’ll fasten it centered on the card base.
The last thing to do is to paint on the puddles below the little girl with the dark blue watercolor brush.
Dancing In The Rain Supplies
The following list may contain affiliate links. If you purchase something by following a link on this page, I may receive a small commission at no extra cost to you. Thank you for supporting my blog.
- Cardstock: Card base – Neenah Classic Crest 110lb Solar White; Card panel – Taylored Expressions Blue Corn; Vellum – Altenew Vellum Translucent Paper; Accent – Neenah Classic Crest 80lb Solar White
- Stamp: Altenew Dancing In The Rain
- Embossing Powder: Altenew Crystal Clear Crisp Embossing Powder; Platinum Crisp Embossing Powder
- Watercolor Brush Markers: Altenew Turquoise, and Desert Night for the puddle (Tropical Fiesta Set); Metallic Silver (Winter set), Ultramarine (Autumn set)
- Watercolor Brush Marker: Altenew DIY Watercolor Brush Marker
- Deckle Trimer: Tim Holtz Deckle Torn Edge Trimmer
- Ink: Watermark ink – Altenew Clear Embossing Ink; Altenew Crisp Dye Ink – Winter Lake, Ultramarine
- Adhesives: Altenew Glue Tape & 3 Refills, Glue Dots Micro
Secret Card Recipe: Blended Roses
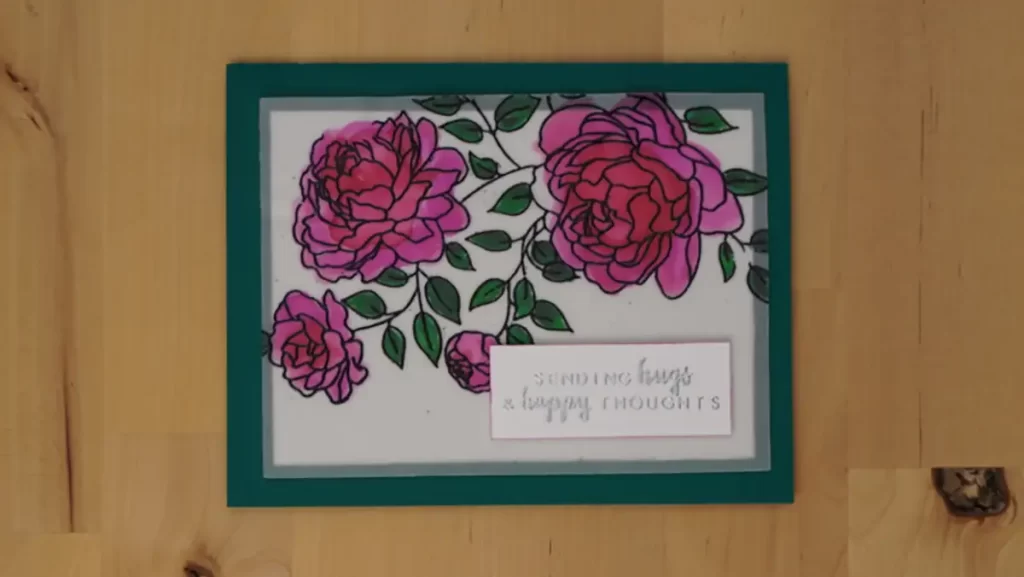
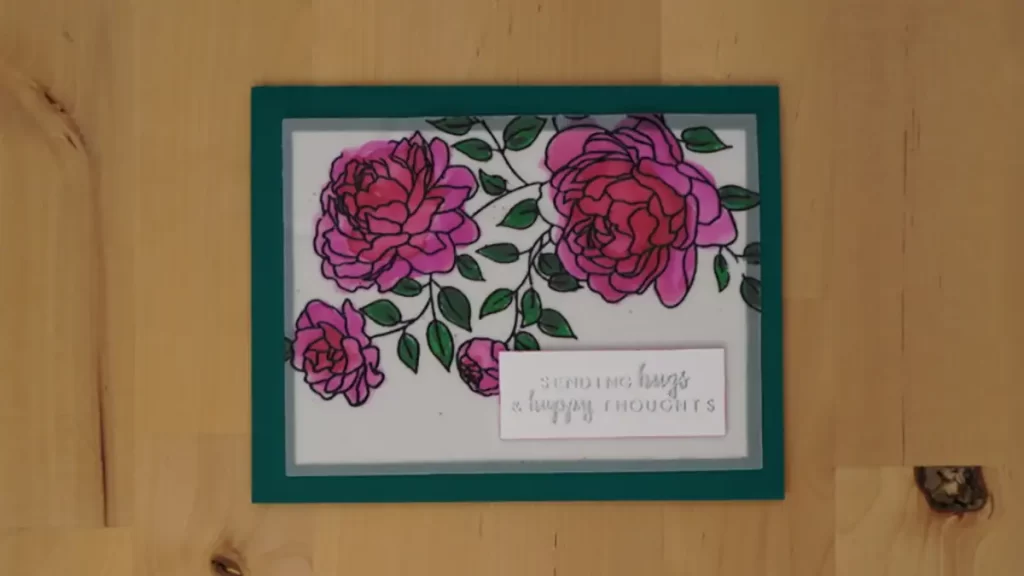
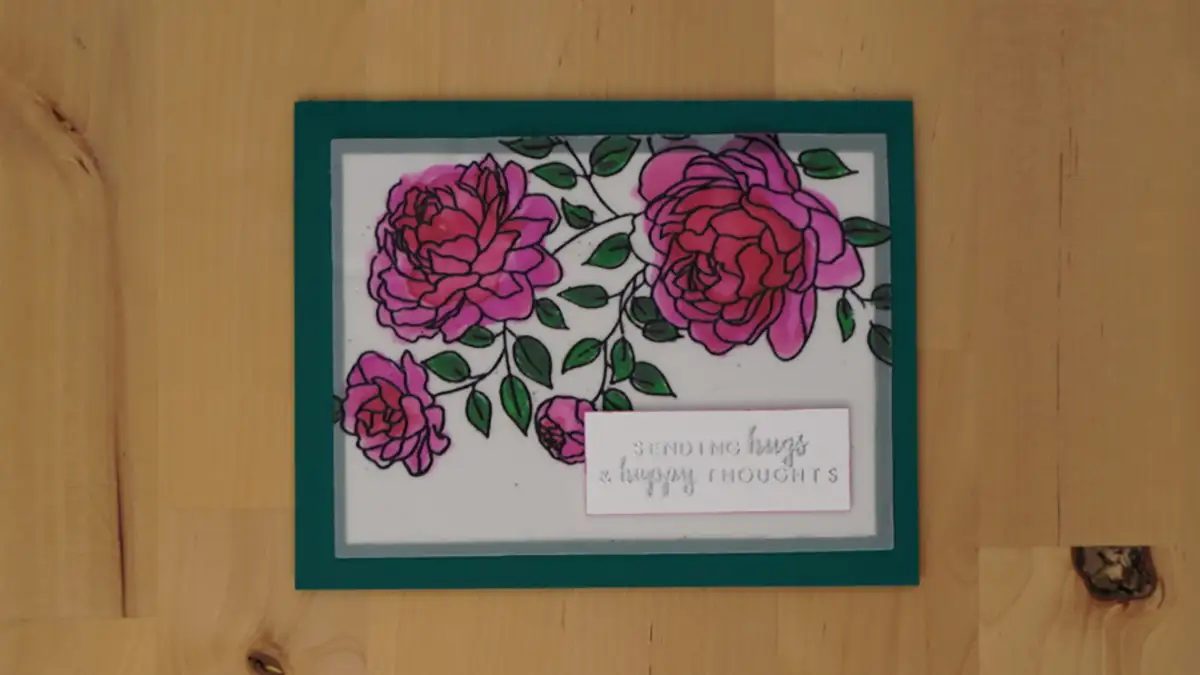
The second card uses a large floral stamp from a Craft Your Life Project Kit called Never Stop Dreaming. I love this stamp because of the whimsical nature of the beautiful roses and the very thin outlines it produces.
We’ll start this card the same way we did with the first one by heat embossing on an A2 piece of vellum. But, we’ll use black embossing powder for this one. And while we’re at it we’ll heat emboss the sentiment with silver embossing powder on a scrap of white cardstock.
Blended Rose Secret Recipe
And, we’ll watercolor the same way too, but we’ll paint the roses first and let them dry. And then we’ll do the leaves. I blend two colors for the roses with water, and two colors with water for the leaves to give the piece added interest and dimension.
This gives us a striking, bold, colorful image against a white background.
If you like watercolor, then you may be ok with coloring outside the lines, and the warping that naturally occurs as the water dries on the vellum. I am ok with it but thought we should try to flatten it by running the vellum through a die-cutting machine.
Finishing the Blended Rose Secret Recipe Card
The piece flattens some, but a few waves remain. We’ll use a double-sided adhesive foam sheet to flatten it a bit more. And, by trimming it to 1/8″ smaller than the colored vellum on all sides it adds a nice transparent frame. Then, we’ll remove the backing paper on the other side and center it on the card base.
Lastly, we’ll add a little bit of color to the sentiment by painting the edge on all four sides with the Purple Wine Watercolor Brush Marker. And, when it’s dry, we’ll attach it to the card with some scraps of the double-sided adhesive foam sheet.
Blended Roses Card #2 Supplies
The following list may contain affiliate links. If you purchase something by following a link on this page, I may receive a small commission at no extra cost to you. Thank you for supporting my blog.
- Cardstock: Card base – Taylored Expressions Poblano; Vellum – Altenew Vellum Translucent Paper; Accent – Neenah Classic Crest 80lb Solar White
- Stamp: Altenew Craft Your Life Project Kit: Never Stop Dreaming
- Embossing Powder: Altenew Silver Crisp Embossing Powder; Brutus Monroe Raven Ultra Fine
- Watercolor Brush Markers: Altenew Purple Wine (Tropical Fiesta Set); Ruby Red (Winter set), Just Green (Autumn set); Emerald (Spring set)
- Watercolor Brush Marker: Altenew DIY Watercolor Brush Marker
- Ink: Watermark ink – Altenew Clear Embossing Ink
- Adhesives: Double-sided Adhesive Foam Sheet
Secret Card Recipe: Pinecone Card
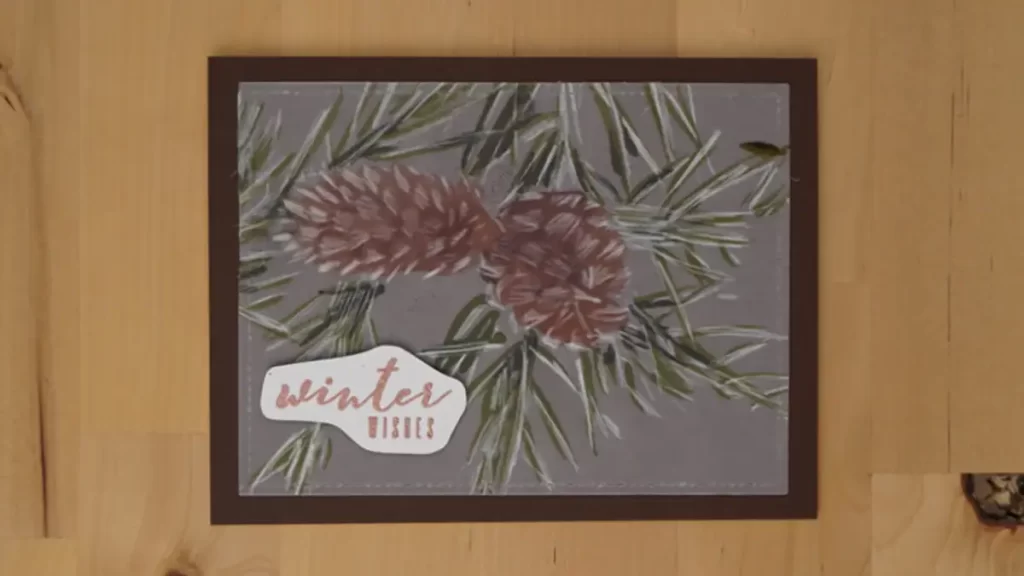
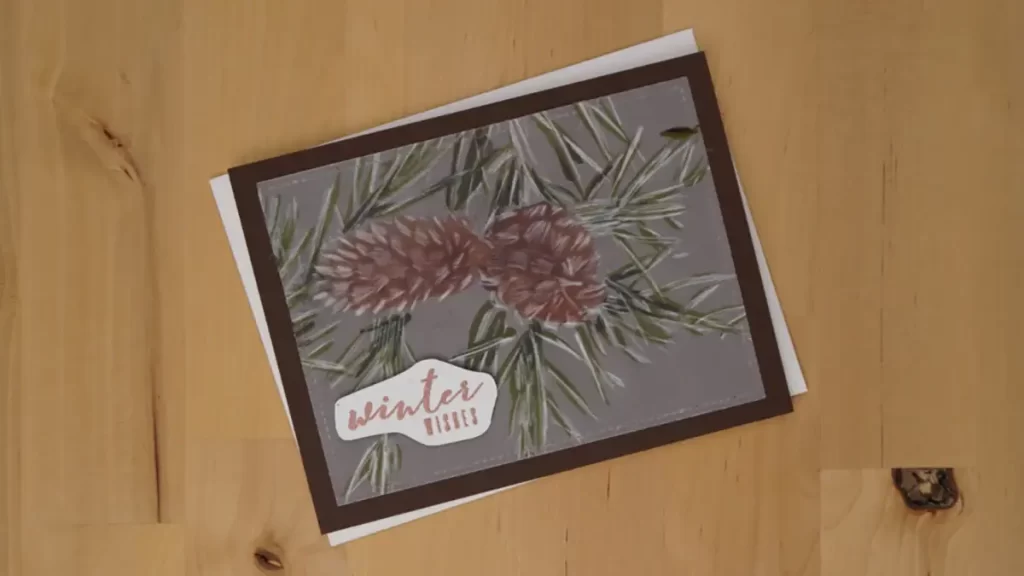
Our third card is slightly more involved than the first two. For example, we’ll use stencils and a stylus to define our pattern. To demonstrate how this is done, we’ll put one of the stencils on top of something soft. Hint: I use the pad that comes with a 3D flower-making kit I have. And, we hold an A2 piece of vellum over the top of it.
Vellum Embossing
Then we gently rub the stylus over the vellum in each of the negative places of the stencil. As a result, the vellum turns bright white in the places where the stylus embosses the vellum. And as you do so, you want to take care to rub the stylus in the correct direction. This is because even the lightest touch will show and you want your markings to be in the right direction.
When all of the negatives have been rubbed onto the vellum for the first stencil, then we’ll align the second layer. We want to do so making sure to match it to the pattern that we created with the first layer. And then, follow the same steps as we use for the first stencil.
The coloring for this card is the same as the other two, however, a bit more intentional with less water.
Finalizing the Card
We heat emboss using a sentiment stamp and copper embossing powder for this card. And then we fussy-cut it out. Assembly is basically the same as for the first two cards.
Pinecone Supplies
The following list may contain affiliate links. If you purchase something by following a link on this page, I may receive a small commission at no extra cost to you. Thank you for supporting my blog.
- Cardstock: Card base – Neenah Classic Crest 110lb Solar White; Card Panel – Spellbinders Timber; Vellum – Altenew Vellum Translucent Paper; Accent – Neenah Classic Crest 80lb Solar White
- Stencils: Altenew Classic Pine Stencil A, Altenew Classic Pine Stencil B
- Stamp: Altenew Build-A-Flower Poinsettia
- Soft Pad: Spellbinders: Susan’s Garden Ultimate Tool Kit
- Stylus: Ranger Ink Stylus Set 01
- Stamp: Altenew Craft Your Life Project Kit: Never Stop Dreaming
- Embossing Powder: Altenew Copper Crisp Embossing Powder
- Watercolor Brush Markers: Altenew Paper Bag (Tropical Fiesta Set); Ruby Red (Winter set), Just Green (Autumn set); Emerald (Spring set)
- Watercolor Brush Marker: Altenew DIY Watercolor Brush Marker
- Ink: Watermark ink – Altenew Clear Embossing Ink
- Adhesives: Double-sided Adhesive Foam Sheet
Watercolor Brush Markers
There are a lot of watercolor brush markers to choose from these days. I have most of them. But, my favorite by far is the ones from Altenew. The colors are so much more vibrant and they are refillable! For this reason, I recommend all four sets: Tropical Fiesta, Autumn, Spring, Winter,
But, if you want to start slow without such a significant purchase, you can make your own. For example: here are the supplies to watercolor with that you will need to get for each of the cards in this article:
Dancing In The Rain
- Watercolor Brush Marker: Altenew DIY Watercolor Brush Marker
- Watercolor Brush Marker Refills: Altenew Turquoise, Metallic Silver, Ultramarine, and Desert Night
Blended Roses
- Watercolor Brush Marker: Altenew DIY Watercolor Brush Marker
- Watercolor Brush Marker Refills: Altenew Purple Wine, Ruby Red, Just Green, and Emerald
Pinecones
- Watercolor Brush Marker: Altenew DIY Watercolor Brush Marker
- Watercolor Brush Marker Refills: Altenew Paper Bag, Ruby Red, Just Green, and Emerald
Don’t forget to check out Eva Bussom‘s article, your next hop on the list.
Are You Interested in More Watercoloring Magic?
Check out: 4 REMARKABLE VALENTINE CARDS YOU CAN MAKE
