
Do have someone in your life that loves sports? Well if you do, I have the perfect tools for you to create perfect cards for them!
I think it’s safe to say that everyone has someone in their life who is interested in sports. Whether they are athletes themselves or sports fans.
I am so pumped to share the new Game Day Collection from Spellbinders! This combination of dies, embossing folder, and stamps are must-haves for anyone who loves sports!
NFL Sports Card

For example, my favorite team is the Green Bay Packers so I use gold and green on the jersey. I had to trim an extra white collar and sleeves die-cuts to make them look more like the Packers’. And, I put Reggie White’s numbers on my card because to me he was such a great person and role model. Finally, I blend Ground Espresso onto the Sports Talk embossing folder before running it through my die-cutting machine for a perfect background.

Supply List

Kids Football Card
My second card is another example of how you can customize a card. This one is for my Great-Grandson, Benson. His school’s colors are red and black and he wears #14.

To begin the background, I stamp the sentiment onto a piece of white cardstock using red ink that matches Bensons’ school colors. Then, I will create a color block by embossing both a white and a red piece of cardstock. Next, I’ll trim the white piece to 3 1/2″ tall by 4″ wide. Finally, I’ll match the red embossed piece with the white one and trim the bottom right where the top of the white piece ends. And then, I’ll trim the top and sides off. The finished red piece should be 1 3/4″ tall by 4″ wide.

Supply List

A Card For All Sports
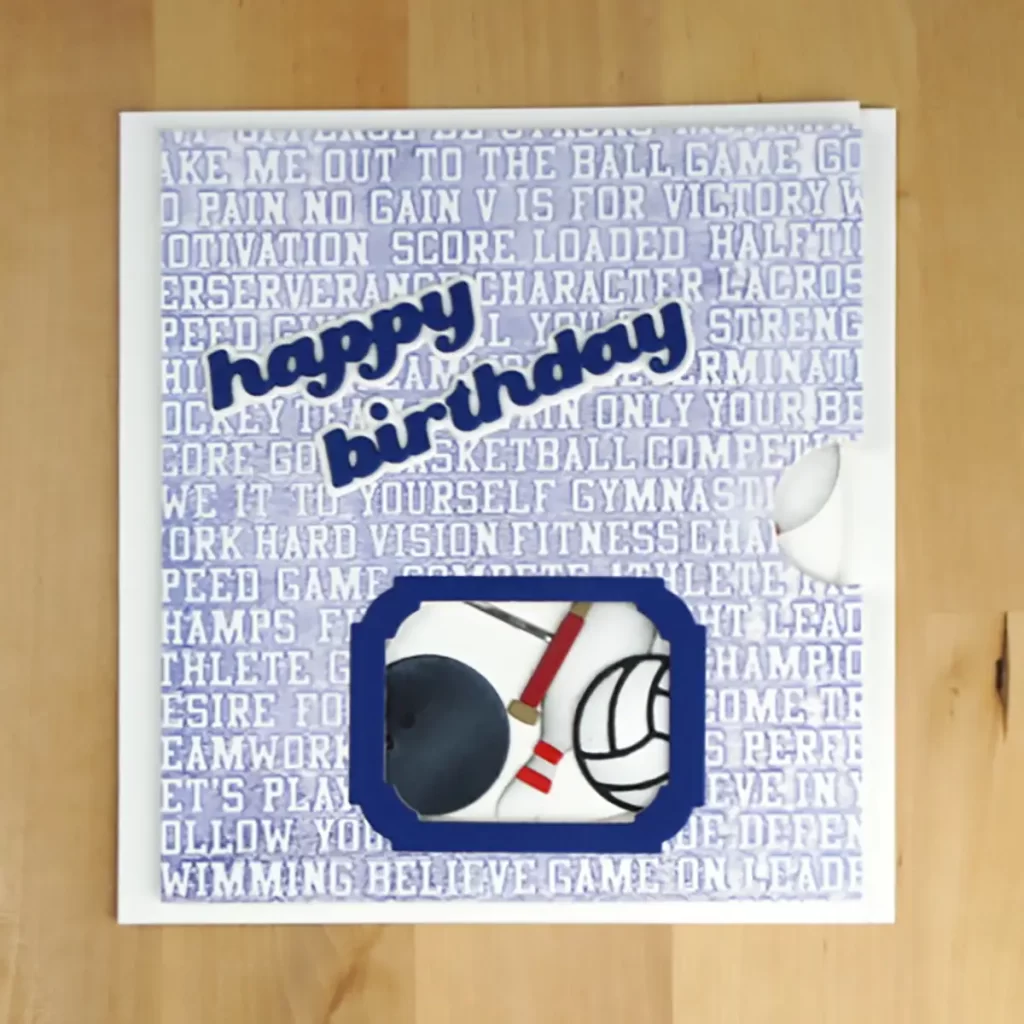
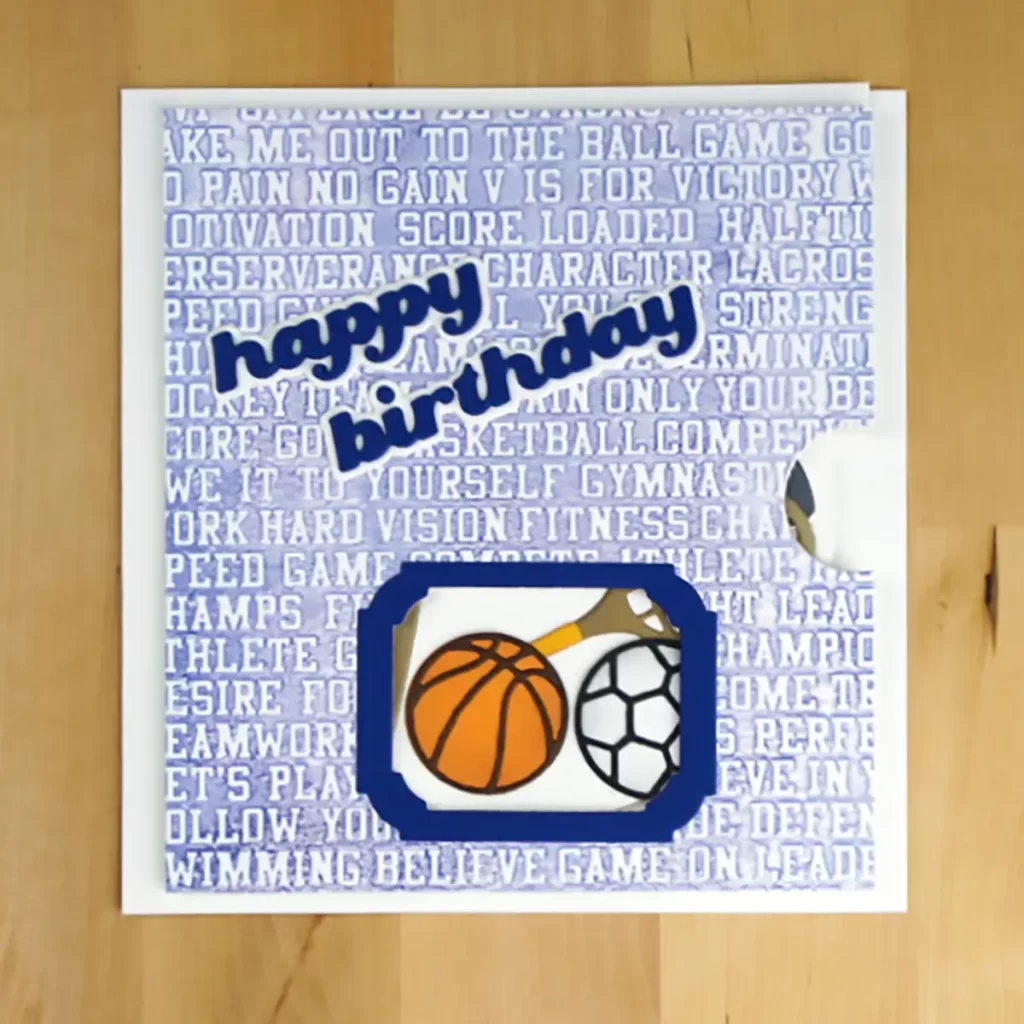
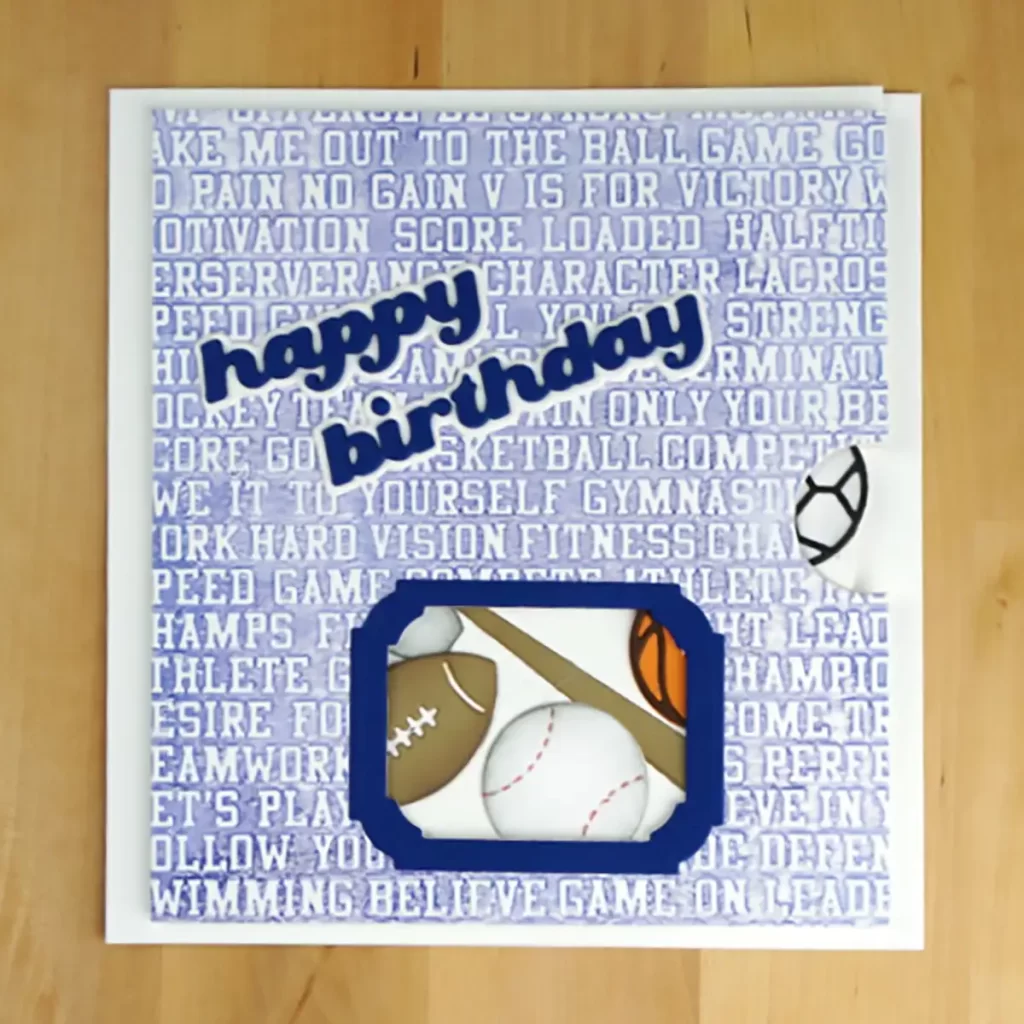
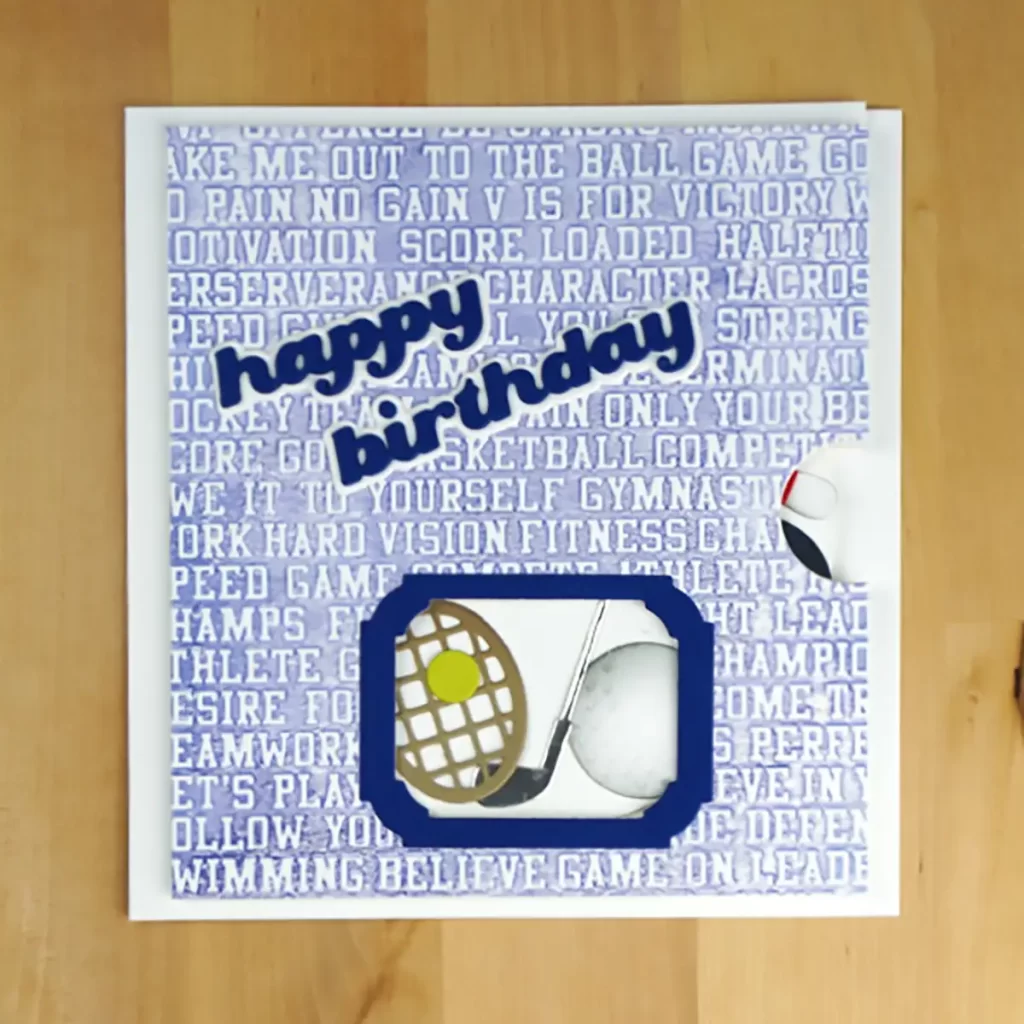
All of the dies in the Sporting Goods Die Set are so awesome! Look through the photos and you’ll see balls for football, basketball, soccer, volleyball, baseball, golf, and bowling. And then, there are rackets and golf clubs, bats, and bowling pins.
I thought it would be fun to make most of them first and then the plan was to pick one or two to make a card with. Well, I love them all, so I came up with an idea for a card to incorporate as many as I can. I start by die-cutting a large circle. With a small circle cut out in the center. And then, I arrange all the balls and equipment around the edges.
Next, I cut 5 or 6 circles that are just a tiny bit smaller than the one in the center of the big one and glue them all together.
I use the Sports Talk embossing folder for the background again for this card. And I cut a half circle out of one side. This is where you will turn the wheel with your finger. Then, I decide where I want the window to be and die-cut it from the background as well. I use the Notched Corners to cut this window and the frame.
To demonstrate how this works, the balls and equipment are placed on a wheel that you can turn with your finger. And then, they show up in a little window on the front of the card.
It’s a perfect card for anyone who loves a lot of sport.
Card Base
To put it all together, I will create a custom-size card base 5 3/4″ tall x 5 1/2″ wide. Then, I trim 1/4″ off of the front on the right side. I’ll then trim down my background to 5 1/2″ tall x 5″ wide. Next, I’ll die-cut half of a 1″ circle from the center on the right side of both the card base front and the background.
Following that, I will die-cut a 2 3/4″ circle from 110lb cardstock. This will be used to hold the wheel up from dragging on the card front.
Assembly
To get the placement correct, put the hole in the wheel over the stacked circles and hold it up behind the window in the embossed background. You want to spin the wheel and adjust its location until each of the balls and equipment show up perfectly in the window when you turn it. Then, lay it all down face-front and glue the stacked circles to the back side of the embossed background.
We’re almost done. With the wheel centered on the stacked circles, attach the 2 3/4″ circle in the center of the stacked circles with liquid glue. Now, add foam tape around the edges of the back of the background. HINT: Make sure that the wheel does not catch on the foam tape anywhere. Add liquid glue to the back side of the 2 3/4″ circle, and remove the backing paper from the foam tape.
Align the sides of the embossed front and the card base front and fasten together. The last thing to do is to die cut Happy Birthday using the Everyday Sentiments die set.
Lorem ipsum dolor sit amet, consectetur adipiscing elit. Ut elit tellus, luctus nec ullamcorper mattis, pulvinar dapibus leo.

Are You Interested In More Fun Cards To Make?
Why don’t you try How To Make A Card That Glows In The Dark?


