

Layered stamping produces gorgeous results but demands accuracy and makes the difference between stunning greeting cards and ones that is meh!
I just finished the second course of the Altenew Academy Educator Certification Program (AECP), All About Layering 2, and it is focused on doing just that.
As a result of participating in the first two classes of the AECP program and practicing what I have learned, I've discovered the following five tips for improving the quality of my stamping with layered stamps. Hopefully, they will help you too:
1: Use a “tester” card base to try out and familiarize yourself with the stamp set.
2: Take your time.
3: Use a conditioning stamp eraser often to improve the quality of your stamping of the base layer or the layer with the largest footprint.
4: Hold your head directly over the image that you are stamping to improve your stamp alignment, just like you do in golf when you're lining up a put.
5: Use the layering guide for hints on how to align each layer, but when practicing using the stamps, determine what works best for you, which might be different than what is in the guide.
If you missed the article I had done based on the first Altenew Educator Certification Program (AECP) class, All About Layering 1, you can check it out here: https://cutcolorandcreate.com/?p=402.
I used the same layered stamp and die set and inks to create three different handmade greeting cards for the first lesson in the class.
Layered Stamping – Sympathy Card
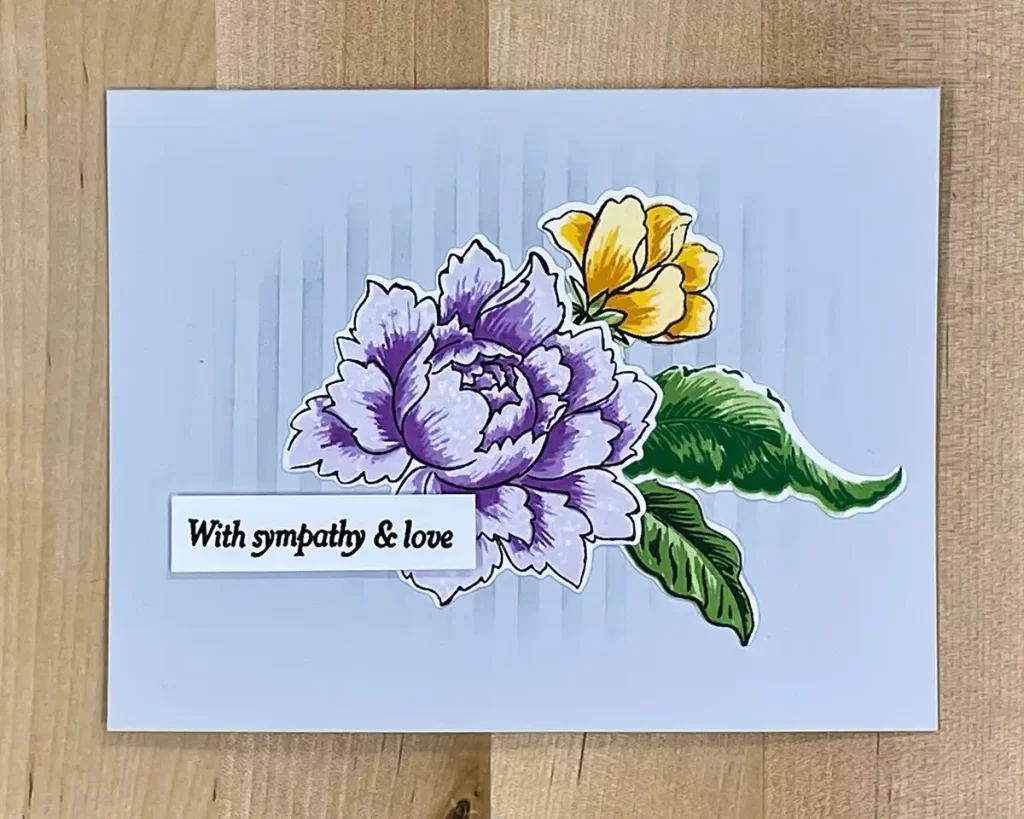

First, I created an outline of the images by stamping the first layer with black ink. And then I used different shades of the same color for the remaining layers beginning with the lightest ink. I did this in two coordinating colors, purple and yellow, for the flowers.
After I did the stamping, I used the coordinating die set to cut out all images.
I needed a sympathy card, so I used a gray to tone down the card. Then I used a stencil to add a muted background. And next, I arranged the flowers on top and added a sentiment with foam tape.
The coordinating die set was used to cut out each image that I had stamped. And then, began to try different arrangements on a blank card base. I needed to make a sympathy card. So, I thought a light gray would make a good base that wasn't too bright and cheery. Then I used a stencil to blend in a background. And then, glued the images onto the card base and then the sentiment on top.
Supplies:
The following list may contain affiliate links. If you purchase something by following a link on this page, I may receive a small commission at no extra cost to you. Thank you for supporting my blog.
Cardstock: Neenah Classic Crest 110lb Solar White: Neenah Classic Crest 80lb Solar White
Stamp: Simon Says Stamp Sympathy Greetings mix
Stamp and Die: Altenew Peony Bouquet
Inks: Altenew Pigment ink Obsidian; Altenew Crisp Dye Ink – Soft Lilac; lavender Fields; Deep Iris; Buttercream; Warm Sunshine; Caramel Toffee; Frayed Leaf; Forest Glades; Evergreen
Stencil: Altenew Classy Stripes Stencil
Adhesive: Bearly Art Glue
Die Cutting Machine: Gemini Jr
Birthday Card
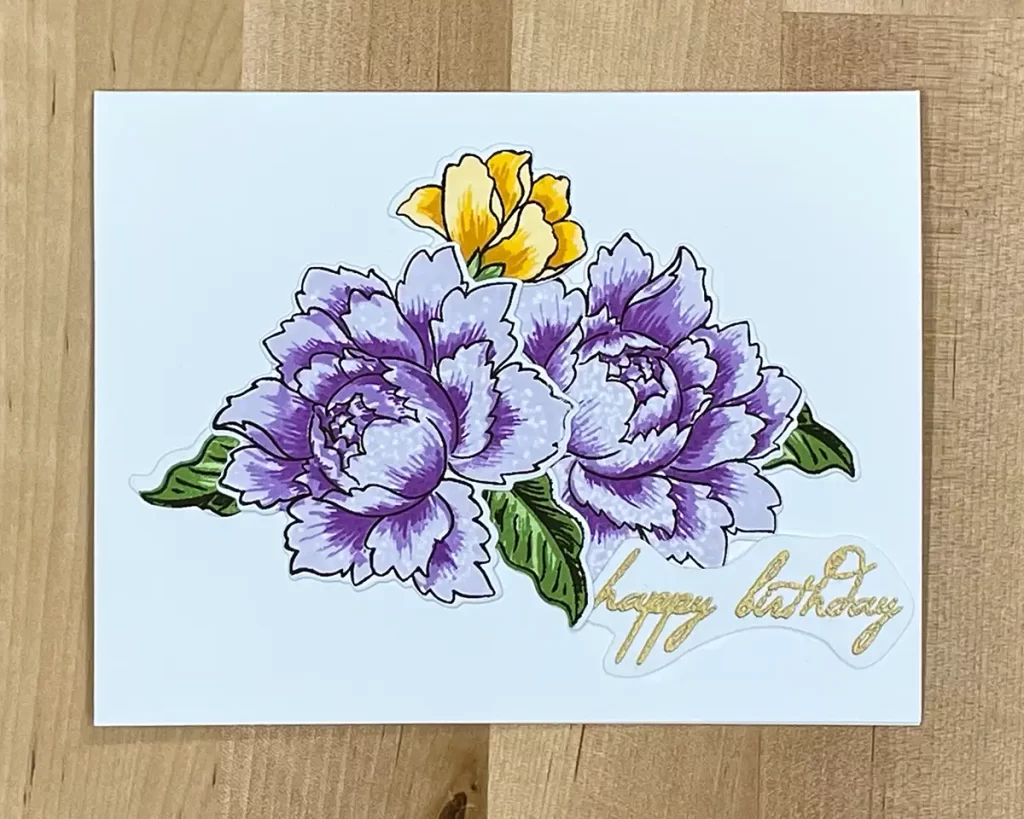
Just a change in background color results in a much brighter card for a birthday. The same process as the sympathy card was used, just a different sentiment.
Supplies:
The following list may contain affiliate links. If you purchase something by following a link on this page, I may receive a small commission at no extra cost to you. Thank you for supporting my blog.
Cardstock: Neenah Classic Crest 110lb Solar White: Neenah Classic Crest 80lb Solar White
Stamp and Die: Altenew Peony Bouquet
Inks: Altenew Pigment ink Obsidian; Altenew Crisp Dye Ink – Soft Lilac; lavender Fields; Deep Iris; Buttercream; Warm Sunshine; Caramel Toffee; Frayed Leaf; Forest Glades; Evergreen
Adhesive: Bearly Art Glue
Die Cutting Machine: Gemini Jr
Layered Stamping – Hello Card

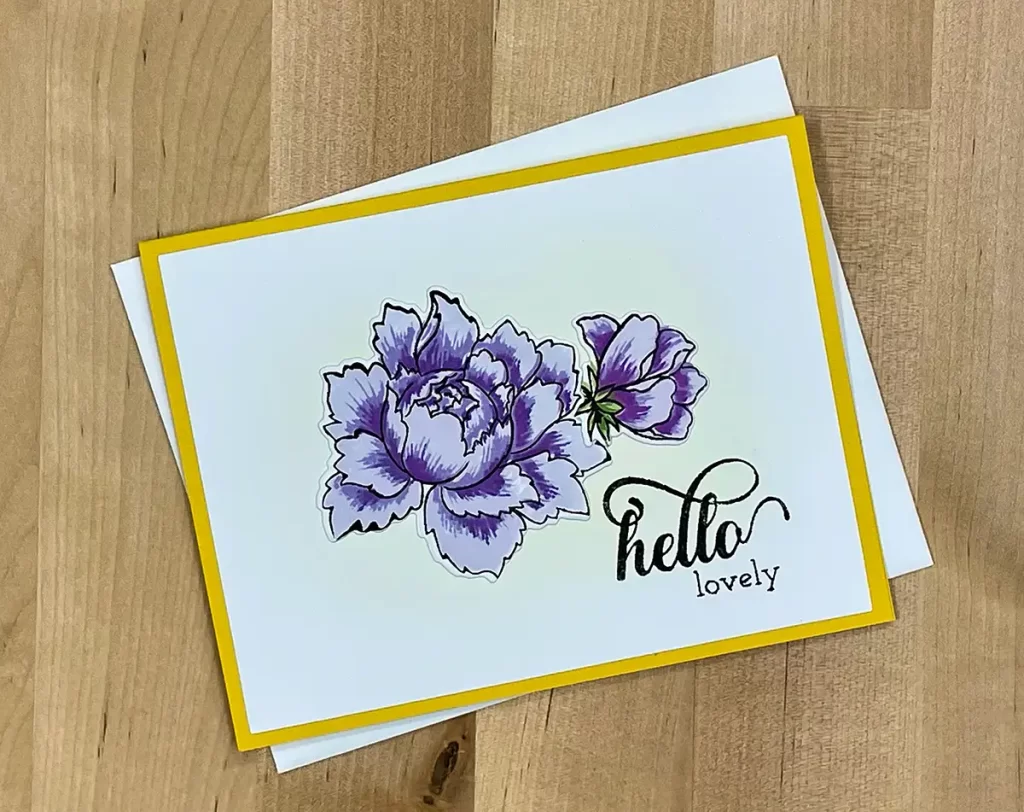
Then I used the same process as the first two cards. But for this one, I added a yellow frame to create a cheery card. And I stamped the sentiment directly on the card panel.
Supplies:
The following list may contain affiliate links. If you purchase something by following a link on this page, I may receive a small commission at no extra cost to you. Thank you for supporting my blog.
Cardstock: Yellow card base – Paper Studio 1147396: Neenah Classic Crest 80lb Solar White
Stamp: Altenew Fancy Greetings
Stamp and Die: Altenew Peony Bouquet
Inks: Altenew Pigment ink Obsidian; Altenew Crisp Dye Ink – Soft Lilac; lavender Fields; Deep Iris; Buttercream; Warm Sunshine; Caramel Toffee; Frayed Leaf; Forest Glades; Evergreen
Adhesive: Barely Art Glue; Dot Adhesive Runner
Die Cutting Machine: Gemini Jr
So there you have it, tips and examples of what I learned in All About Layering 2.