

How to make a beautiful handmade You Are Sew Amazing Shaker Card with a sewing theme. Step-by-step instructions and a full supply list are included.
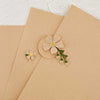
Who wouldn't want to receive a gorgeous shaker card like this?
Steps To The You Are Sew Amazing Shaker Card
Die-cutting
Begin by die-cutting all of the pieces as follows:
- Scissors: handle – mirror gold (cut 2), blades – brushed silver
- Embossing Floss skeins: rainforest , teal topaz, lilac blossom, brushed gold (cut 3 sets)
- Pins, needles, thimble: brushed silver
- Thread strands, pin tops (cut 2 for each): fern, royal amethyst, teal topaz
- Floss spool and emroidery floss: snowdrift, peridot (cut 2)
- Buttons: dune
- Jar: waterfall (cut 2), acetate(cut 2)
- Jar ring: metallic copper (cut 2)
- Jar topper: the one I used is no longer available, a good substitute is Floral Friendship Collection (cut 2)
Once all the die-cutting is complete, we can fasten the different pieces together with liquid glue as follows:
- Attach one the scissor handles to the blades. And then attach the other handle to the back side
- Attach the embroidery floss to the spool on both sides
- Fasten the pin tops to the pins on both sides
And then, blend a little bit of dark brown ink that's on your blending brush on the buttons. to make them mlook a little more realistic.
Creating the “Jar” for the You Are Sew Amazing Shaker
Add some dimension to the jar by blending some gray ink along the sides and bottoms of both of the jar die-cuts. TIP: we'll be using the back side of one of the die-cuts for the back so do your blending on the back on one of them.
Next, we'll use the die for the jar and a craft knife on the jar die-cuts to cut along the inside lines of the die. As a result we create a “window” for our shaker. Repeat for the second jar die-cut.
To make the jar look like a blue ball jar, you can use a blue marker, Copic Sketch B04, to color the acetate. When it's dry, fasten the acetate to the inside of the “jar window” that we just created. Don't forget that the back side should be flipped. So, you'll actually be gluing the acetate to the right side of the window that will be on the back.
Attach the jar rings and tops to both pieces with liquid glue. And then trim and add foam squares around the edges behind the “window frame” on the one that will be on the back. Make sure that the foam squares are touching so that nothing can get through. Add another layer of foam squares over the first one to give the shaker some room for your die-cut pieces.
Arrange the die-cuts inside the jar making sure that it will look nice on both sides. And then remove the backing paper from the foam squares and lower the top jar window down over them. TIP: I find that using a Stampwheel without the mat helps to get the top aligned with the bottom.
Sentiment
There's one last step to our pretty shaker card and that's the sentiment. The “You are sew amazing” sentiment is in the April 2024 Glimmer of the Month Club kit. And, it comes with a coordinating die. Hot foil it on onyx cardstock with moondust hot foil and you'll create a beautiful sentiment that coordinates well with your jar of sewing goodies. Use the coordinating die to die-cut it and then die-cut three more from black cardstock scraps and layer them together with liquid glue. And then fasten the sentiment to the front of your shaker.
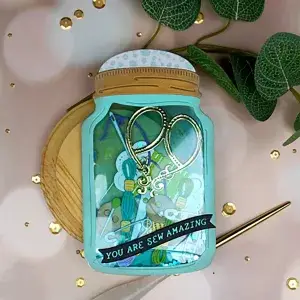
You are sew amazing shaker card created with Spellbinders April 2024 Large die of the month
There are affiliate links in this article. If you use one I may receive a small commission at no extra cost to you. Thank you for your support!

Royal Amethyst Cardstock

Bundled Sage Distress Oxide Ink

Mirror Gold Cardstock

Spellbound Hot Foil Variety Pack - Spellbinders

Hickory Smoke Distress Oxide

Lilac Blossom

Brushed Silver Cardstock

Waterfall Cardstock

Snowdrift Cardstock

Spellbinders Foam Squares

Brushed Gold Cardstock - Spellbinders
110lb Solar White

Stencil of the Month
Dune Cardstock
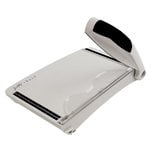
Tonic Studios - Tim Holtz - 8.5 Inch Comfort Trimmer

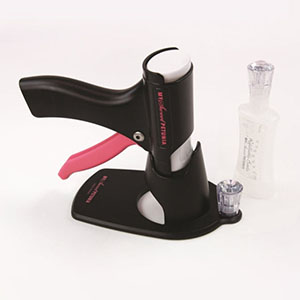
Glimmer Hot Foil System
Glue Press
Teflon Bone Folder
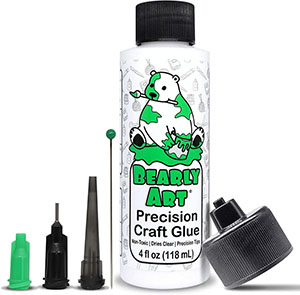
Bearly Art Glue
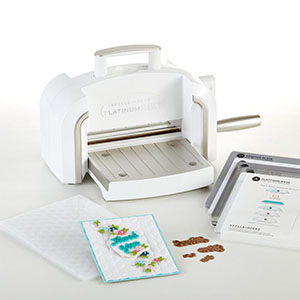
Platinum 6 Die-cutting Machine