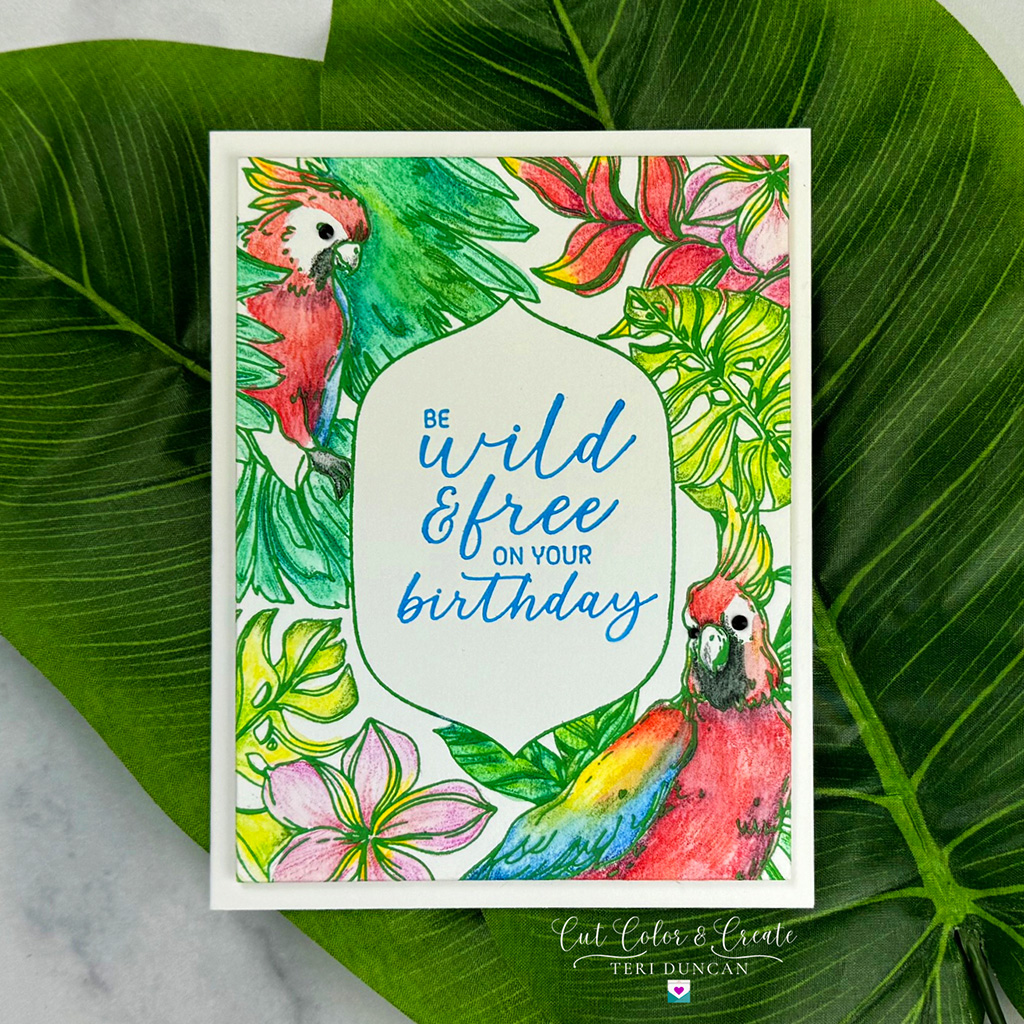
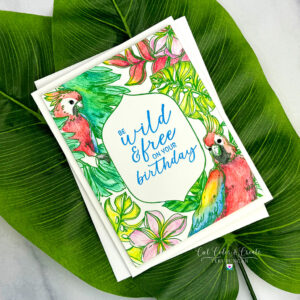
Learn how to make the Wild & Free birthday card to send tropical birthday wishes!
To give you an idea of what you can do with this beautiful press plate I use water-reactive colored pencils and two colors of BetterPress ink. The results from doing so create a beautiful representation of the bright colors of the tropics.
Leaf green ink is the perfect color for the tropical design, and azure ink beautifully complements the blue in the bird's wing feathers.
Oh, and the smaller Onyx gems are perfect for the eyes for each of the birds.
1. Create a Card Base For The Wild & Free Birthday Card
To begin the card, we're going to create an A2 size (4 1/4″ x 5 1/2″) side-folding card base. For tips on how to make a card base, go to How To Make A Card Base.
2. Letterpress
Trim a piece of porcelain BetterPress cardstock to A2 size. And then, we'll go ahead and press the design Wild & Free BetterPress Press Plate on the cotton cardstock panel with leaf BetterPress ink.
If you're new to letterpressing with BetterPress, go to How To BetterPress Press for tips on how to get the best results.
Once that is done, let's go ahead and press the sentiment on the card panel as well. I like to leave the design press plate on the Chase (magnetic platform) so that I can get the sentiment press plate aligned perfectly.
Then, we'll remove and put away the design press plate and then tape the card panel onto the platen (clear top plate with registration marks). Now, ink up the sentiment press plate with azure BetterPress ink and run the sandwich through your Platinum 6 die-cutting machine.
3. Color The Pressed Images
We are using water-reactive colored pencils to color our card because:
- It is easy to get color into tiny little spaces with them
- They blend beautifully
- Once you apply water to them, their colors allow you to achieve beautiful, vibrant colors.
To color your card similar to mine, here are the colors to use:
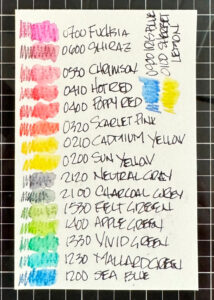
I like to kind of scribble all of the colors on before adding any water. And, to add depth I blend several hues very close to each other. Then, with a DIY watercolor brush full of water you want to start with the lightest color and then blend. Make sure to clean your brush often by wiping it on a piece of paper towel.
4. Assemble The Wild & Free Birthday Card
To finish the card, we'll trim the pressed panel. I like to use the second largest die from Spellbinders Precision Layering A2 B die set for this. However, you can use a paper trimmer as well by cutting it 3 7/8″ x 5 1/8″ if you prefer.
Next we'll give it some dimension by popping it up with a double-sided adhesive foam sheet. Then, we'll fasten it centered on the card base. And finally, we'll add onyx gems over the each of both of the birds to really make them stand out.
And, that's all there is to this beautiful tropical card to send special birthday wishes.
Wild & Free Birthday Card Supply List

BetterPress of the Month

Porcelain BetterPress Cardstock

Tropical Tones BetterPress Ink

Flower Garden BetterPress Ink Set
Best Ever Craft Tape - 5/8" - Spellbinders

Derwent Inktense Pencils

Precision Layering A2 B Die Set - Spellbinders

Onyx Color Essentials Gems - Spellbinders
110lb Solar White

Scrapbook.com Foam Sheet
Tool List

DIY Watercolor Brush Marker
Teflon Bone Folder
Altenew Scoring Board
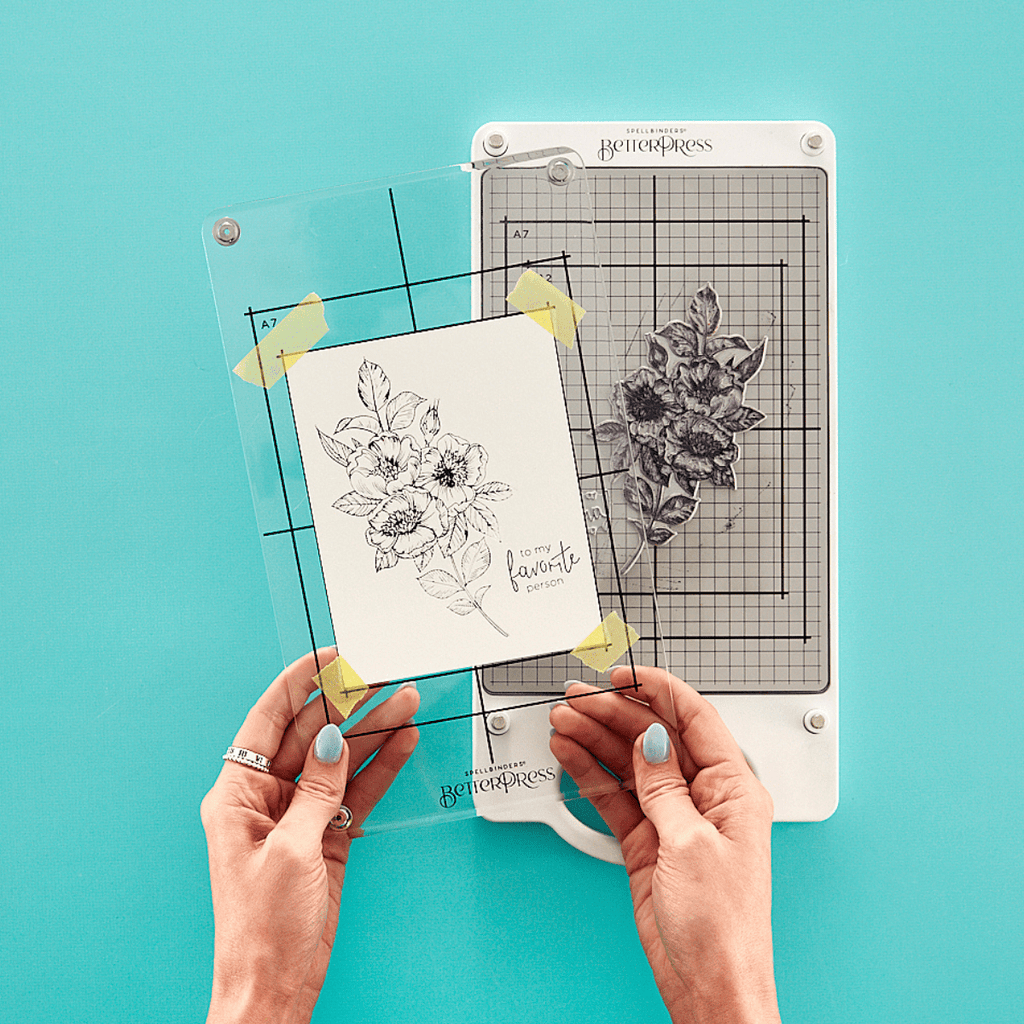
BetterPress System
Platinum 6 Die-cutting Machine
The Wild & Free birthday card celebrates Spellbinders May 2024 BetterPress plate of the month. Additionally, the article where I introduce the press plate and this card is here:
