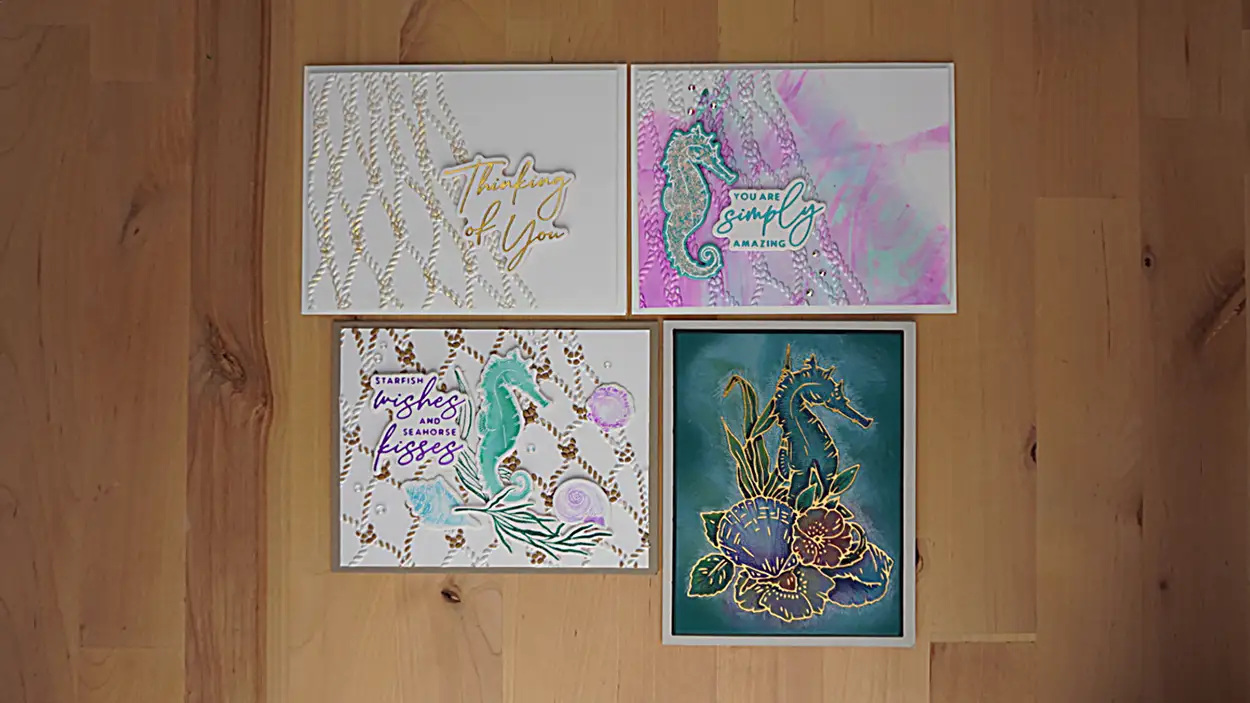
The Seahorse Kisses Collection, available now from Spellbinders is what I've used to make these beautiful cards. Keep reading to learn how.
I don't know about you, but there is something about the water – and especially seahorses – that I am drawn to. Maybe it's because I live on the Gulf Coast. But anyway, it is so fun to work with this set. And, I'm going to share just what I did for each one of the cards and the supplies too.
Seahorse Kisses: Gilted Fishnet Thinking Of You Card
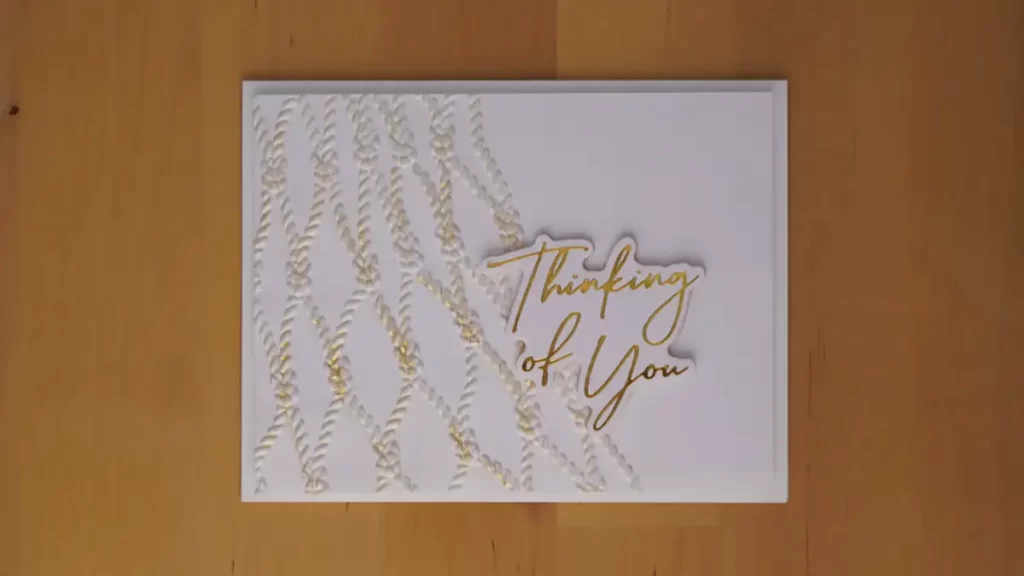
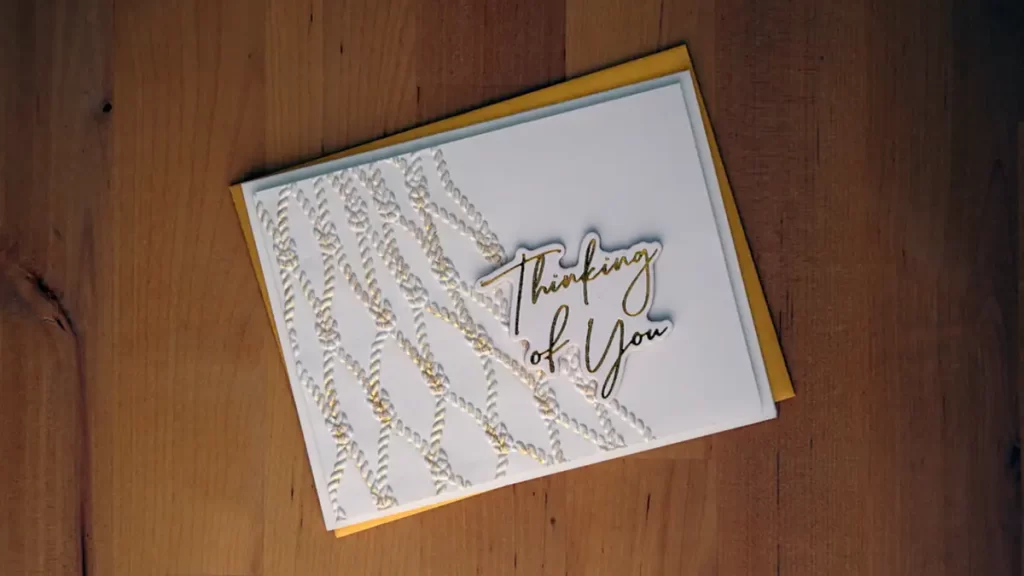
This clean and simple card is elegant with its foiled sentiment and the gold sparkle on the fishnet.
Seahorse Kisses – Embossing
To create the card, we'll begin by embossing the background. And to do so, we'll spritz a half sheet of white layering cardstock with water and then we'll put it in the fishnet embossing folder making sure that it is straight in the folder. Then, following the manufacturer's instructions for your die-cutting and embossing machine, create a sandwich for 3D embossing folders and run the sandwich through your die-cutting and embossing machine. Remove the cardstock from the embossing folder to reveal the beautifully embossed image that we've produced. Set it aside to let it dry.
Seahorse Kisses – Hot Foiling
While we're waiting for the background to dry, we will foil the sentiment. Hot foiling may seem daunting, but it is quite simple and produces beautiful results. You always want to follow the instructions that come with your own hot foil system. But, there are a couple of things that you can do to help ensure that you have good results.
We'll go ahead and turn on the hot foiling machine and let it heat up. The key to high-quality foiling is to ensure that your machine is good and hot before you begin. So, that means that it is ok to heat the machine even after the lights come on. As the foiling system heats up, we'll prepare our project to be foiled.
Hot Foil Sandwich
We use Spellbinders hot foil system, Glimmer, and as we do with die-cutting, we will use a sandwich to hot foil as well. Here is what makes up our sandwich from bottom to top (the bottom layer is the first bulleted item.
- Hot Foil Plate (foiling side up)
- Foil (pretty side facing down) trimmed to close to the hot foil plate
- Cardstock
- Thin Shim
- Cardstock Shim
- Spacer shim
It is helpful to tape the foil to the cardstock that you are foiling and then tape the hot foil plate to the foil and cardstock. As a result, this will keep things from shifting so your sentiment will be where you want it and the plate remains covered by the foil. HINT: trim the foil close to where the size of the plate – this should eliminate foil transferring in places you don't want it to be.
Now, we'll wait for the machine to come up to the desired temperature. After the “Platform Ready” light comes on place the hot foil plate, foil, and cardstock down on the hot platform The hot foil plate should be laying on the platform. Following that, we'll tap the timer button and wait for the “Ready” button to light.
Once lit, then we'll pull on the handle to remove the heating plate from the machine. Then, we'll add the rest of the sandwich. And then, we'll run the whole thing through our die-cutting machine.
Only run the sandwich through your die-cutting and embossing machine once to keep extra foil from transferring to the cardstock.
Die-cutting
And now, we will die-cut out the sentiment with the coordinating die.
By now, the background should be dry. If it's not, you can hit it with your heat gone to speed up the drying process. And then, we'll add a little bling by using a gold shimmer brush on the fishnet.
All that is left to do is trim the background to 4″ x 5 1/4″ when the shimmery painting is dry. HINT: If you are careful, you can get two card panels from your embossed half sheet of cardstock, but you may want to trim first and then add the bling if you are going to do that. This card uses the top half of the embossed image. And then, we'll pop it and the sentiment up with a foam sheet.
Supplies
The following list may contain affiliate links. If you purchase something by following a link on this page, I may receive a small commission at no extra cost to you. Thank you for supporting my blog.
- Cardstock: Card base – Neenah Classic Crest 110lb Solar White; Card panel – Neenah Classic Crest 80lb Solar White
- Embossing Folder: Spellbinders Cast Away 3D Embossing Folder
- Hot Foil Plate: Spellbinders Seahorse Kisses Sentiments Hot Foil Plate & Die Set
- Sprayer: Tim Holtz Distress Sprayer
- Die-cutting and Embossing Machine: Spellbinders Platinum 6
- Hot Foil System: Spellbinders Glimmer
- Adhesives: Low tack Tape – Scrapbook.com Mint tape; Foam Sheets – Scrapbook.com Double-sided Adhesive Foam Sheets
- Gold Brush: Nuvo Aqua Shimmer Midas Touch
- Paper Trimmer: Tim Holtz Rotary Media Trimmer
Seahorse Kisses – Simply Amazing Seahorse Card
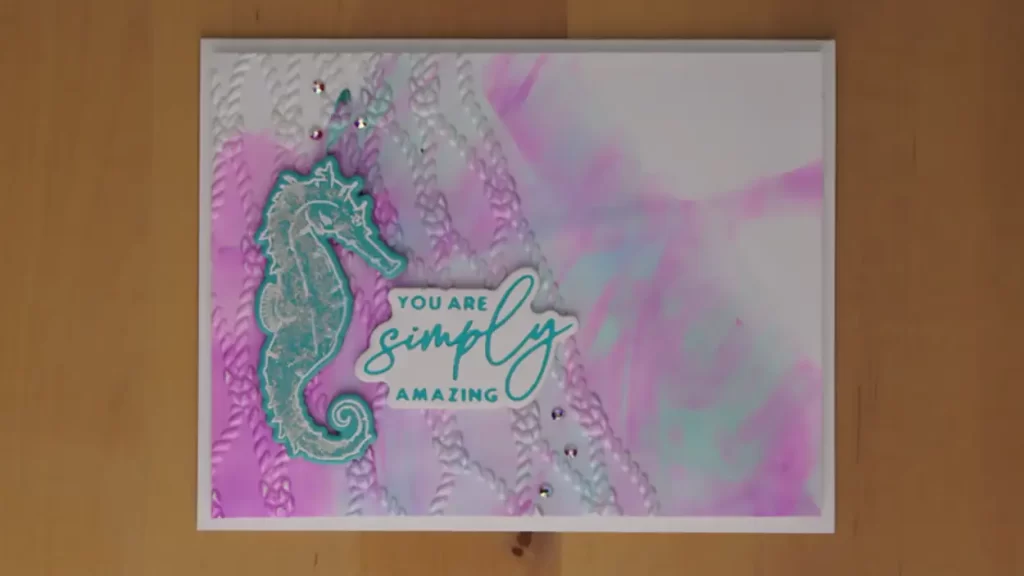
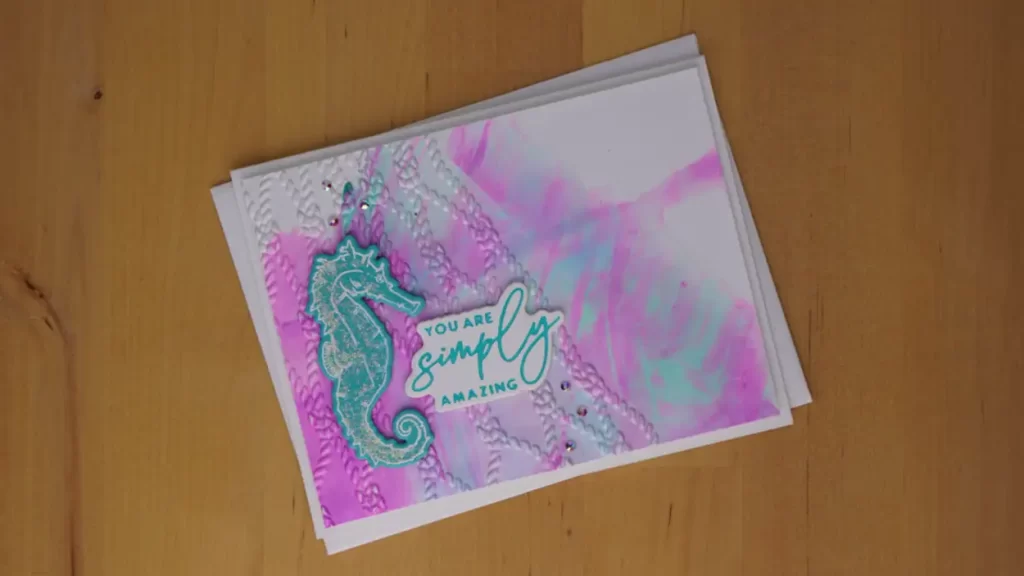
This was an experiment. The background that I use for this card is actually a couple of different colors of an acrylic medium that I used for stenciling a couple of weeks ago. I didn't want to waste the paste because it was so pretty. So I just spread it on a spare piece of cardstock and left it to dry.
For example, the experiment is to emboss the cardstock with paste on it with a 3D embossing folder. And it is a success! Just like for the first card, we just want to trim down the background to 4″ x 5 1/4″ and pop it up on a white A2 card base with a double-sided adhesive foam sheet.
Seahorse Kisses – Heat Embossing
Next, we'll heat emboss the seahorse onto a scrap of teal cardstock with white embossing powder. Next, we'll die-cut it with the coordinating die. And, we'll cut two more from teal and then layer them up behind the heat-embossed one with liquid glue. Once that's done, we'll add some bling to him with a glitter brush.
Now, we'll hot foil our sentiment just like we did for the first card, but we'll use teal foil for this one. And then we'll die-cut it with the coordinating die plus two more from white cardstock and then we'll layer them together with liquid glue.
To finish up the card we'll position the seahorse and the sentiment where we want them to be and then attach them with liquid glue. The mutli-thickness of the layers helps to give the card more dimension. And finally, we'll add some more sparkle to the card by attaching a couple of crystals in threes with liquid glue.
Supplies
The following list may contain affiliate links. If you purchase something by following a link on this page, I may receive a small commission at no extra cost to you. Thank you for supporting my blog.
- Cardstock: Cardbase – Neenah Classic Crest 110lb Solar White; Card Panel – Neenah Classic Crest 80lb Solar White; Teal Cardstock – Spellbinders Teal Topaz
- Embossing Folder: Spellbinders Cast Away 3D Embossing Folder
- Embossing Powder: Spellbinders White
- Glitter Brush: Scrapbook.com Clear Glitter Brush
- Heat Gun: Sizzix Dual Speed
- Anti-Static Tool: Cottontail
- Hot Foil: Spellbinders Glimmer Foil Teal
- Paper Trimmer: Tim Holtz Rotary Media Trimmer
- Embellishments: Crystals – Jollin Glue Fix Crystal AB F
Seahorse Kisses – Sea Garden Card
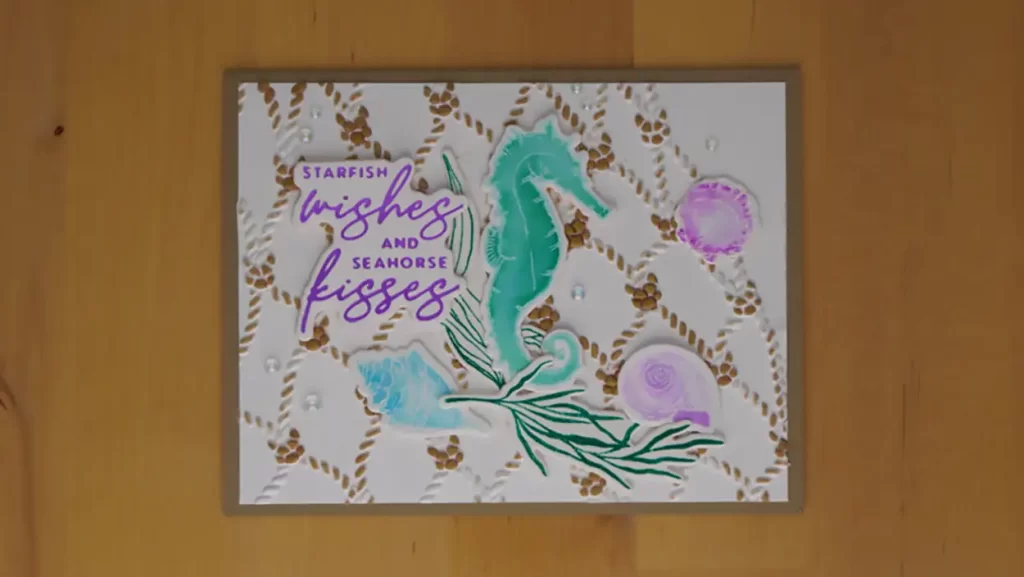
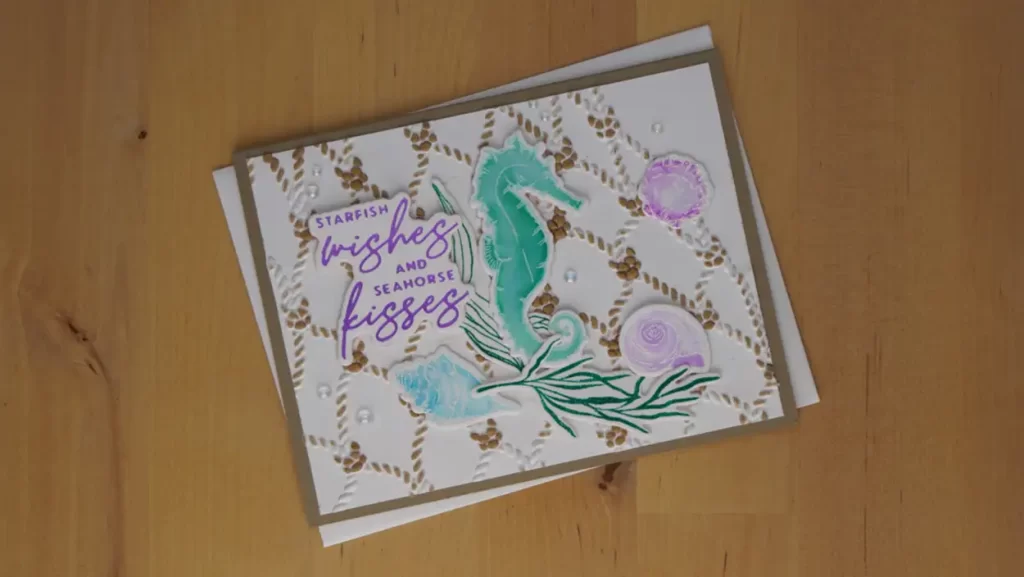
This card uses most of the techniques that we use for the first two cards.
First, we'll use the bottom half of the fishnet background that we embossed for the first card. And then, we'll apply kraft ink directly to the embossing taking care that the ink is only transferred to the fishnet. And, a mini cube works perfectly for this technique. Now, we'll set that aside to dry while we work on the rest of our card.
Some of the bling for this card comes from embossing powder with glitter in it. But first, we'll heat emboss the images for the seahorse and shells with white embossing powder And follow the steps defined for the Simply Amazing Seahorse card. HINT: Use a stamp positioning tool for this to ensure that the second layer of embossing ink lines up exactly with the first one.
Seahorse Kisses Coloring and Finishing the Card
While we have our stamp positioning tool out, let's go ahead and stamp the seaweed stamps with dark teal ink on a couple of scraps of white cardstock. To color the images, we'll add a drop of purple, blue, and teal re-inker to our palette or glass mat. And then we'll add 3 drops of water with a watercolor brush. The trick is to dilute the ink with the water to get a beautiful pastel and then add it to your images making sure to use some white spaces where the light hits your images.
We'll repeat for each of the images making sure to clean our brush between colors. Let the coloring dry before going on to the next won't take long.
Next, we'll hot foil the sentiment just as we did for the first two cards only we'll use lavender foil.
To complete the card, we'll trim the background to 4″ x 5 1/4″. And then, we'll fasten it to a white A2-size card base with a tape runner. Next, we'll arrange all everything else just the way we want it on the card. Following that, we'll fasten each piece with liquid glue. And finally, we'll add some pretty bubbles also with the liquid glue.
Supplies
The following list may contain affiliate links. If you purchase something by following a link on this page, I may receive a small commission at no extra cost to you. Thank you for supporting my blog.
- Cardstock: Card base – Neenah Classic Crest 110lb Solar White; Card panel – Neenah Classic Crest 80lb Solar White
- Embossing Folder: Spellbinders Cast Away 3D Embossing Folder
- Re-inker: Altenew – Midnight Violet, Volcano Lake; Hero Arts – Summer Sky
- Watercolor Brush: Altenew Fine
- Hot Foil Plate: Spellbinders Seahorse Kisses Sentiments Hot Foil Plate & Die Set
- Sprayer: Tim Holtz Distress Sprayer
- Die-cutting and Embossing Machine: Spellbinders Platinum 6
- Hot Foil System: Spellbinders Glimmer
- Adhesives: Low tack Tape – Scrapbook.com Mint tape; Tape Runner: Spellbinders Tape Runner
- Gold Brush: Nuvo Aqua Shimmer Midas Touch
- Paper Trimmer: Tim Holtz Rotary Media Trimmer
- Embossing Powder: Wow Sparkling Snow
- Stamp Positioning Tool: Misti
- Embellishments: Sunny Studios Iridescent Bubbles
Colored Pencil Colored Foiled Seahorse Card
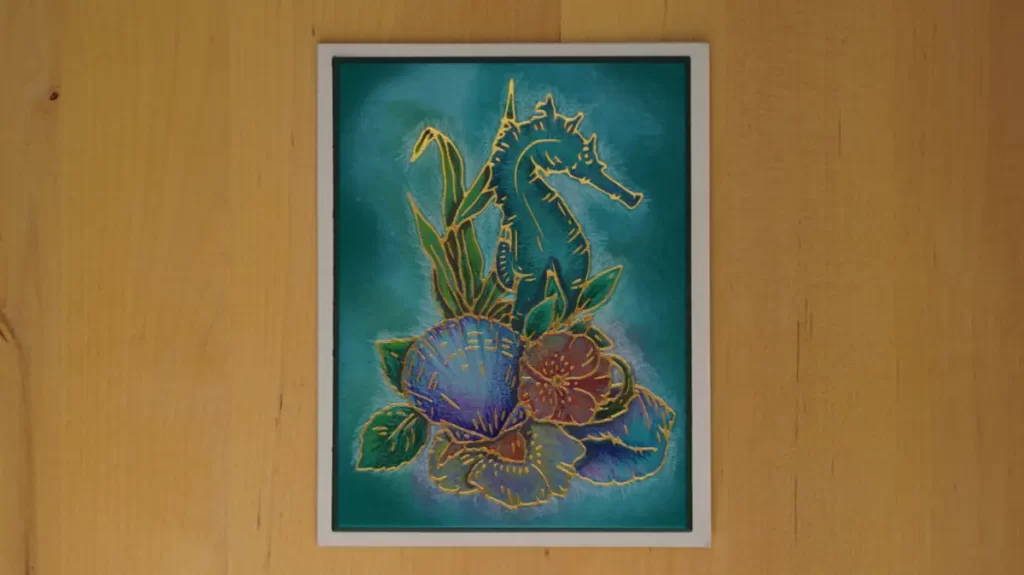
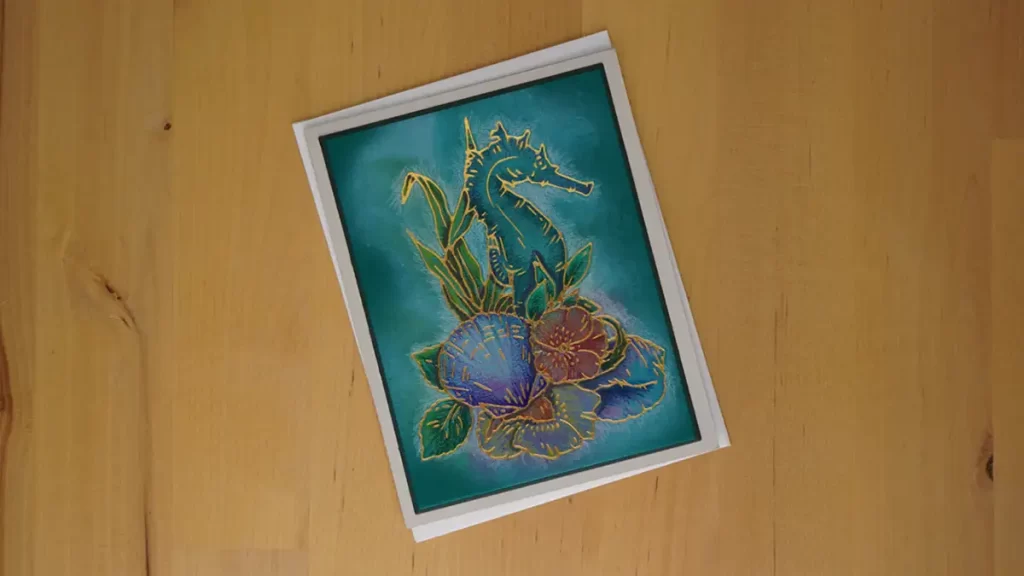
This is a card that you can use for just about any occasion. And, for anyone too.
To create it, we'll begin by hot-foiling the image onto an A2-sized dark teal cardstock with gold foil.
Seahorse Kisses Background
Next, we'll blend white pigment ink over the image using circular motions. We do this because we want to lighten up the images so that we can color them. And, you don't have to stay inside the lines, in fact, it's better if you don't. As a result, you get a pretty halo effect.
Next, we'll lightly blend shimmery ink over the seahorse, and the leaves to give some color to them. We'll use a light green for some of the water foliage and a darker green for the others. And then, we'll use a teal for the seahorse.
Coloring
And, we'll follow that by coloring the seahorse, the greenery, the shells, and the flowers with colored pencils. I suggest that you select three tones that you want to use for each. And then, start with the darkest one to create the shadows – or the areas that roll towards the back. And, you want to use a very sharp pencil with little flicks from the outline toward the center.
Next, blend the mid-tone into the shadow and then lightly add the lightest tone. Be sure to leave some white or the lightest color in the areas that are closest to a light source. And, the last thing to do that will really punch out the focal point is to use a white color pencil and just lightly color all the way around the image on the outside of all of the outlines.
Now, to finish up the card, we'll trim a piece of very dark green cardstock to 3 7/8″ x 5 1/8″. And then, we'll trim our card panel to 3 3/4″ x 5″. HINT: You can use rectangle dies to ensure that your pieces are square. And then, we'll fasten them together with a tape runner. And to finish the card off, we'll center the whole thing on a gray A2 size card base and attach it with the tape runner as well.
Supplies
The following list may contain affiliate links. If you purchase something by following a link on this page, I may receive a small commission at no extra cost to you. Thank you for supporting my blog.
- Cardstock: Card base – Neenah Classic Crest 110lb Solar White; Card panel – Spellbinders Blue Spruce
- Hot Foil Plate: Spellbinders Glimmer Seahorse Floral Hot Foil Plate
- Ink: Gina K Designs White Pigment Ink; Shimmer Ink: Prism Evergreen, Peacock Green, Blue Lagoon
- Blending Brushes: Gina K Designs Standard
- Die-cutting and Embossing Machine: Spellbinders Platinum 6
- Hot Foil System: Spellbinders Glimmer
- Adhesives: Low tack Tape – Scrapbook.com Mint tape; Tape Runner: Spellbinders Tape Runner
- Paper Trimmer: Tim Holtz Rotary Media Trimmer
- Colored Pencils: Prismacolor Premier – PC928 Blueish Pink, PC926 Crimson Red, PC918 Orange, PC922 Poppy Red, PC988 Marine Green, PC1090 Kelp Green, PC1026 Greyed Lavender, PC932 Violet, PC901 Indigo Blue, PC909 Grass Green, PC907 Peacock Green, PC908 Dark Green, PC 995 Mulberry, PC1005 Limeppol, PC989 Chartreasue, PC916 Canary Yellow, PC938
Looking For More Dreamy Inspiration?
Check out How To Make A Card Fit For A Princess
