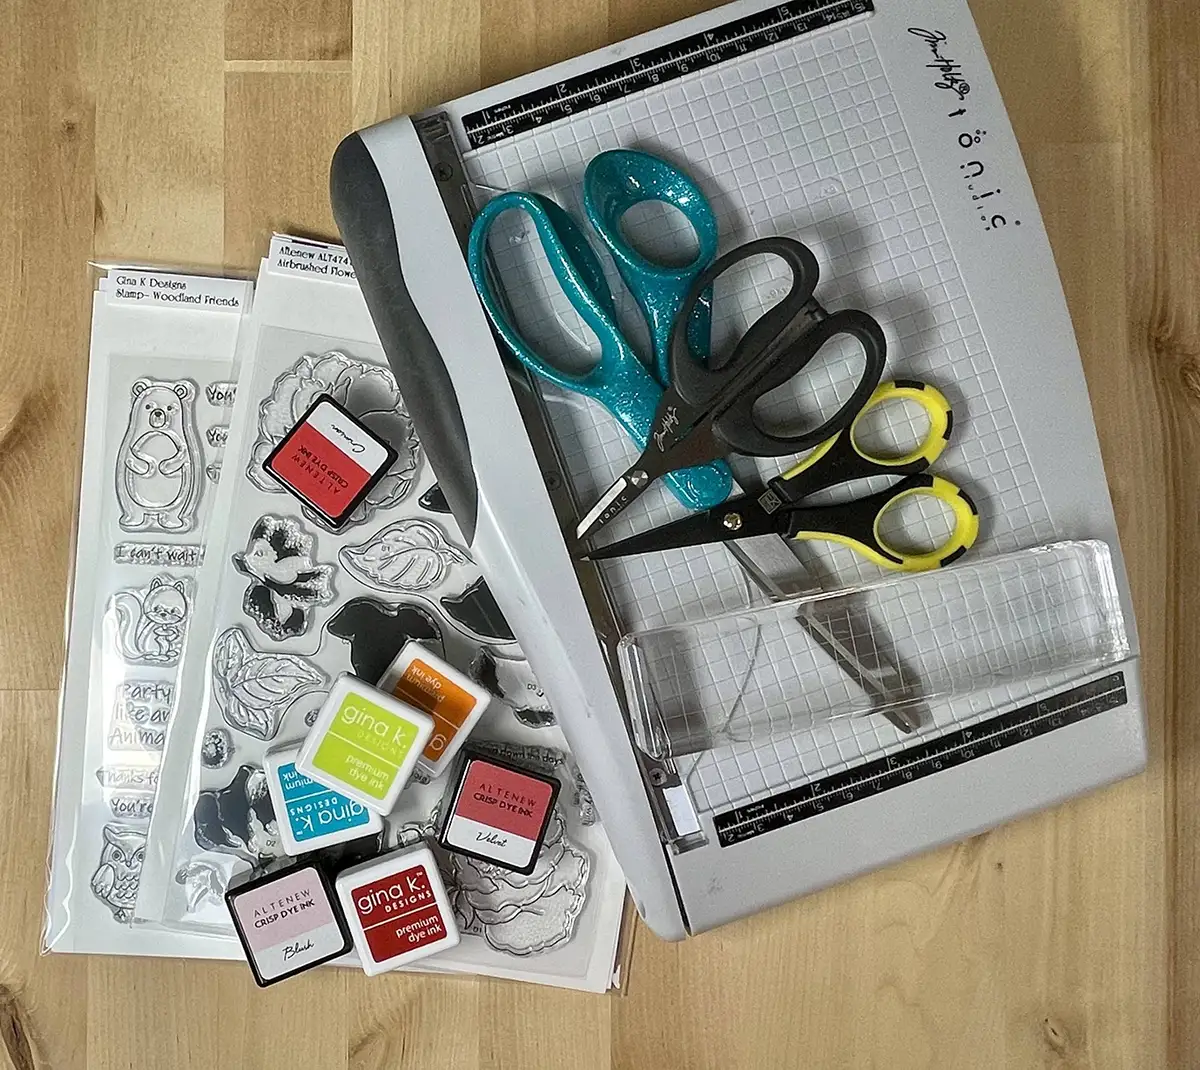
Tool Kit: Learn here what to include in your cardmaking tool kit and why. You'll also find recommendations and links to where to get them.
This is quite a lengthy post but has lots of info for you to get started on the right foot.
Tool Kit: Stamps
A technique that is a mainstay in cardmaking is to use a stamp and some ink to transfer images on your cards. Stamps come in a variety of types. I'll describe a couple of them here:
Clear Photopolymer Stamps
Also known as polymer stamps. These stamps are kind of “sticky”. Therefore, ink sticks to them very well resulting in a crisp stamped image. Additionally, the sticky nature of these stamps is used to attach the stamp to an acrylic block or stamp positioner (see descriptions below).
Some inks will stain this type of stamp however the stain doesn't hurt the stamp nor does it affect the image that you are stamping. These stamps are also light-sensitive and will turn yellow if left out or stored in or near sunlight.
Rubber Stamps
Sometimes referred to as red rubber stamps, these stamps consist of a piece of rubber with raised letters or images on it. These stamps are attached to a wood block or handle therefore an acrylic block or stamp positioner is not required to use for transferring their images onto a surface.
Cling Stamps
Kind of a hybrid that has the benefits of clear stamps and rubber stamps. They're like rubber stamps without the woodblock or backer. In its place is a sticky surface that will “cling” to an acrylic block or stamp positioner.
Acrylic Stamps
Similar to clear Photopolymer stamps but lighter, stretchier, and don't produce the same level of quality in your images.
Stamp Recommendations
Many crafting companies provide new stamps and crafty products on a monthly basis (they call them releases). It is very easy to get caught up in buying up the items in each of the releases because there are so many great products being introduced. However, to start off you don't need all of the latest and greatest.
My recommendation is that you look at the stamps offered by a number of different companies and then select a couple that you like. For example a floral stamp, and a cutesy stamp, or one with critters on it. While you're waiting on your stamps to arrive start thinking of all the ways that you can use your new stamps to create different kinds of cards with them.
Here are just a couple of companies that I like and recommend (there are many, many more wonderful companies to choose from).
Please note that these companies have not given me stamps to recommend and promote nor do they pay me to promote their products. They do however pay me a commission should you decide to buy something from the links in this article.
The following list may contain affiliate links. If you purchase something by following a link on this page, I may receive a small commission at no extra cost to you. Thank you for supporting my blog.
Altenew – Beautiful florals and more – Layered Stamps – Nice Sentiments
Gina K Designs – Beautiful florals – Beautiful butterflies – Unique images – Nice Sentiments
Colorado Craft Company – Darling Storybook Critters – Very artful
Lawn Fawn – Darling Critters and sentiments
Scrapbook.Com – Large variety of different suppliers
Tool Kit: Stamping Tools
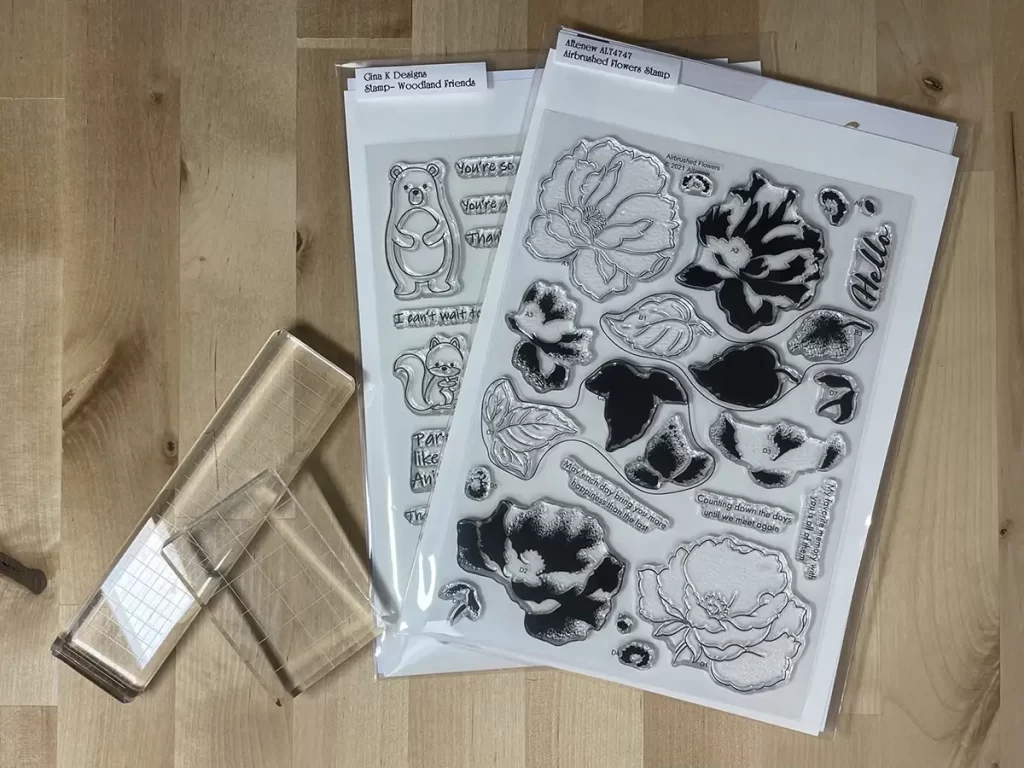
As described in the stamp section above there are a number of stamp types that require something else in order to use them. Both acrylic blocks and stamp positioning tools are used to attach a clear stamp or a cling stamp in order to transfer the image.
Have to Have
Acrylic Blocks- You have to have something to back up and support your clear stamps. Acrylic blocks are used to transfer the stamp images to whatever you're stamping on. They come in all kinds of shapes and sizes which allows you to select a block that is just slightly larger than the stamp you are using in order to create a top-quality image.
Acrylic blocks are relatively inexpensive. The ones that have grids on them help to line up your images so that they are straight and even.
I recommend that you either start with a set like the one that Altenew has or just start with a 2″ x 3″ and a circle like Gina K Designs offers. You can always add more acrylic blocks later.
https://shareasale.com/r.cfm?b=813537&u=2913752&m=63125&urllink=https%3A%2F%2Fginakdesigns%2Ecom%2Fproducts%2Facrylic%2Dblock%2Dcomfort%2Dblocks%2Dset%2Dof%2D5%3F%5Fpos%3D2%26%5Fsid%3Dc4abfd0ce%26%5Fss%3Dr&afftrack=ACRYLIC BLOCK- Comfort Block- Round 2.75″
from: Gina K. Designs, LLC
Nice to Have
Stamp Positioning Tool
A stamp positioner tool helps with stamping in several ways:
- Ensures that your sentiments and stamps are straight and parallel with a side of the card (as necessary and with the help of a transparency grid – see description below);
- Allows for restamping in exactly the same spot – this is helpful when your stamped image isn't complete or isn't dark enough. You can reink and then restamp the image to fill in the voids without worrying about stamping in the exact same place as the first stamp
- Helps with more advanced tools like Gina K Designs Wreath Builder or Concord & 9th's Turnabout Jig – these are two templates that can be used to create fun wreaths and swags.
Recommended: Stamp Positioner: My Sweet Petunia Misti (Misti stands for Most incredible stamping tool invented). These positioners come in three sizes: mini, original, and 12 x 12. These positioners are kind of pricey so you should decide on what to get based on what you think you'll be making. I have the original and the mini and use the mini for almost everything.
document.write(decodeURIComponent(‘%3Cscript%3E(function(htm)%7B%0D%0Afunction%20%24id()%7B%0D%0Avar%20id%3D%27ShareASale-%27%2BMath.random().toString(36).substr(2).toUpperCase()%3B%0D%0Areturn%20document.getElementById(id)%3F%24id()%3Aid%3B%0D%0A%7D%0D%0Avar%20ifr%2Cdoc%2Cid%20%3D%20%24id()%3B%0D%0Adocument.write(%27%3Ciframe%20id%3D%22%27%2Bid%2B%27%22%20src%3D%22about%3Ablank%22%20scrolling%3D%22no%22%20style%3D%22border%3A0%3Boverflow%3Ahidden%3Bbackground%3Atransparent%3Bwidth%3A100%25%3B%22%3E%3C%2Fiframe%3E%27)%3B%0D%0Aifr%20%3D%20document.getElementById(id)%3B%0D%0Adoc%20%3D%20ifr.contentDocument%7C%7Cifr.contentWindow.document%3B%0D%0Adoc.open()%3B%0D%0Adoc.write(%27%3C!DOCTYPE%20html%3E%3Chtml%3E%3Cmeta%20charset%3D%22UTF-8%22%3E%3Cbody%20style%3D%22height%3A100%25%3Bmargin%3A0%3Bpadding%3A0%3Bfont-family%3Asans-serif%3Bfont-size%3A12pt%3B%22%3E%27%2Bhtm%2B%27%3C%2Fbody%3E%3C%2Fhtml%3E%27)%3B%0D%0Adoc.close()%3B%0D%0Awindow.setTimeout((%0D%0Afunction(I%2CD)%7B%0D%0Avar%20s%3D%20I.style%2C%20%0D%0Ab%20%3D%20doc.body%3B%0D%0As.width%20%3D%20b.scrollWidth%20%2B%20%27px%27%3B%0D%0As.height%20%3D%20b.scrollHeight%20%2B%20%27px%27%3B%0D%0A%7D%0D%0A).bind(null%2C%20ifr%2C%20doc)%2C200)%3B%0D%0A%7D)(decodeURIComponent(%27%253Ca%2520href%253D%2522https%253A%252F%252Fshareasale.com%252Fm-pr.cfm%253Fmerchantid%253D7429%2526amp%253Buserid%253D2913752%2526amp%253Bproductid%253D1212287628%2526amp%253Bafftrack%253D%2522%2520target%253D%2522_blank%2522%253E%253Cimg%2520alt%253D%2522Mini%2520MISTI%2520-%2520Most%2520Incredible%2520Stamp%2520Tool%2520Invented%2522%2520src%253D%2522https%253A%252F%252Fwww.scrapbook.com%252Fproducts%252Fcache%252FSBC_msp-64781_249751_0.jpg%2522%2520border%253D%25220%2522%253E%253C%252Fa%253E%27))%3B%3C%2Fscript%3E'));However, there are times when I need the original due to the size of the product I'm making.
Transparency Grid: If you get a stamping positioning tool you'll want to go ahead and get a transparency grid. This is basically a piece of acetate printed with an A2 rectangle and a grid inside of it. You can use it over your card to make sure that your images and sentiments are centered and/or straight.
Tool Kit: Cutting Tools

It goes without saying that you have to have a way to cut the cardstock and trim that you use while making cards. But when you're just starting out you may need some help picking out just what you really need because there is a lot to choose from.
Have to Have
There are three types of scissors that every crafter really has to have:
A basic pair of scissors that have a long blade – these scissors can be used for just about anything. The longer blade helps with cutting straight longer lengths. I also use my basic scissors to cut foam tape and foam sheet pieces. I do this because the bigger blades are easier to clean. These can be scissors that you already have. Recommendation: Fiskars
Craft Scissors – used for hand trimming paper and cardstock, twine, embellishments, etc…, Recommendation: Tim Holtz
document.write(decodeURIComponent(‘%3Cscript%3E(function(htm)%7B%0D%0Afunction%20%24id()%7B%0D%0Avar%20id%3D%27ShareASale-%27%2BMath.random().toString(36).substr(2).toUpperCase()%3B%0D%0Areturn%20document.getElementById(id)%3F%24id()%3Aid%3B%0D%0A%7D%0D%0Avar%20ifr%2Cdoc%2Cid%20%3D%20%24id()%3B%0D%0Adocument.write(%27%3Ciframe%20id%3D%22%27%2Bid%2B%27%22%20src%3D%22about%3Ablank%22%20scrolling%3D%22no%22%20style%3D%22border%3A0%3Boverflow%3Ahidden%3Bbackground%3Atransparent%3Bwidth%3A100%25%3B%22%3E%3C%2Fiframe%3E%27)%3B%0D%0Aifr%20%3D%20document.getElementById(id)%3B%0D%0Adoc%20%3D%20ifr.contentDocument%7C%7Cifr.contentWindow.document%3B%0D%0Adoc.open()%3B%0D%0Adoc.write(%27%3C!DOCTYPE%20html%3E%3Chtml%3E%3Cmeta%20charset%3D%22UTF-8%22%3E%3Cbody%20style%3D%22height%3A100%25%3Bmargin%3A0%3Bpadding%3A0%3Bfont-family%3Asans-serif%3Bfont-size%3A12pt%3B%22%3E%27%2Bhtm%2B%27%3C%2Fbody%3E%3C%2Fhtml%3E%27)%3B%0D%0Adoc.close()%3B%0D%0Awindow.setTimeout((%0D%0Afunction(I%2CD)%7B%0D%0Avar%20s%3D%20I.style%2C%20%0D%0Ab%20%3D%20doc.body%3B%0D%0As.width%20%3D%20b.scrollWidth%20%2B%20%27px%27%3B%0D%0As.height%20%3D%20b.scrollHeight%20%2B%20%27px%27%3B%0D%0A%7D%0D%0A).bind(null%2C%20ifr%2C%20doc)%2C200)%3B%0D%0A%7D)(decodeURIComponent(%27%253Ca%2520href%253D%2522https%253A%252F%252Fshareasale.com%252Fm-pr.cfm%253Fmerchantid%253D7429%2526amp%253Buserid%253D2913752%2526amp%253Bproductid%253D1212288951%2526amp%253Bafftrack%253D%2522%2520target%253D%2522_blank%2522%253E%253Cimg%2520alt%253D%2522Tonic%2520Studios%2520-%2520Tim%2520Holtz%2520-%2520Non-Stick%2520Micro%2520Serrated%2520Scissors%2520-%25209.5%2520Inch%2520Titanium%2520Shears%2522%2520src%253D%2522https%253A%252F%252Fwww.scrapbook.com%252Fproducts%252Fcache%252FSBC_pp-to-819_43049_0.jpg%2522%2520border%253D%25220%2522%253E%253C%252Fa%253E%27))%3B%3C%2Fscript%3E'));Scissors for fussy cutting – used to cut out an image or design with intricate detail. If you don't have a die-cutting machine or if you don't have a die for a particular stamp but want the image cut out then you can use your fussy cut scissors to cut it out instead. Recommendation: Cutter Bee
document.write(decodeURIComponent(‘%3Cscript%3E(function(htm)%7B%0D%0Afunction%20%24id()%7B%0D%0Avar%20id%3D%27ShareASale-%27%2BMath.random().toString(36).substr(2).toUpperCase()%3B%0D%0Areturn%20document.getElementById(id)%3F%24id()%3Aid%3B%0D%0A%7D%0D%0Avar%20ifr%2Cdoc%2Cid%20%3D%20%24id()%3B%0D%0Adocument.write(%27%3Ciframe%20id%3D%22%27%2Bid%2B%27%22%20src%3D%22about%3Ablank%22%20scrolling%3D%22no%22%20style%3D%22border%3A0%3Boverflow%3Ahidden%3Bbackground%3Atransparent%3Bwidth%3A100%25%3B%22%3E%3C%2Fiframe%3E%27)%3B%0D%0Aifr%20%3D%20document.getElementById(id)%3B%0D%0Adoc%20%3D%20ifr.contentDocument%7C%7Cifr.contentWindow.document%3B%0D%0Adoc.open()%3B%0D%0Adoc.write(%27%3C!DOCTYPE%20html%3E%3Chtml%3E%3Cmeta%20charset%3D%22UTF-8%22%3E%3Cbody%20style%3D%22height%3A100%25%3Bmargin%3A0%3Bpadding%3A0%3Bfont-family%3Asans-serif%3Bfont-size%3A12pt%3B%22%3E%27%2Bhtm%2B%27%3C%2Fbody%3E%3C%2Fhtml%3E%27)%3B%0D%0Adoc.close()%3B%0D%0Awindow.setTimeout((%0D%0Afunction(I%2CD)%7B%0D%0Avar%20s%3D%20I.style%2C%20%0D%0Ab%20%3D%20doc.body%3B%0D%0As.width%20%3D%20b.scrollWidth%20%2B%20%27px%27%3B%0D%0As.height%20%3D%20b.scrollHeight%20%2B%20%27px%27%3B%0D%0A%7D%0D%0A).bind(null%2C%20ifr%2C%20doc)%2C200)%3B%0D%0A%7D)(decodeURIComponent(%27%253Ca%2520href%253D%2522https%253A%252F%252Fshareasale.com%252Fm-pr.cfm%253Fmerchantid%253D7429%2526amp%253Buserid%253D2913752%2526amp%253Bproductid%253D1212286382%2526amp%253Bafftrack%253D%2522%2520target%253D%2522_blank%2522%253E%253Cimg%2520alt%253D%2522Cutter%2520Bee%2520Scissors%2522%2520src%253D%2522https%253A%252F%252Fwww.scrapbook.com%252Fproducts%252Fcache%252FSBC_EK-CB01_0.jpg%2522%2520border%253D%25220%2522%253E%253C%252Fa%253E%27))%3B%3C%2Fscript%3E'));When you have to have something that produces straight cuts, you will need a trimmer to do so. There are two different kinds that you can choose from:
Guillotine Trimmer – the traditional paper cutter with a blade that you can lift up to load the paper in and push down to cut the paper. Although there are guards on all guillotine paper cutter/trimmers you still have to be very careful while using this type of paper cutter. Recommendation: Tim Holtz
document.write(decodeURIComponent(‘%3Cscript%3E(function(htm)%7B%0D%0Afunction%20%24id()%7B%0D%0Avar%20id%3D%27ShareASale-%27%2BMath.random().toString(36).substr(2).toUpperCase()%3B%0D%0Areturn%20document.getElementById(id)%3F%24id()%3Aid%3B%0D%0A%7D%0D%0Avar%20ifr%2Cdoc%2Cid%20%3D%20%24id()%3B%0D%0Adocument.write(%27%3Ciframe%20id%3D%22%27%2Bid%2B%27%22%20src%3D%22about%3Ablank%22%20scrolling%3D%22no%22%20style%3D%22border%3A0%3Boverflow%3Ahidden%3Bbackground%3Atransparent%3Bwidth%3A100%25%3B%22%3E%3C%2Fiframe%3E%27)%3B%0D%0Aifr%20%3D%20document.getElementById(id)%3B%0D%0Adoc%20%3D%20ifr.contentDocument%7C%7Cifr.contentWindow.document%3B%0D%0Adoc.open()%3B%0D%0Adoc.write(%27%3C!DOCTYPE%20html%3E%3Chtml%3E%3Cmeta%20charset%3D%22UTF-8%22%3E%3Cbody%20style%3D%22height%3A100%25%3Bmargin%3A0%3Bpadding%3A0%3Bfont-family%3Asans-serif%3Bfont-size%3A12pt%3B%22%3E%27%2Bhtm%2B%27%3C%2Fbody%3E%3C%2Fhtml%3E%27)%3B%0D%0Adoc.close()%3B%0D%0Awindow.setTimeout((%0D%0Afunction(I%2CD)%7B%0D%0Avar%20s%3D%20I.style%2C%20%0D%0Ab%20%3D%20doc.body%3B%0D%0As.width%20%3D%20b.scrollWidth%20%2B%20%27px%27%3B%0D%0As.height%20%3D%20b.scrollHeight%20%2B%20%27px%27%3B%0D%0A%7D%0D%0A).bind(null%2C%20ifr%2C%20doc)%2C200)%3B%0D%0A%7D)(decodeURIComponent(%27%253Ca%2520href%253D%2522https%253A%252F%252Fshareasale.com%252Fm-pr.cfm%253Fmerchantid%253D7429%2526amp%253Buserid%253D2913752%2526amp%253Bproductid%253D1212291096%2526amp%253Bafftrack%253D%2522%2520target%253D%2522_blank%2522%253E%253Cimg%2520alt%253D%2522Tonic%2520Studios%2520-%2520Tim%2520Holtz%2520-%25208.5%2520Inch%2520Comfort%2520Trimmer%2522%2520src%253D%2522https%253A%252F%252Fwww.scrapbook.com%252Fproducts%252Fcache%252FSBC_ton-160e_43051_0.jpg%2522%2520border%253D%25220%2522%253E%253C%252Fa%253E%27))%3B%3C%2Fscript%3E'));Rotary Trimmer – has a sliding blade and a ruler-type attachment to measure off where to make your cuts.
The type you choose is really just personal preference.
Nice To Have
Die-cutting machines are probably the single most expensive tool that we use in cardmaking. But they are great for making cuts quickly, accurately, and easily. And, you can also use them to do embossing with dies or embossing folders.
There are many, many brands and sizes to choose from. They all work pretty well. Before you buy one you'll need to decide if you want one that is electric or manual. The electric ones do a fantastic job and are especially nice for people who don't have much strength or who suffer from issues like arthritis or carpal tunnel. You can use the manual ones anywhere you want to take them and are probably a bit more portable.
The next decision that you need to make is on the size you need. Many die-cutting machines come in three sizes; mini, regular, and large. If you choose a mini you will only be able to cut with smaller dies. Large, over 6″, is something that you'll need if you'll be working with very large images and dies. The regular size like the Spellbinders Platinum 6, the Sizzix Big Shot, and Gemini Jr. can cut just about anything that most card makers would need to cut.
Die-cutting Machine Recommendations
Electric – regular size: Gemini Jr.
document.write(decodeURIComponent(‘%3Cscript%3E(function(htm)%7B%0D%0Afunction%20%24id()%7B%0D%0Avar%20id%3D%27ShareASale-%27%2BMath.random().toString(36).substr(2).toUpperCase()%3B%0D%0Areturn%20document.getElementById(id)%3F%24id()%3Aid%3B%0D%0A%7D%0D%0Avar%20ifr%2Cdoc%2Cid%20%3D%20%24id()%3B%0D%0Adocument.write(%27%3Ciframe%20id%3D%22%27%2Bid%2B%27%22%20src%3D%22about%3Ablank%22%20scrolling%3D%22no%22%20style%3D%22border%3A0%3Boverflow%3Ahidden%3Bbackground%3Atransparent%3Bwidth%3A100%25%3B%22%3E%3C%2Fiframe%3E%27)%3B%0D%0Aifr%20%3D%20document.getElementById(id)%3B%0D%0Adoc%20%3D%20ifr.contentDocument%7C%7Cifr.contentWindow.document%3B%0D%0Adoc.open()%3B%0D%0Adoc.write(%27%3C!DOCTYPE%20html%3E%3Chtml%3E%3Cmeta%20charset%3D%22UTF-8%22%3E%3Cbody%20style%3D%22height%3A100%25%3Bmargin%3A0%3Bpadding%3A0%3Bfont-family%3Asans-serif%3Bfont-size%3A12pt%3B%22%3E%27%2Bhtm%2B%27%3C%2Fbody%3E%3C%2Fhtml%3E%27)%3B%0D%0Adoc.close()%3B%0D%0Awindow.setTimeout((%0D%0Afunction(I%2CD)%7B%0D%0Avar%20s%3D%20I.style%2C%20%0D%0Ab%20%3D%20doc.body%3B%0D%0As.width%20%3D%20b.scrollWidth%20%2B%20%27px%27%3B%0D%0As.height%20%3D%20b.scrollHeight%20%2B%20%27px%27%3B%0D%0A%7D%0D%0A).bind(null%2C%20ifr%2C%20doc)%2C200)%3B%0D%0A%7D)(decodeURIComponent(%27%253Ca%2520href%253D%2522https%253A%252F%252Fshareasale.com%252Fm-pr.cfm%253Fmerchantid%253D7429%2526amp%253Buserid%253D2913752%2526amp%253Bproductid%253D1212293778%2526amp%253Bafftrack%253D%2522%2520target%253D%2522_blank%2522%253E%253Cimg%2520alt%253D%2522Crafter%2527s%2520Companion%2520-%2520Gemini%2520Jr.%2520-%2520Die-Cutting%2520and%2520Embossing%2520Machine%2522%2520src%253D%2522https%253A%252F%252Fwww.scrapbook.com%252Fproducts%252Fcache%252FSBC_nm-314802_278373_0.jpg%2522%2520border%253D%25220%2522%253E%253C%252Fa%253E%27))%3B%3C%2Fscript%3E'));Manual: Spellbinders Platinum 6
New & Improved Platinum SIX Machine with Universal Plate System – 6″ PPaper Arts
from: Spellbinders
Mini: Altenew Mini Blossom
Tool Kit: Work Surface
Nice to Have
Some of the materials that we work with when creating cards can be messy, and some can stain. To protect the table, workbench, or counter that you are working at you may want to get some of these:
Glass Mat – Good strong surface that is easy to clean off (including glue) – Tim Holtz Glass Media Mat
document.write(decodeURIComponent(‘%3Cscript%3E(function(htm)%7B%0D%0Afunction%20%24id()%7B%0D%0Avar%20id%3D%27ShareASale-%27%2BMath.random().toString(36).substr(2).toUpperCase()%3B%0D%0Areturn%20document.getElementById(id)%3F%24id()%3Aid%3B%0D%0A%7D%0D%0Avar%20ifr%2Cdoc%2Cid%20%3D%20%24id()%3B%0D%0Adocument.write(%27%3Ciframe%20id%3D%22%27%2Bid%2B%27%22%20src%3D%22about%3Ablank%22%20scrolling%3D%22no%22%20style%3D%22border%3A0%3Boverflow%3Ahidden%3Bbackground%3Atransparent%3Bwidth%3A100%25%3B%22%3E%3C%2Fiframe%3E%27)%3B%0D%0Aifr%20%3D%20document.getElementById(id)%3B%0D%0Adoc%20%3D%20ifr.contentDocument%7C%7Cifr.contentWindow.document%3B%0D%0Adoc.open()%3B%0D%0Adoc.write(%27%3C!DOCTYPE%20html%3E%3Chtml%3E%3Cmeta%20charset%3D%22UTF-8%22%3E%3Cbody%20style%3D%22height%3A100%25%3Bmargin%3A0%3Bpadding%3A0%3Bfont-family%3Asans-serif%3Bfont-size%3A12pt%3B%22%3E%27%2Bhtm%2B%27%3C%2Fbody%3E%3C%2Fhtml%3E%27)%3B%0D%0Adoc.close()%3B%0D%0Awindow.setTimeout((%0D%0Afunction(I%2CD)%7B%0D%0Avar%20s%3D%20I.style%2C%20%0D%0Ab%20%3D%20doc.body%3B%0D%0As.width%20%3D%20b.scrollWidth%20%2B%20%27px%27%3B%0D%0As.height%20%3D%20b.scrollHeight%20%2B%20%27px%27%3B%0D%0A%7D%0D%0A).bind(null%2C%20ifr%2C%20doc)%2C200)%3B%0D%0A%7D)(decodeURIComponent(%27%253Ca%2520href%253D%2522https%253A%252F%252Fshareasale.com%252Fm-pr.cfm%253Fmerchantid%253D7429%2526amp%253Buserid%253D2913752%2526amp%253Bproductid%253D1212292947%2526amp%253Bafftrack%253D%2522%2520target%253D%2522_blank%2522%253E%253Cimg%2520alt%253D%2522Tonic%2520Studios%2520-%2520Tim%2520Holtz%2520-%2520Glass%2520Media%2520Mat%2522%2520src%253D%2522https%253A%252F%252Fwww.scrapbook.com%252Fproducts%252Fcache%252FSBC_ton-1914e_20933_0.jpg%2522%2520border%253D%25220%2522%253E%253C%252Fa%253E%27))%3B%3C%2Fscript%3E'));Water Media Mat – Non-stick, waterproof, and heat-resistant surface. I use this mat to do all of my ink blending. It holds your card panel in place and it also holds your ink pads in place – Waffle Flower Water Media Mat
document.write(decodeURIComponent(‘%3Cscript%3E(function(htm)%7B%0D%0Afunction%20%24id()%7B%0D%0Avar%20id%3D%27ShareASale-%27%2BMath.random().toString(36).substr(2).toUpperCase()%3B%0D%0Areturn%20document.getElementById(id)%3F%24id()%3Aid%3B%0D%0A%7D%0D%0Avar%20ifr%2Cdoc%2Cid%20%3D%20%24id()%3B%0D%0Adocument.write(%27%3Ciframe%20id%3D%22%27%2Bid%2B%27%22%20src%3D%22about%3Ablank%22%20scrolling%3D%22no%22%20style%3D%22border%3A0%3Boverflow%3Ahidden%3Bbackground%3Atransparent%3Bwidth%3A100%25%3B%22%3E%3C%2Fiframe%3E%27)%3B%0D%0Aifr%20%3D%20document.getElementById(id)%3B%0D%0Adoc%20%3D%20ifr.contentDocument%7C%7Cifr.contentWindow.document%3B%0D%0Adoc.open()%3B%0D%0Adoc.write(%27%3C!DOCTYPE%20html%3E%3Chtml%3E%3Cmeta%20charset%3D%22UTF-8%22%3E%3Cbody%20style%3D%22height%3A100%25%3Bmargin%3A0%3Bpadding%3A0%3Bfont-family%3Asans-serif%3Bfont-size%3A12pt%3B%22%3E%27%2Bhtm%2B%27%3C%2Fbody%3E%3C%2Fhtml%3E%27)%3B%0D%0Adoc.close()%3B%0D%0Awindow.setTimeout((%0D%0Afunction(I%2CD)%7B%0D%0Avar%20s%3D%20I.style%2C%20%0D%0Ab%20%3D%20doc.body%3B%0D%0As.width%20%3D%20b.scrollWidth%20%2B%20%27px%27%3B%0D%0As.height%20%3D%20b.scrollHeight%20%2B%20%27px%27%3B%0D%0A%7D%0D%0A).bind(null%2C%20ifr%2C%20doc)%2C200)%3B%0D%0A%7D)(decodeURIComponent(%27%253Ca%2520href%253D%2522https%253A%252F%252Fshareasale.com%252Fm-pr.cfm%253Fmerchantid%253D7429%2526amp%253Buserid%253D2913752%2526amp%253Bproductid%253D1212298181%2526amp%253Bafftrack%253D%2522%2520target%253D%2522_blank%2522%253E%253Cimg%2520alt%253D%2522Waffle%2520Flower%2520Crafts%2520-%2520Water%2520Media%2520Mat%2522%2520src%253D%2522https%253A%252F%252Fwww.scrapbook.com%252Fproducts%252Fcache%252FSBC_wfc-wft001_229973_0.jpg%2522%2520border%253D%25220%2522%253E%253C%252Fa%253E%27))%3B%3C%2Fscript%3E'));Tool Kit: Adhesive
Adhesives are a must in card making.
Have to Have
Liquid Glue is used for adhering delicate pieces to your card. It is a stronger adhesive – Recommendation: Bearly Art.
document.write(decodeURIComponent(‘%3Cscript%3E(function(htm)%7B%0D%0Afunction%20%24id()%7B%0D%0Avar%20id%3D%27ShareASale-%27%2BMath.random().toString(36).substr(2).toUpperCase()%3B%0D%0Areturn%20document.getElementById(id)%3F%24id()%3Aid%3B%0D%0A%7D%0D%0Avar%20ifr%2Cdoc%2Cid%20%3D%20%24id()%3B%0D%0Adocument.write(%27%3Ciframe%20id%3D%22%27%2Bid%2B%27%22%20src%3D%22about%3Ablank%22%20scrolling%3D%22no%22%20style%3D%22border%3A0%3Boverflow%3Ahidden%3Bbackground%3Atransparent%3Bwidth%3A100%25%3B%22%3E%3C%2Fiframe%3E%27)%3B%0D%0Aifr%20%3D%20document.getElementById(id)%3B%0D%0Adoc%20%3D%20ifr.contentDocument%7C%7Cifr.contentWindow.document%3B%0D%0Adoc.open()%3B%0D%0Adoc.write(%27%3C!DOCTYPE%20html%3E%3Chtml%3E%3Cmeta%20charset%3D%22UTF-8%22%3E%3Cbody%20style%3D%22height%3A100%25%3Bmargin%3A0%3Bpadding%3A0%3Bfont-family%3Asans-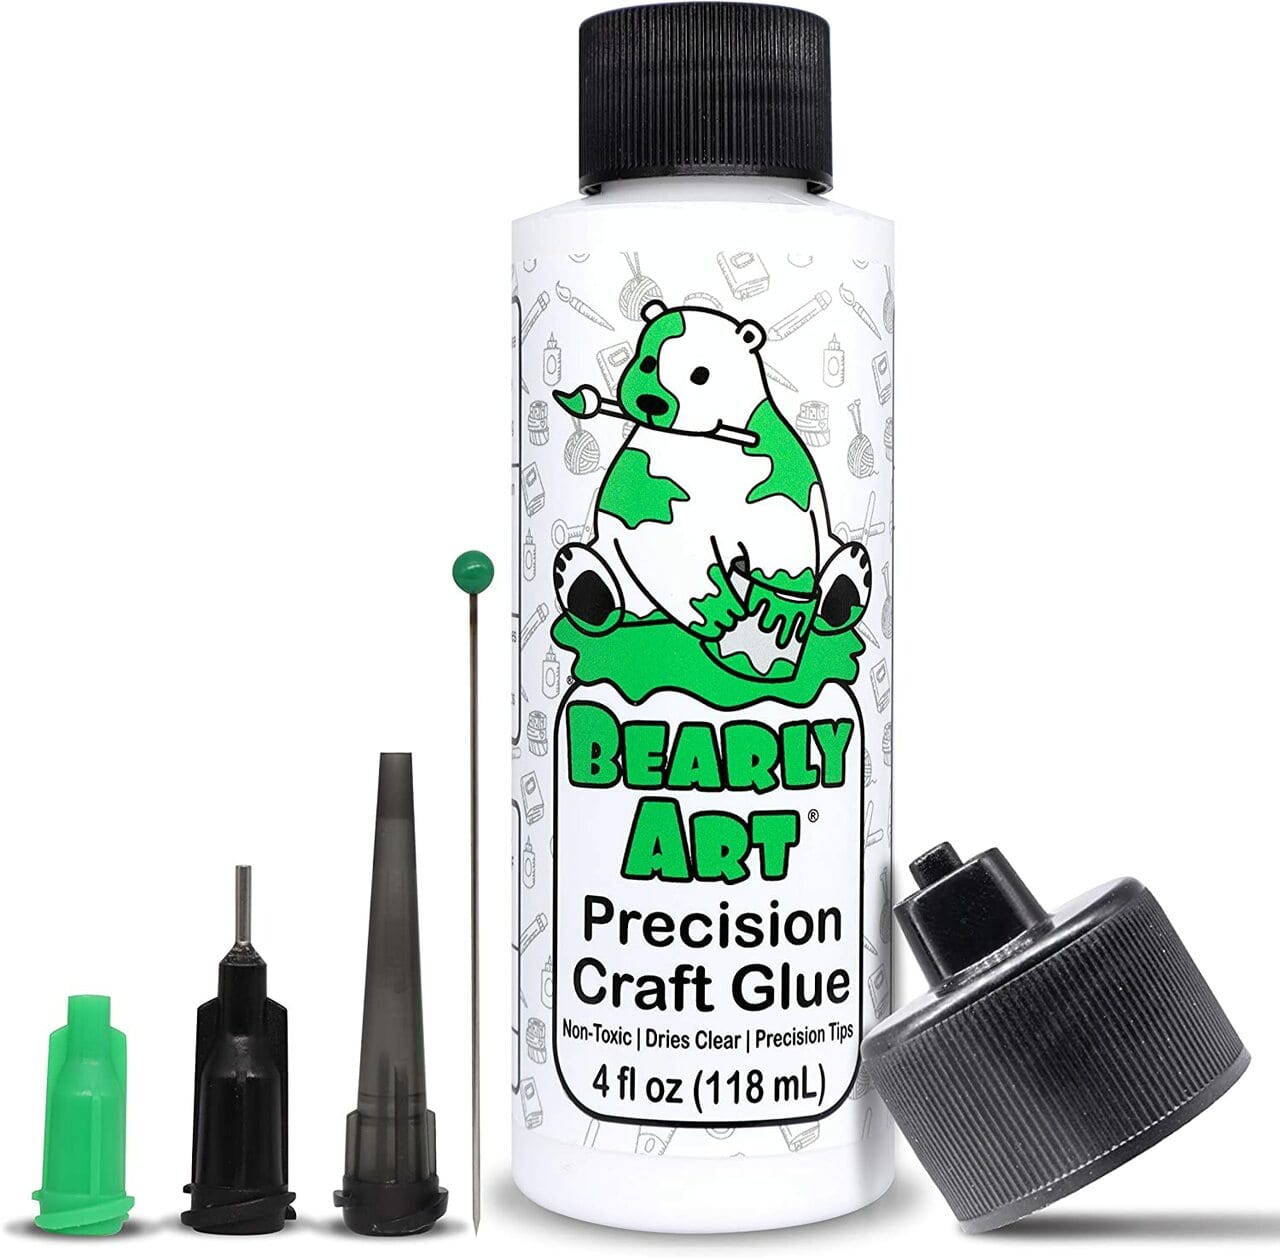
Bearly Art Original 4 fl oz Precision Craft Glue + Tip KitPaper Arts
from: Spellbinders
Glue Runner – Glue runners can be used for almost anything. Attaching card panels (the cardstock you make your designs on) to card bases (the basic card that has a front page and opens to the back page). You can also use a glue runner to add sentiments and images to the front of your card. Recommendation: Gina K Designs Dot Adhesive Runner.
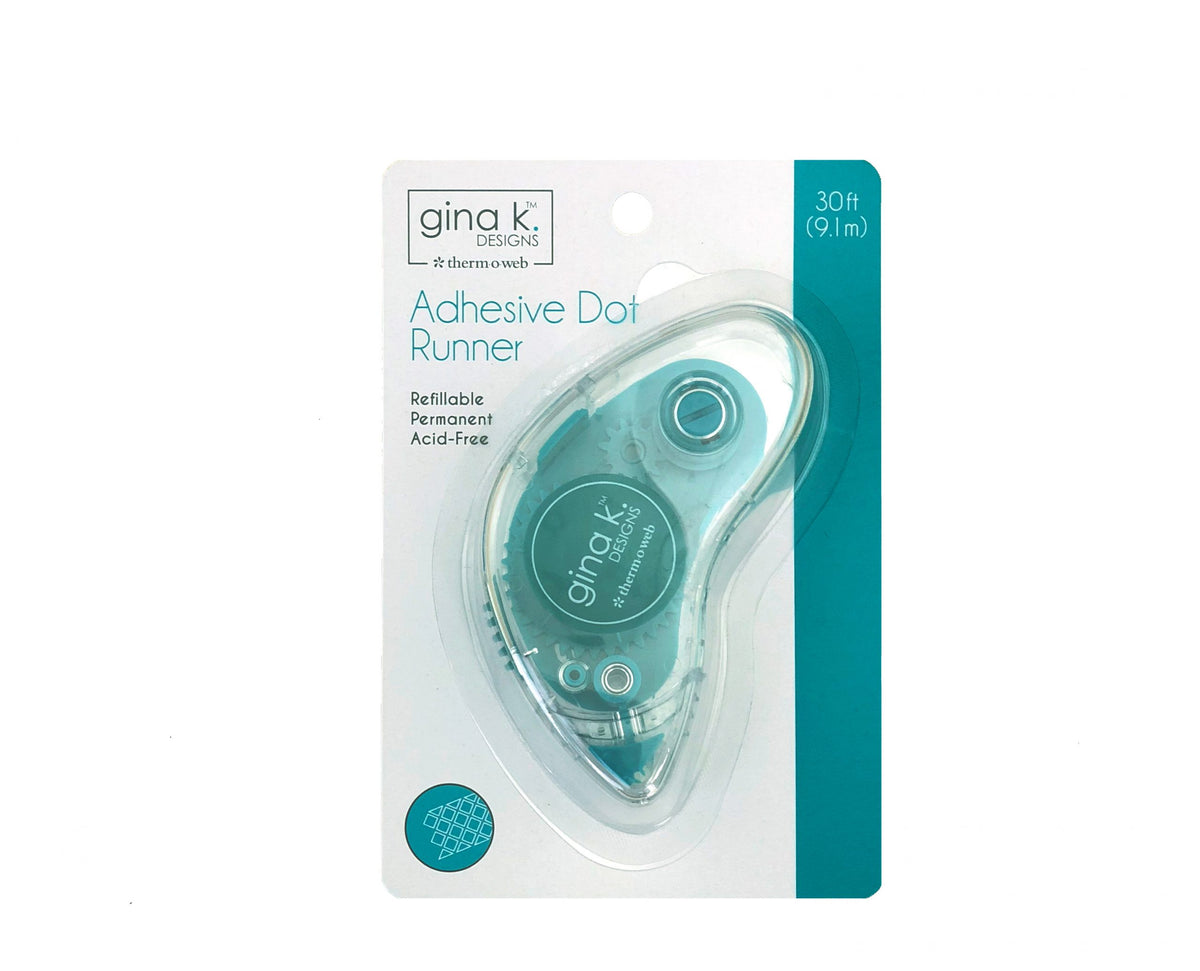
ADHESIVE- Adhesive Dot Runner
from: Gina K. Designs, LLC
Nice to Have
There are lots of additional types of adhesives that you can get that will make your life easier. The two that I use the most are:
Glue dots (both 1/8″ and 3/8″) – used for attaching small items to your card
document.write(decodeURIComponent(‘%3Cscript%3E(function(htm)%7B%0D%0Afunction%20%24id()%7B%0D%0Avar%20id%3D%27ShareASale-%27%2BMath.random().toString(36).substr(2).toUpperCase()%3B%0D%0Areturn%20document.getElementById(id)%3F%24id()%3Aid%3B%0D%0A%7D%0D%0Avar%20ifr%2Cdoc%2Cid%20%3D%20%24id()%3B%0D%0Adocument.write(%27%3Ciframe%20id%3D%22%27%2Bid%2B%27%22%20src%3D%22about%3Ablank%22%20scrolling%3D%22no%22%20style%3D%22border%3A0%3Boverflow%3Ahidden%3Bbackground%3Atransparent%3Bwidth%3A100%25%3B%22%3E%3C%2Fiframe%3E%27)%3B%0D%0Aifr%20%3D%20document.getElementById(id)%3B%0D%0Adoc%20%3D%20ifr.contentDocument%7C%7Cifr.contentWindow.document%3B%0D%0Adoc.open()%3B%0D%0Adoc.write(%27%3C!DOCTYPE%20html%3E%3Chtml%3E%3Cmeta%20charset%3D%22UTF-8%22%3E%3Cbody%20style%3D%22height%3A100%25%3Bmargin%3A0%3Bpadding%3A0%3Bfont-family%3Asans-serif%3Bfont-size%3A12pt%3B%22%3E%27%2Bhtm%2B%27%3C%2Fbody%3E%3C%2Fhtml%3E%27)%3B%0D%0Adoc.close()%3B%0D%0Awindow.setTimeout((%0D%0Afunction(I%2CD)%7B%0D%0Avar%20s%3D%20I.style%2C%20%0D%0Ab%20%3D%20doc.body%3B%0D%0As.width%20%3D%20b.scrollWidth%20%2B%20%27px%27%3B%0D%0As.height%20%3D%20b.scrollHeight%20%2B%20%27px%27%3B%0D%0A%7D%0D%0A).bind(null%2C%20ifr%2C%20doc)%2C200)%3B%0D%0A%7D)(decodeURIComponent(%27%253Ca%2520href%253D%2522https%253A%252F%252Fshareasale.com%252Fm-pr.cfm%253Fmerchantid%253D7429%2526amp%253Buserid%253D2913752%2526amp%253Bproductid%253D1212287091%2526amp%253Bafftrack%253D%2522%2520target%253D%2522_blank%2522%253E%253Cimg%2520alt%253D%2522Glue%2520Dots%2520-%2520Mini%2522%2520src%253D%2522https%253A%252F%252Fwww.scrapbook.com%252Fproducts%252Fcache%252FSBC_JV-32794_0.jpg%2522%2520border%253D%25220%2522%253E%253C%252Fa%253E%27))%3B%3C%2Fscript%3E'));Double-sided adhesive foam sheets from Scrapbook.com – used for popping up card panels or sentiments on your card.
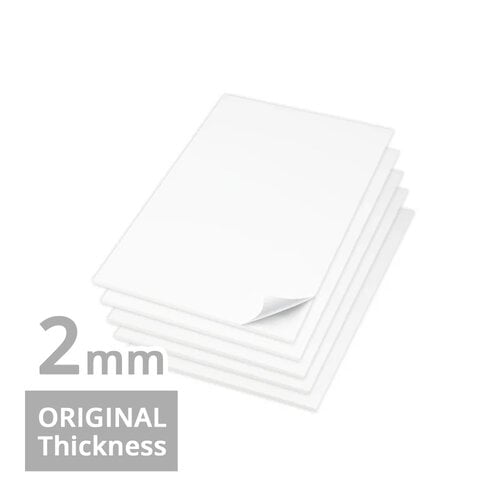 Scrapbook.com – Double Sided Adhesive Foam Sheets – 6 x 8.5 inches – 2mm Thickness – 5 Sheets – $7.99 Scrapbook.com – Double Sided Adhesive Foam Sheets – 6 x 8.5 inches – 2mm Thickness – 5 Sheets |
Tool Kit: Cardstock
When you're just starting out all you really need is white cardstock. There are many to choose from but most cardmakers use Neenah Classic Crest 110lb Solar White. It's a nice sturdy weight and is a bright white. Neenah makes the same color in 80lb.
I use 110lb for my card bases and 80lb for card panels. If you are just starting out, my recommendation is to get Neenah Classic Crest 80lb Solar White and use it for both. Then get the 110lb after you have some experience.
Tool Kit: Ink

You have to have ink if you're going to stamp. There are many different inks to choose from and even more colors. You only need a few to get started though.
There are two main types of ink to stamp dye inks and pigment inks.
Dye Ink
Dye inks absorb into paper and cardstock and they bind to it. They dry quickly which could result in a different color on the cardstock than what you see in the stamp pad (depending on the cardstock you use). These inks dry quickly, are less expensive than pigment inks, and are the easiest to use. But please note that light-colored dye inks cannot be used on dark paper or cardstock because the ink seeps into the paper and you cannot see it.
There are two different types of ink pads that dye ink manufacturers use: felt and foam. The material used in each type dictates how the ink pad “acts”. Felt pads are drier than foam pads so you may need to load the ink onto your stamp with a couple of taps. And felt pads last for a very long time. I have some that are over twenty years old.
Foam pads are very juicy. You just tap lightly to load ink onto your stamp. These pads break down quicker than the felt pads so they don't last as long. But they are very versatile and fun to use.
Pigment Ink
Pigment Inks are finely ground particles of color that are suspended in a liquid medium. They sit on top of the cardstock or paper rather than being absorbed as the dye ink does. Therefore, pigment ink dries much slower than dye ink but, they are opaque and very vibrant in intensity and lighter colors show up beautifully on dark cardstock and paper.
There are many more types of inks available to stamp with, too many to include in this article but keep a lookout for a whole article on ink in the future.
Have to Have
We do a lot of stamping with black ink. We use it for images that we are stamping as well as for sentiments. A multi-purpose black ink won't bleed when you add other colors. Recommendation: Gina K Designs Amalgam Ink – Obsidian.
The difference between felt and foam pads is personal preference, however, my recommendation is to start with felt pads because they aren't as messy. You can start with just one or two colors to start off and then add to your collection once you get the hang of it.
Many crafting companies offer miniature ink pads or cubes which are at a better price point and provide a wonderful opportunity to try out a number of different brands. Two companies that have very high-quality felt ink pads with beautiful colors are Gina K Designs and Altenew.
Use Your Tool Kit: Beginner Projects
We use many techniques in card making to color our images. Ink blending, layered stamping, alcohol marker coloring, die-cutting, water coloring, faux water coloring, and heat embossing.
But, layered stamping is a wonderful way to start to learn. Practicing with layered stamps will help you to perfect your stamping skills and it takes care of the coloring for you. All you need is a layered stamp set, an acrylic block, cardstock, and two colors of ink (one for your outline and one for the layers). Here are a couple of articles on layered stamping with some examples of stamps that you could choose to try:
Beautiful Cards Using Layered Stamps
Five Tips on How To Improve Your Layered Stamping Techniques When Card Making.
