I am grateful! And to show it we, the Altenew Certified Educators, are having an Instagram Hop called Thanks and Gratitude. Come along!
First, I just want to say thank you for visiting me here on my blog. I am so grateful for you and for being part of this fantastic creative cardmaking community! And, for all who are in the US, I hope that you have a very Happy Thanksgiving!
For the Instagram hop, Altenew is giving away a $20 gift certificate to 5 lucky winners! So please check out my page at @CutColorandCreate and if you want to start at the beginning, the whole thing starts at @altenewllc. Either handle will have all the hop details. And, be sure to leave comments by 11/30/2022.
Altenew will draw 5 random winners from the comments left on each stop of this Instagram hop and announce the winners on Altenew’s Educator Instagram hop post on 12/01/2022.
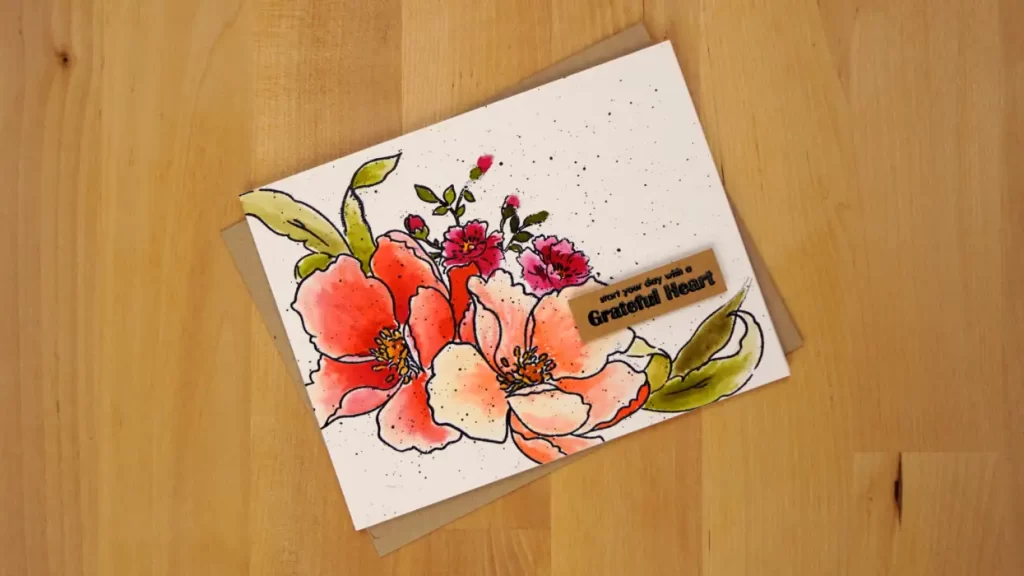
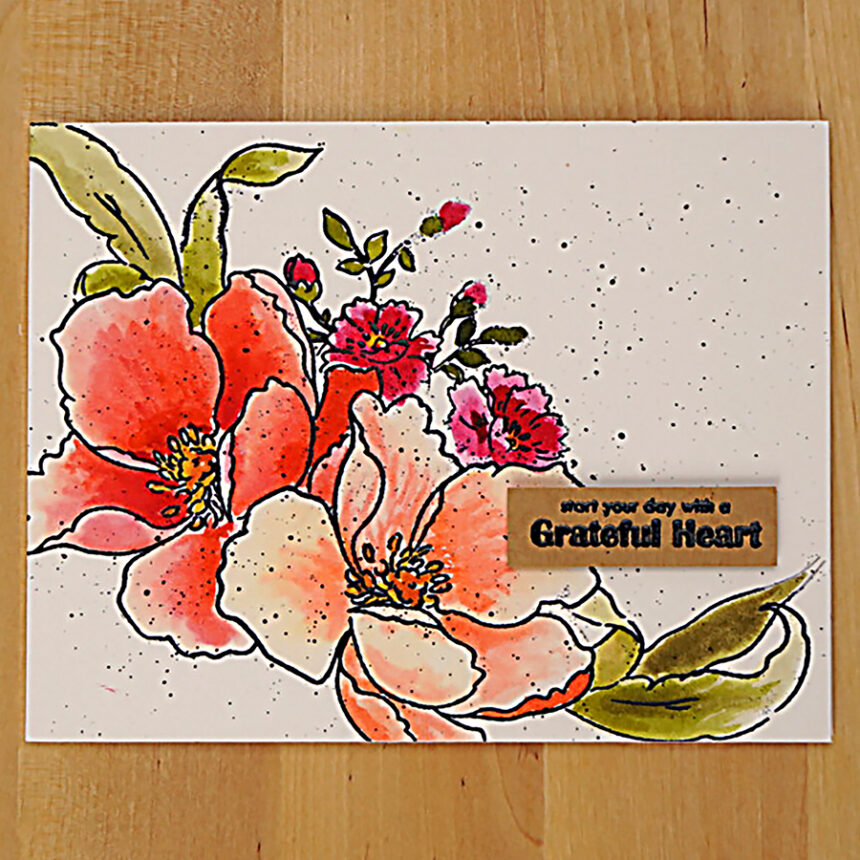
How To Make The Grateful Heart Card

Masking
This stamp set is actually a beautifully layered stamp set. But, for this card, we're only using the outline stamps.
When I'm creating a design like this, I like to stamp the images onto a scrap piece of inexpensive paper or cardstock once I have an arrangement in mind. As a result, it helps to confirm that the composition is a good one. Additionally, it gives me an idea of what I need to mask and the order I need to stamp the images in.
For this arrangement, we need two masks of the large floral outline, and one each of the two leaf stamps. To create a mask, just stamp the image onto masking paper, post-it tape or notes, or just a piece of paper. I like to fussy-cut out the masks right on the outlines.
Heat Embossing The Grateful Heart Card
Brush the entire card panel with anti-static powder. As a result, the embossing powder will stick only to the ink-stamped images. Beginning with the large flower in the center of the card, we'll stamp it tilted to the right with watermark ink.
Next, we'll sprinkle black embossing powder over the ink and let it sit for a second. And then, we'll pour it off and give the card panel a tap. Next, we'll heat up our heat tool for about 45 seconds and then heat the embossing powder until it's smooth and melted.
When the heat embossing is cool, we'll place one of the floral masks right over the top and run our finger over it to ensure that it is attached. And then we'll stamp the same floral image overlapping the upper left-hand corner of the masked flower and tilt it to the left.
From here, we'll repeat the process until all of our images are heat embossed. HINT: you may want to add the anti-static powder after each heating.
While we've got our heat embossing tools out, let's go ahead and stamp the sentiment onto a little scrap of Kraft paper and heat emboss it too.
Coloring the Grateful Heart Card
To color the images we begin adding pigment with the watercolor brush marker in places that should be the darkest. And then we'll use a water brush to draw the color out. By doing it this way the water dilutes the color and it gives a nice gradient of color.
Think about where the shadows would be and add your color there.
HINT: In my opinion, Altenew's Watercolor Brush Markers are the best that you can buy. Therefore I recommend that you go ahead and get each of the sets…you will love them! But, if you're not ready to take that jump yet, there is a that you can get the individual brush markers that I've listed below. For each, you will need an empty watercolor brush marker and a bottle of refill.
Finishing
Once the coloring is dry, we'll splatter some black spray over the card panel. I like to do this by removing the sprayer from the bottle and tapping it on an acrylic block over the card panel. As a result, you have a little more control over the splatter.
Assembly is a breeze. Begin by attaching the card panel to a white A2 (4 1/4″ x 5 1/2″) card base using a glue runner. And then, we'll trim our sentiment and pop it up with foam tape.
Supplies
The following list may contain affiliate links. If you purchase something by following a link on this page, I may receive a small commission at no extra cost to you. Thank you for supporting my blog.
- Cardstock: Card base – Neenah Classic Crest 110lb Solar White;
- Stamp: Altenew Grateful Heart
- Embossing Powder: Brutus Monroe Raven
- Anti-static Tool: Rabbit Hole Cottontail Tool
- Watermark Ink: Altenew Embossing Ink
- Masking Paper: Gina K Designs Masking Magic
- Heat Tool: Sizzix Dual Speed
- Watercolor Brush Markers: Altenew Tropical Fiesta – Sunkissed, Crimson; Winter – Ruby Red, Citrus Burst; Spring Garden – Moss; Autumn – Sea Forest, Yellow Ochre
- Spray: Altenew Jet Black Spray
- Fussy-cut Scissors: Cutter Bee
- Adhesives: Gina K Designs Adhesive Dot Runner; Altenew Instant Dimension Foam Tape


